

-
Welcome back Guest! Did you know you can mentor other members here at H-M? If not, please check out our Relaunch of Hobby Machinist Mentoring Program!
You are using an out of date browser. It may not display this or other websites correctly.
You should upgrade or use an alternative browser.
You should upgrade or use an alternative browser.
Some work on a TX650.
- Thread starter th62
- Start date

- Joined
- Sep 2, 2013
- Messages
- 5,090
I have one that I will be modifying into a dual sport. You might see if you have a motorcycle junkyard in your area, to find a suitable frame (you want one with a title). You can build a frame from scratch, but not for the faint of heart, and more work to register. Mike
I have a 650 motor that needs a bike to go into. Gonna try to figure that out next month, suggestions appreciated.
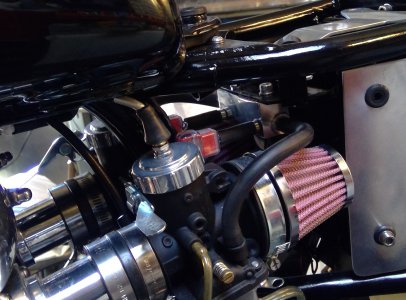
Fuel distributor.
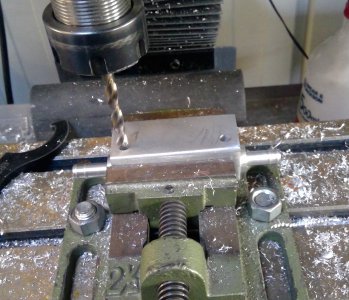
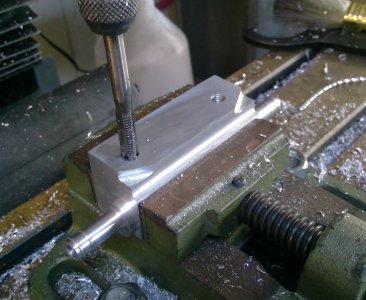
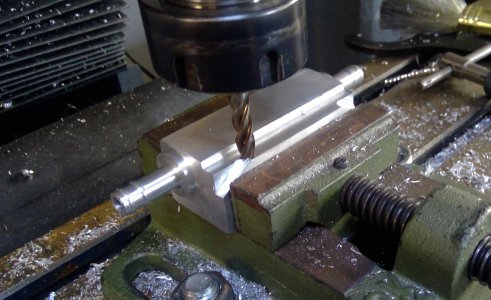
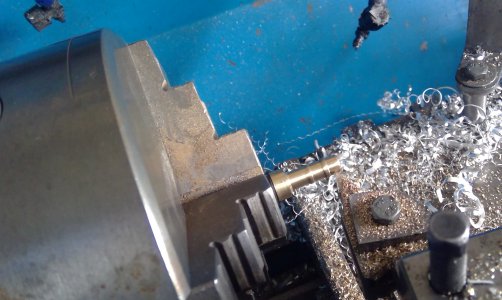
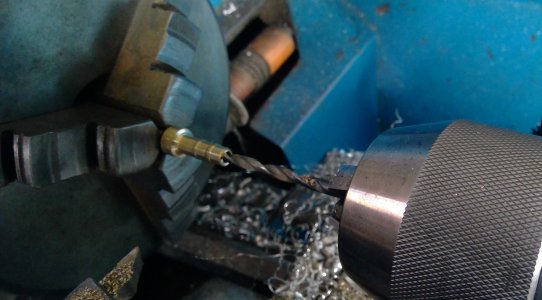
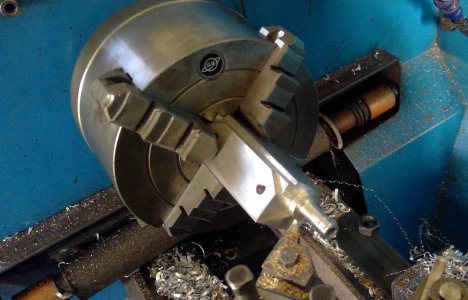
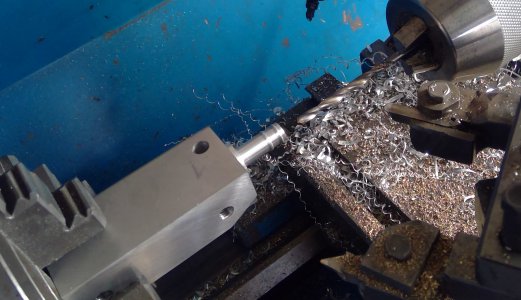
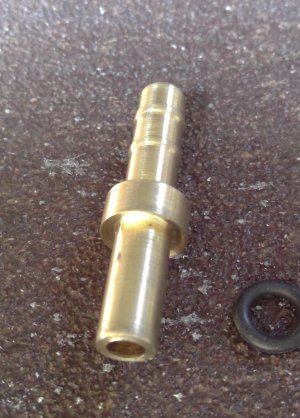
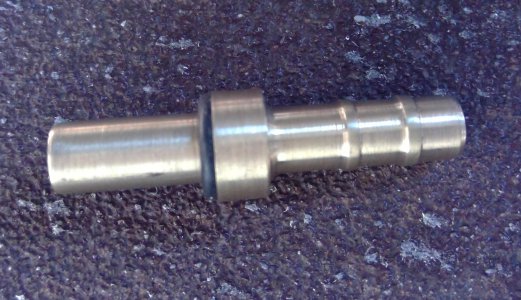
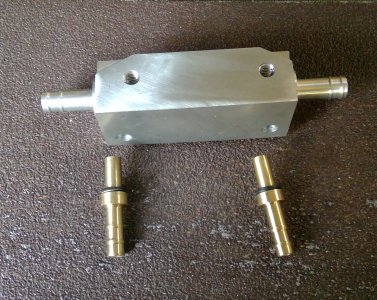
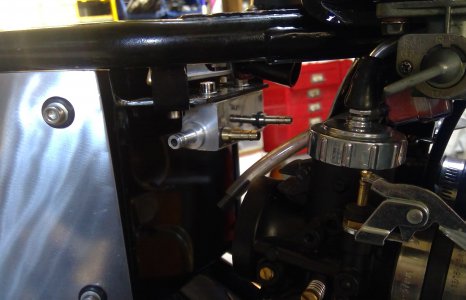
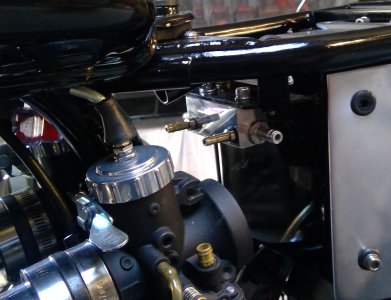
I binned the original fuel distributor I was making, too big, and made another smaller one. The design has changed a little: There are outlet spigots either side of the fuel distributer which feed the carbs via fuel hoses, the two outlet spigots are joined by a 4.5mm through hole. A line from the petcock feeds into small plastic filters which feed into the two brass spigots on the front of the distributor, via fuel hose, and these feed into the 4.5mm through hole.
The brass spigots have been undercut on the face connecting to the distributor to allow for an O ring. The brass spigots are a push fit in the distributor so shouldn't leak, the O rings are just added insurance.
This was about as neat as I could make it and certainly neater than the jumble of hoses, adapters and T pieces I had there before.
I didn't bother polishing the ends, that was a mistake - looks unfinished, so I'll have to remove it and polish the ends.
Here's lots of pics (as usual), including the build process.
Attachments
-
 WIN_20220809_11_12_05_Pro.jpg391.7 KB · Views: 7
 -
 WIN_20220809_11_13_41_Pro.jpg342.1 KB · Views: 4
 -
 WIN_20220809_11_14_51_Pro.jpg554.9 KB · Views: 3
 -
 WIN_20220809_11_17_11_Pro.jpg558.6 KB · Views: 3
 -
 WIN_20220809_11_18_03_Pro.jpg507 KB · Views: 3
 -
 WIN_20220809_11_21_51_Pro.jpg421.6 KB · Views: 3
 -
 WIN_20220809_11_23_44_Pro.jpg517.5 KB · Views: 3
 -
 WIN_20220809_11_11_34_Pro.jpg243.3 KB · Views: 3
 -
 WIN_20220809_11_10_59_Pro.jpg656.9 KB · Views: 3
 -
 WIN_20220809_13_33_16_Pro.jpg902.3 KB · Views: 4
 -
 WIN_20220809_14_23_26_Pro.jpg640.4 KB · Views: 7
 -
 WIN_20220809_14_31_13_Pro.jpg400.4 KB · Views: 8
 -
 WIN_20220809_14_31_26_Pro.jpg381.4 KB · Views: 7
 -
 WIN_20220809_14_43_25_Pro.jpg375 KB · Views: 9
 -
 WIN_20220809_14_43_49_Pro.jpg524.3 KB · Views: 9
Neat, clean solution. My RD400c petcock has with two spigots to the carbs, and a cross-over hose at the front of the tank to connect the two sides of the tank (it runs under the backbone, and has to be disconnected each time to pull the tank). Every tank should have two petcocks allowing cross-connecting the sides.
Last edited:
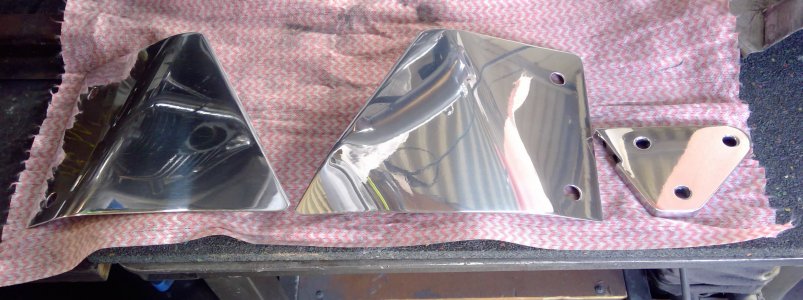
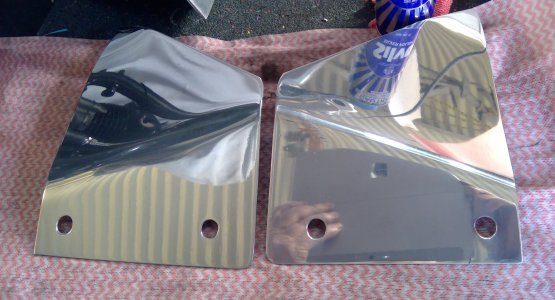
I stripped the clear coat off the side panels because the polishing wasn't good enough. Interestingly, After soaking the 2k clear just wiped off the blasted inner surface, the outer polished surface was a different matter, had to scrub and scrub and scrub to get it off.
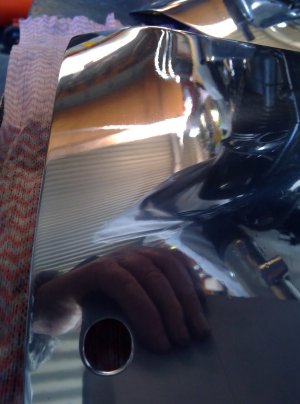
Then I polished again: Sisal and black, sewn cloth and white and then loose leaf cloth with green. Finish was pretty good, but I wanted better so finished off with a loose leaf Swansdown mop and green compound. Normal loose leaf cloth mops are calico, Swansdown is a finer, softer material providing a better finish. But don't be fooled, all mops, sisal, calico and even Swansdown mops leave streaks in the aluminium, you just have to look closely. You can reduce the streaks by polishing in different directions leaving a cross hatch finish, again, if you look close enough. Polishing with a very soft touch will reduce the streaking even further.
The compound is what does the polishing, don't use enough compound and all you'll produce is heat. Compounds when running lean will leave little globs on the surface of the material, particularly around holes and edges, particularly green compound.
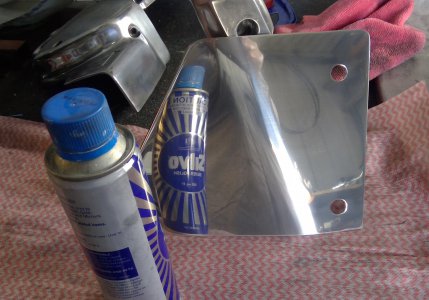
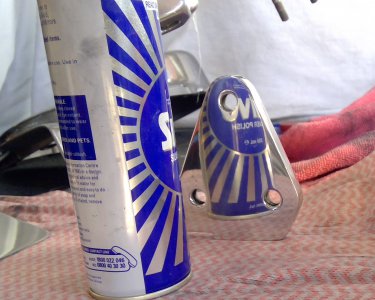
I use Silvo as a final hand polish, Silvo has a finer texture than aluminium polishes such as Meguires and Autosol, so provides a better finish. Final polishing with Silvo and a microfibre cloth will also scratch the material, particularly if used in a circular motion. So, take note of the direction in which the streaks run, polish with the microfibre in the same direction, streaks are then less noticeable. These streaks are hardly noticeable unless you look very, very closely and are very, very fussy, not something you would normally notice.
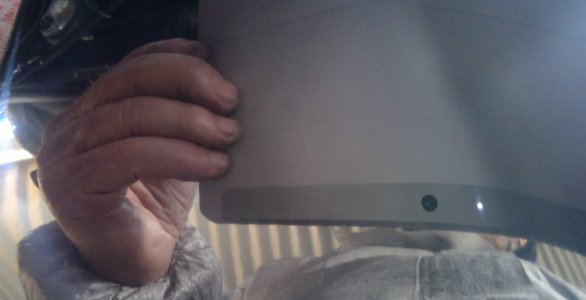
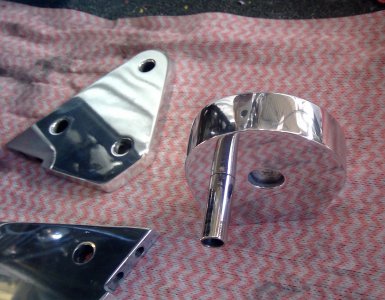
I've been at it for over 55 years, so I'm very fussy. Here's some final polishing I did today; side panels, engine mounts and a filter mount I made some time ago. Aluminium will never polish up like chrome or stainless, it is a more 'subdued' shine, which I prefer. Nevertheless, it does come up nice providing a good mirror finish. In pic three you can see the hairs on my fingers..
Then I polished again: Sisal and black, sewn cloth and white and then loose leaf cloth with green. Finish was pretty good, but I wanted better so finished off with a loose leaf Swansdown mop and green compound. Normal loose leaf cloth mops are calico, Swansdown is a finer, softer material providing a better finish. But don't be fooled, all mops, sisal, calico and even Swansdown mops leave streaks in the aluminium, you just have to look closely. You can reduce the streaks by polishing in different directions leaving a cross hatch finish, again, if you look close enough. Polishing with a very soft touch will reduce the streaking even further.
The compound is what does the polishing, don't use enough compound and all you'll produce is heat. Compounds when running lean will leave little globs on the surface of the material, particularly around holes and edges, particularly green compound.
I use Silvo as a final hand polish, Silvo has a finer texture than aluminium polishes such as Meguires and Autosol, so provides a better finish. Final polishing with Silvo and a microfibre cloth will also scratch the material, particularly if used in a circular motion. So, take note of the direction in which the streaks run, polish with the microfibre in the same direction, streaks are then less noticeable. These streaks are hardly noticeable unless you look very, very closely and are very, very fussy, not something you would normally notice.
I've been at it for over 55 years, so I'm very fussy. Here's some final polishing I did today; side panels, engine mounts and a filter mount I made some time ago. Aluminium will never polish up like chrome or stainless, it is a more 'subdued' shine, which I prefer. Nevertheless, it does come up nice providing a good mirror finish. In pic three you can see the hairs on my fingers..
Attachments
-
 WIN_20220823_14_33_28_Pro.jpg454.5 KB · Views: 8
 -
 WIN_20220823_14_37_09_Pro.jpg502.5 KB · Views: 8
 -
 WIN_20220823_14_38_31_Pro.jpg211.2 KB · Views: 10
 -
 WIN_20220823_14_40_55_Pro.jpg452.5 KB · Views: 9
 -
 WIN_20220823_14_41_26_Pro.jpg422.5 KB · Views: 9
 -
 WIN_20220823_14_43_21_Pro.jpg177.6 KB · Views: 6
 -
 WIN_20220823_15_03_09_Pro.jpg419.9 KB · Views: 8
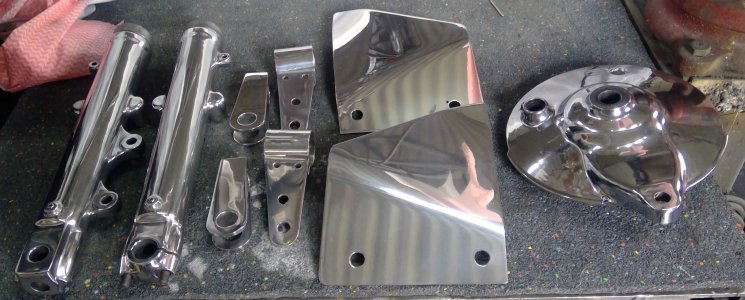
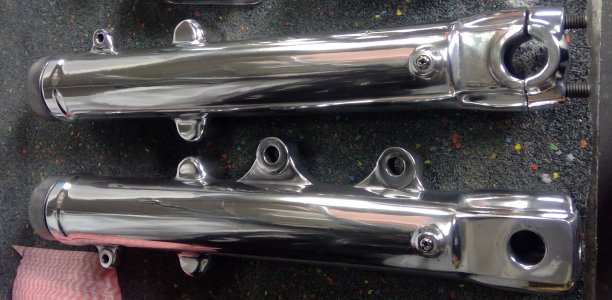
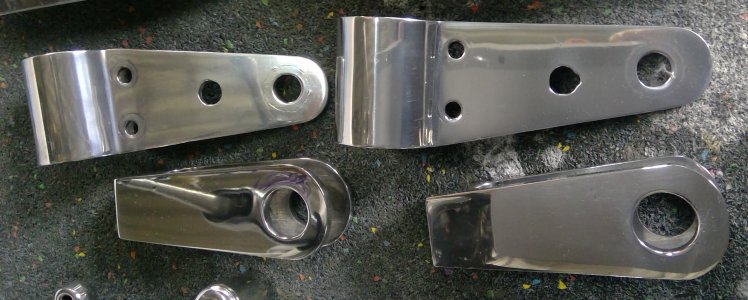
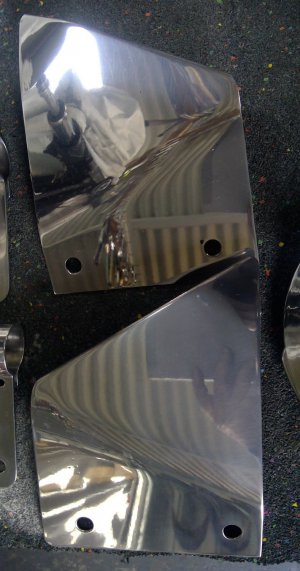
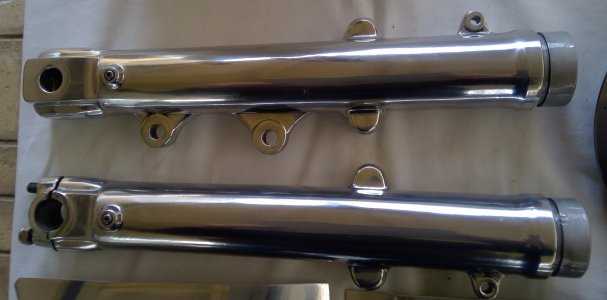
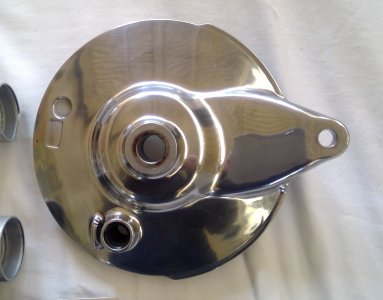
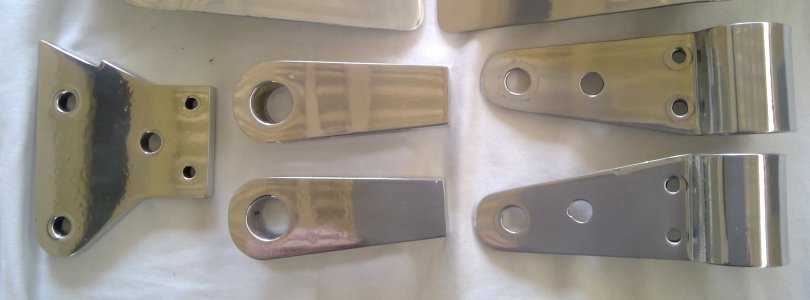
The clear coat on the forks and sides wasn't up to scratch so I stripped them and re polished them. I also re-polished the chain adjusters, headlight brackets and brake backing plate. I might make some new headlight brackets, these ones are looking a little shabby. Brake backing plate came up pretty good with just a quick rub on the mop . The wheels have been sitting on the floor of the study for a couple months now so have lost a bit of their shine. When I've finished with the other bits I'll de spoke and polish up the hubs and rims again.
Attachments

I've clear coated most of the polished aluminium, smaller bits, just have the wheels to finish. Unfortunately, the clear coat dulls the shine quite a bit. Funny stuff to spray on polished aluminium: I had to spray a very light coat first, give it a few minutes then hit it again with a heavier coat so the paint would pool and flatten out. Still a bit of orange peel though, particularly on the triangular engine mount. The clear coat doesn't behave the same over painted surfaces, just polished aluminium, very disappointed in the finish. I may not clear coat the wheels as they'd be hard to get the clear to pool, there's a very fine line between pooling and a run. Float coating seems to just run and build up on the edges. I'm also thinking of painting the side covers black, they just didn't come up to scratch.
Attachments


Last edited: