Some work on a TX650.

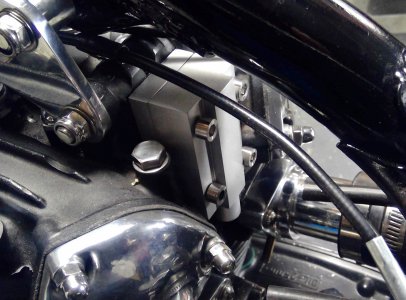
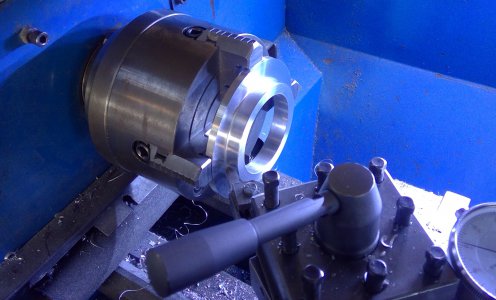
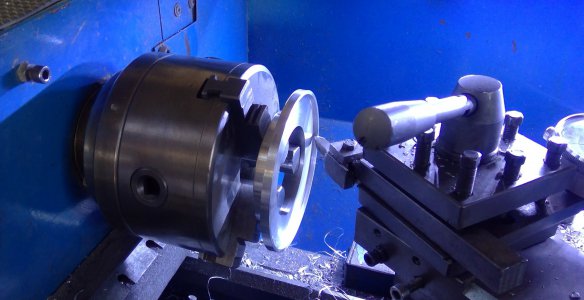
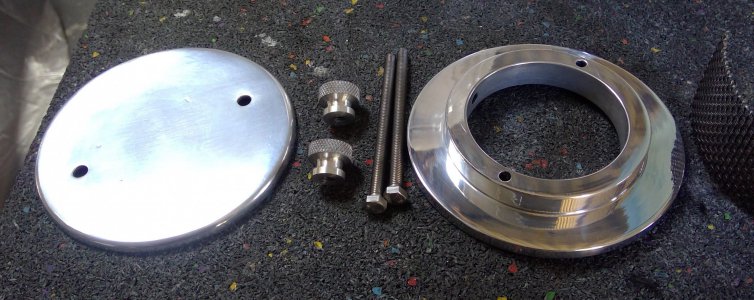
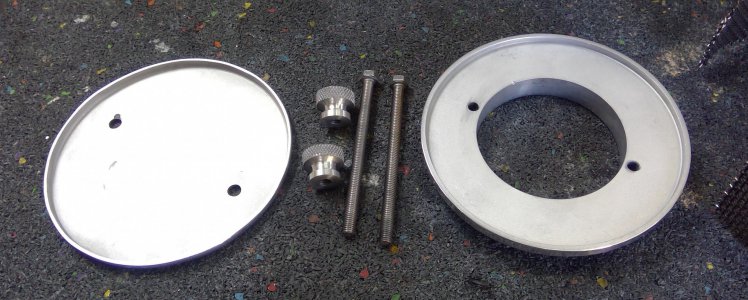
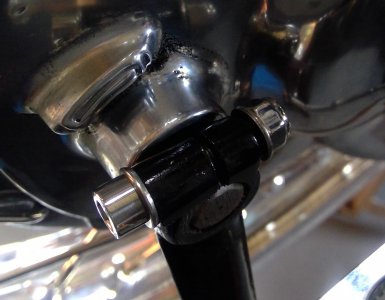
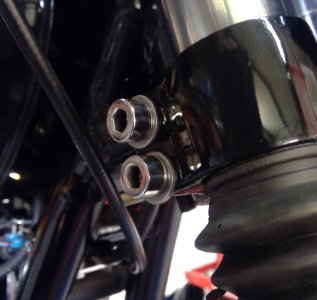
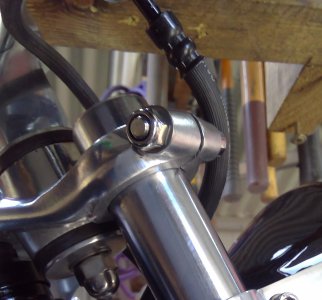
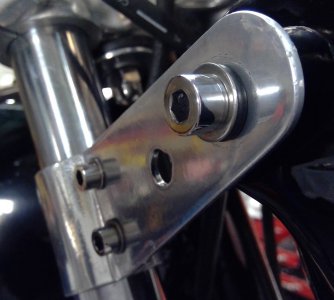
A little premature, but I did a little detailing. Stainless fasteners don't look the best straight off the shelf, so I've started neatening them up a little. Allen heads have striations on the side of the heads and numbers stamped on the face of the heads, so I chucked a heap of them and turned them down a little before polishing. Hex heads were very rough, so they were ground down a little before polishing. I ground and polished the ends of any bolts that were seen as well as removing the excess thread..
I've only done one side of the bike, tomorrow I'll tackle the other. Then the engine fasteners, a few little ones on the carbs. I haven't done the washers, can't figure out how to hold them without polishing the ends of my fingers.
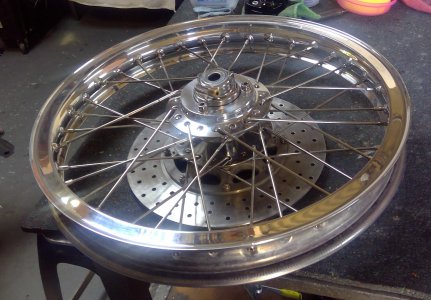
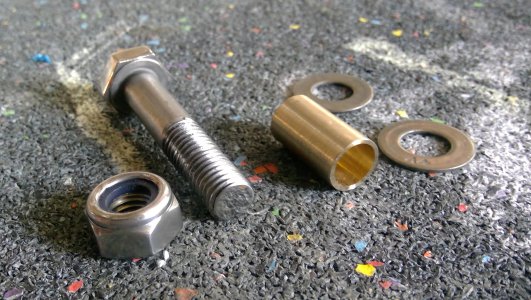
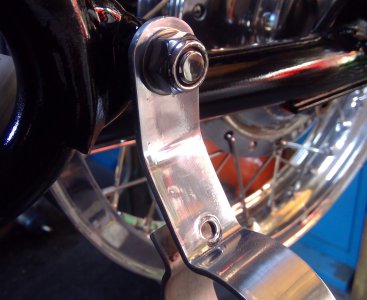
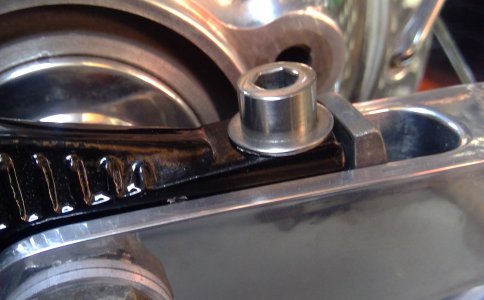
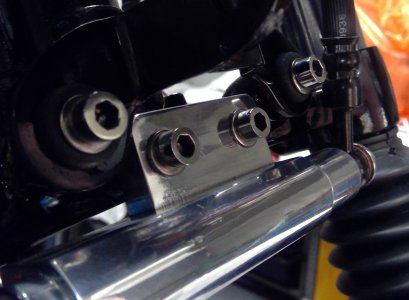
The footpeg holes to which I mount the mufflers are 12mm, heads of the fasteners on the inside looked like they'd scrape against the swingarm, so I turned up some brass shim tubes and pressed them into place so I could use 10mm fasteners, they just clear the swingarm.
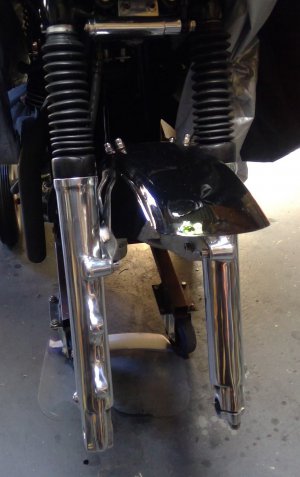
Once I've finished, I'll remove the clear coat and just leave the ally bare.
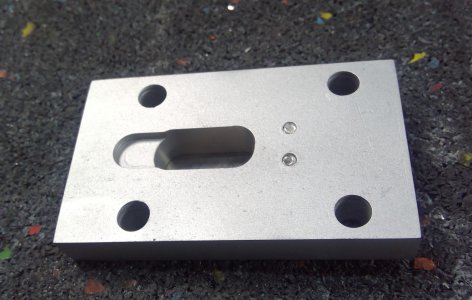
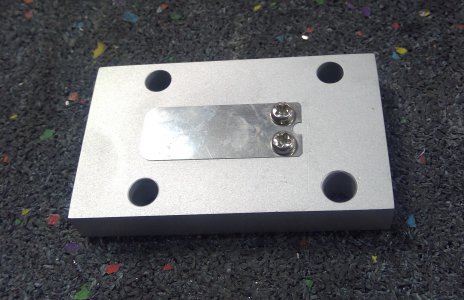
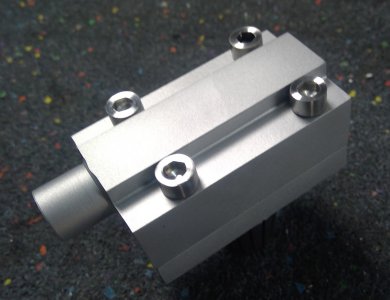
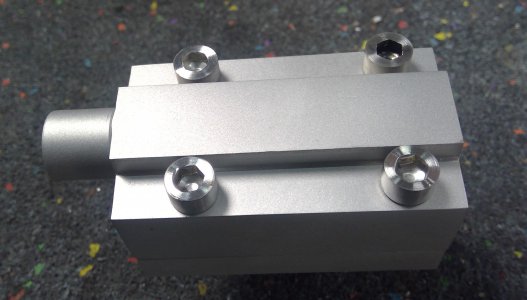
 

Attachments

  • WIN_20220915_11_19_11_Pro.jpg
    WIN_20220915_11_19_11_Pro.jpg
    870.9 KB · Views: 9
  • WIN_20220915_11_22_09_Pro.jpg
    WIN_20220915_11_22_09_Pro.jpg
    382.1 KB · Views: 8
  • WIN_20220915_11_29_40_Pro.jpg
    WIN_20220915_11_29_40_Pro.jpg
    292.5 KB · Views: 7
  • WIN_20220915_11_22_24_Pro.jpg
    WIN_20220915_11_22_24_Pro.jpg
    326.2 KB · Views: 7
  • WIN_20220915_11_23_11_Pro.jpg
    WIN_20220915_11_23_11_Pro.jpg
    270.3 KB · Views: 6
  • WIN_20220915_11_59_51_Pro.jpg
    WIN_20220915_11_59_51_Pro.jpg
    190.5 KB · Views: 6
  • WIN_20220915_12_00_04_Pro.jpg
    WIN_20220915_12_00_04_Pro.jpg
    264.3 KB · Views: 6
  • WIN_20220915_14_12_30_Pro.jpg
    WIN_20220915_14_12_30_Pro.jpg
    205 KB · Views: 6
  • WIN_20220915_14_11_34_Pro.jpg
    WIN_20220915_14_11_34_Pro.jpg
    252 KB · Views: 5
  • WIN_20220915_14_10_37_Pro.jpg
    WIN_20220915_14_10_37_Pro.jpg
    852.1 KB · Views: 6
A good wax will protect and seal well.

Just need to re apply

Sent from my SM-G781V using Tapatalk
 
There were aluminum sealers, but I'm not sure if they are still around. Zoopseal changed it's name to Shineseal.
 
Polished aluminum on my GL1000 GoldWing is easy to restore if it isn't coated in any way - just lightly polish once a year and it is good. That is, after the weeks spent getting the initial polished finish.
 
Reed valve engine breather.
I made this little gizmo yesterday, finished it off this morning with the bead blaster. I was going to polish it, but damn this gizmo looks good with a bead blasted finish.
Petal was taken from a pit bike read valve and cut in half, two holes drilled and screwed to the base plate. Base plate was tapped M3 10mm deep to take the petal. Not fun tapping this small, but, this time around the tap survived.
Main body was carved out with an endmill to give the petal room to move and air to flow. Base plate has a channel on the engine side for any oil to run down back into the rockers. Topside was channelled either side to get the Allen heads level with the top surface. Stainless Allen's were turned to make them shiny, I do like shiny baubles.
Outlet spigot is 16mm with a 10mm hole. If it's not big enough I can take it out to 12mm later on.
Air from the engine enters the main body from the reed valve is channelled upward, does a U turn and travels downward to the outlet spigot, losing a little oil on the way. Any oil trapped before the reed valve is channelled back to the rockers.
I'll have to design and build a catch can now, thinking of mounting it behind the downtube between the carbs. But, it's getting a little busy in that area.
Manual machining only, would love a CNC, but not in my budget, would've made things a lot easier
 

Attachments

  • WIN_20221003_16_06_39_Pro.jpg
    WIN_20221003_16_06_39_Pro.jpg
    398.8 KB · Views: 7
  • WIN_20221003_16_08_18_Pro.jpg
    WIN_20221003_16_08_18_Pro.jpg
    497.1 KB · Views: 6
  • WIN_20221003_16_03_05_Pro.jpg
    WIN_20221003_16_03_05_Pro.jpg
    468.4 KB · Views: 6
  • WIN_20221003_16_09_04_Pro.jpg
    WIN_20221003_16_09_04_Pro.jpg
    168 KB · Views: 7
  • WIN_20221011_11_04_46_Pro.jpg
    WIN_20221011_11_04_46_Pro.jpg
    398.7 KB · Views: 7
  • WIN_20221011_11_04_56_Pro.jpg
    WIN_20221011_11_04_56_Pro.jpg
    599.8 KB · Views: 7
  • WIN_20221011_11_05_05_Pro.jpg
    WIN_20221011_11_05_05_Pro.jpg
    711.6 KB · Views: 7
  • WIN_20221011_11_03_19_Pro.jpg
    WIN_20221011_11_03_19_Pro.jpg
    240.4 KB · Views: 8
  • WIN_20221011_11_03_30_Pro.jpg
    WIN_20221011_11_03_30_Pro.jpg
    529.8 KB · Views: 9
  • WIN_20221011_11_09_37_Scan.jpg
    WIN_20221011_11_09_37_Scan.jpg
    573.6 KB · Views: 9
A while back I made two wiring harnesses, one for ignition, the other for lights. I wrapped both up in plastic insulation tape, not an easy job keeping the cables straight and in the same order for the harness length. I managed that reasonably well, but after wrapping the harnesses were s tiff as a board and twisted.

This morning some cloth insulation tape arrived, so I cut the old plastic stuff off and wrapped both harnesses in the cloth tape, boy what a difference. The harnesses are now quite straight, pliable and easier to thread through the frame. Big improvement. Good stuff this cloth insulation tape.

Tomorrow I'll solder on some more terminals for the rear end, shorten a couple of leads and hook everything up.
 

Attachments

  • WIN_20221024_15_00_32_Pro.jpg
    WIN_20221024_15_00_32_Pro.jpg
    720.8 KB · Views: 11
  • WIN_20221024_16_46_29_Pro.jpg
    WIN_20221024_16_46_29_Pro.jpg
    831.9 KB · Views: 11
Very nice! Someone (Vintage Connections?) sells a harness wrap tape that is much thinner than regular electrical tape (and not designed as insulation).
 
I believe that tape is called "friction tape."
Looking good BTW
 
I've slowed right down now, I can only manage an hour or so in the workshop before the elbow complains. But, I haven't been totally idle: I stripped the clear coat off the forks and gave them another polish. Pulled the front wheel apart, polished the rim and hub and re laced it. I stuck the caliper together, hoping the pistons would seal, no such luck, so I'll have to,order some new pistons. Still haven't re painted the seat and covered it yet or bought tyres.

Most of my interest is making stuff, and mostly machining, but being as the bike is all but finished I didn't have anything more to make. So, I thought real hard about it and decided on some air cleaners, pods just don't do it for me. I turned up an aluminium base and a couple of knurled nuts, then beat up a rear plate and polished them. I was going to use the black, stainless mesh to hold the foam in place, but changed my mind, just don't like the look of it, so I'll look around for some perforated sheet and use that.

I was going to use a catch can for the engine breather, but being as I'll have pancake air filters I'll plumb the breather hose into the filters via a T joining piece.

I finally decided on a shrink fit for the base of the filter, so did a little experimenting with heating and freezing.: The carb bell mouth is tapered slightly by around .05mm,, so I chucked the carb body and trued up the bell so it measures 57.38mm, then stuck it in the freezer for a couple of days to see how much it would shrink - virtually nothing, .01 mm. Next I bored out the centre of the air cleaner base to 57mm and stuck it in the over at 250C, it expanded by .18mm. So, I chucked the base again and turned the hole to 57.20mm. So if I heat the base to 240c it'll expand to 57.38. That of course won't fit over the bell mouth, because it's not a clearance fit, so a little light pushing in the vice will be required. That should give a good tight fit and just to make sure it won't come off, I've tapped the side of the air cleaner base for a 5mm grub screw.

So, you'd probably think freezing the carb body is a waste of time as it doesn't shrink enough to make a difference, but there is a good reason to freeze the carb: Bringing the air cleaner base and carb together to press fit them can't be done quickly, so heat transfer will take place and the carb will heat up slowly, if I'm quick enough it should reach normal temperature sometime during the press fit and hopefully the air cleaner base won't cool down too quickly.

Tomorrow, I'll find out if my plan works, if so, all I have to do then is is make another air cleaner for the left carb.

Well, it's not quite that simple: A while back I made a fuel distributor block that bolts under the front lip of the battery carrier to neaten up the hoses joining carbs and taps, and also to get a level fuel flow in both carbs. Unfortunately, the distributor block hangs too low, so the filters interfere with the fuel lines, I've made the filters as small a diameter as I can, so another 'narower' fuel distributor block will route the fuel hoses around the filter.

There is a method to my madness, I've now got more stuff to machine up, Oh happy days!
 

Attachments

  • 316253820_3420438184882870_4370446279843329100_n.jpg
    316253820_3420438184882870_4370446279843329100_n.jpg
    560.6 KB · Views: 4
  • 316816314_3420438124882876_8169140446795404691_n.jpg
    316816314_3420438124882876_8169140446795404691_n.jpg
    718.4 KB · Views: 4
  • WIN_20221217_15_58_12_Pro.jpg
    WIN_20221217_15_58_12_Pro.jpg
    167.6 KB · Views: 5
  • WIN_20221216_15_35_26_Pro.jpg
    WIN_20221216_15_35_26_Pro.jpg
    721 KB · Views: 5
  • WIN_20221216_15_42_38_Pro.jpg
    WIN_20221216_15_42_38_Pro.jpg
    363.8 KB · Views: 5
  • WIN_20221217_14_17_17_Pro.jpg
    WIN_20221217_14_17_17_Pro.jpg
    522.9 KB · Views: 5
  • WIN_20221217_14_20_22_Pro.jpg
    WIN_20221217_14_20_22_Pro.jpg
    521.7 KB · Views: 5
  • WIN_20221217_14_30_03_Pro.jpg
    WIN_20221217_14_30_03_Pro.jpg
    542.6 KB · Views: 5
  • WIN_20221217_14_36_55_Scan.jpg
    WIN_20221217_14_36_55_Scan.jpg
    566.5 KB · Views: 5
  • WIN_20221217_14_37_33_Scan.jpg
    WIN_20221217_14_37_33_Scan.jpg
    402.6 KB · Views: 5
  • WIN_20221217_14_38_47_Scan.jpg
    WIN_20221217_14_38_47_Scan.jpg
    395.7 KB · Views: 5
Lacing gives me the shivers, to me that's a special talent.
 
Back
Top