-
Welcome back Guest! Did you know you can mentor other members here at H-M? If not, please check out our Relaunch of Hobby Machinist Mentoring Program!
You are using an out of date browser. It may not display this or other websites correctly.
You should upgrade or use an alternative browser.
You should upgrade or use an alternative browser.
Some work on a TX650.
- Thread starter th62
- Start date
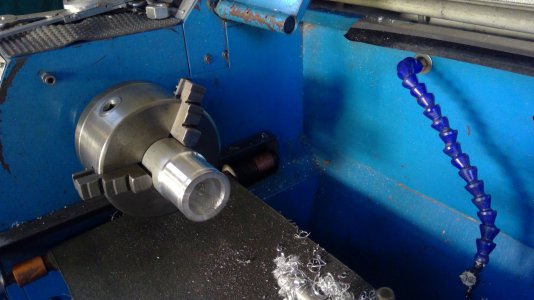
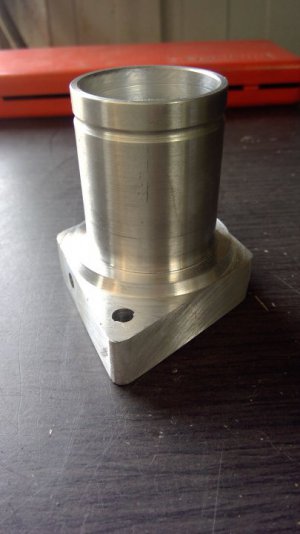
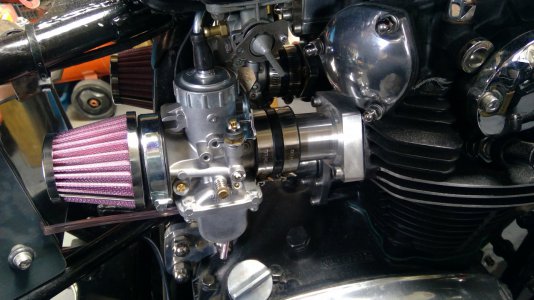
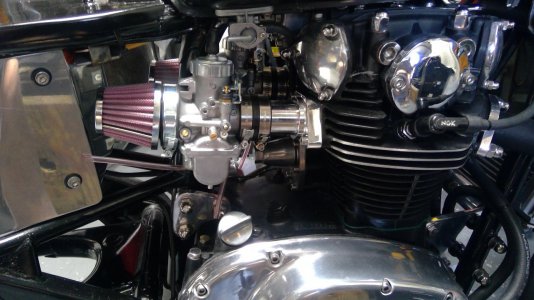
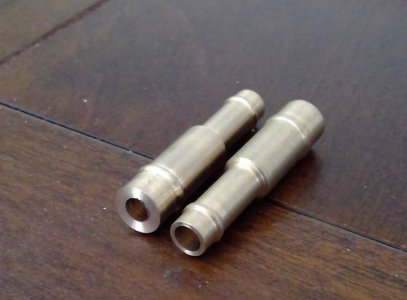
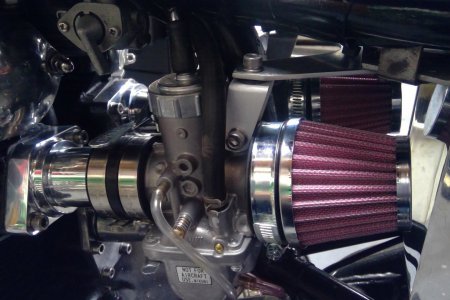
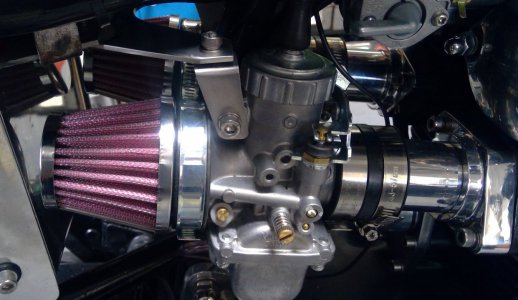
I bought some round slide VMs in kit form, they come with extra jets, cables , manifolds and rubber boots for mounting. The kit is put together as a kit expressly for the XS650. However, when I mounted them on the bike I found I had to tilt the carbs over quite a bit for the carb cables to clear the petcocks, amateur hour in my opinion. To stop the carbs hanging up on the petcocks, I turned up an aluminium manifold, 40mm longer than the kit manifolds . It moves the carb back behind the tap, so I can sit the carbs upright and get to the adjusters. Problem with is, the fuel spigot on the tap now gets in the way, so I swapped the taps left to right, right to left, so the spigot now faces forward. Rather than turn the manifold up from one 90mm round, solid lump, I turned the spigot up from a 50 mm piece, leaving a 2.5mm lip at the bottom. I used one of the spacers I turned up beforehand for the flange, enlarged the hole and forced the spigot through. The lip actually seals against the cylinder head stopping the spigot from shaking itself loose. Longer inlet tracts do move the torque curve further down the rev range, but like a lot of performance mods, twin carb conversions, porting, velocity stacks, and so, the difference in performance, particularly on a street bike, would be hard to pick up, only a dyno would pick up the difference. This was only a rough manifold to try it out, I'm happy with this solution, so I'll turn up two identical manifolds over the next few days. Once done, I'll polish the float chambers and screw tops and paint the bodies black to match the engine.
Attachments
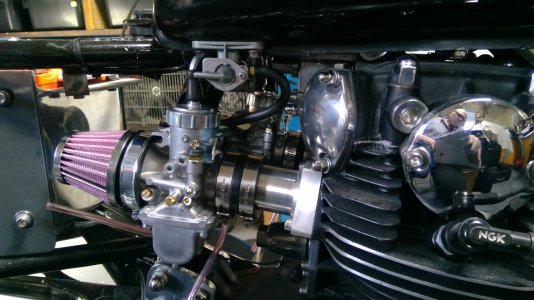
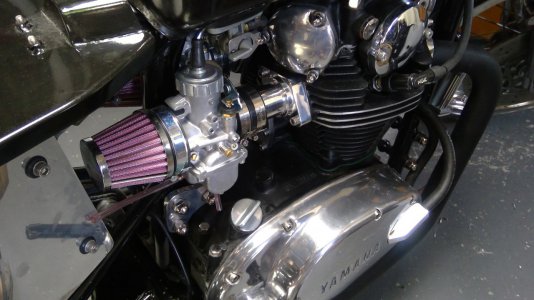
Finished off the right side manifold, looks OK when polished up. Unfortunately, you can see a couple of scraping from where I pressed the two pieces together, I'll try to fix that on the left side. I did make one boo boo with the flange, I drilled the mounting holes before the bore, bad mistake, makes it very difficult to line the three holes up. Oh well, I'm committed now as I've made two flange blanks the same way.
Attachments
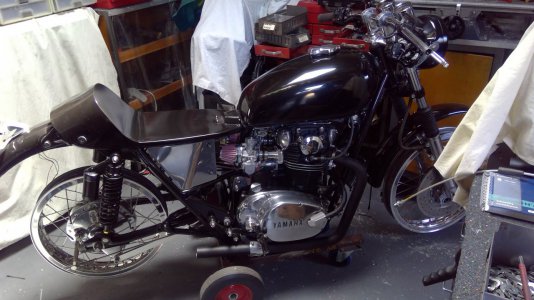
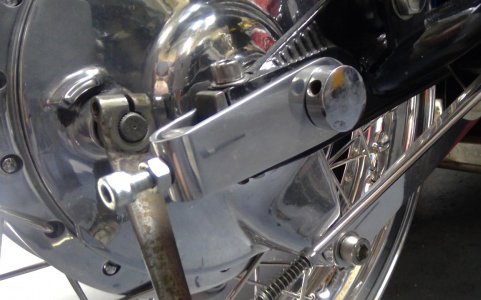
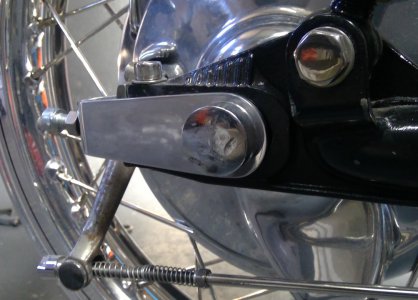
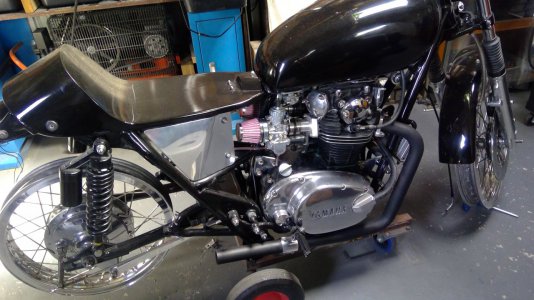
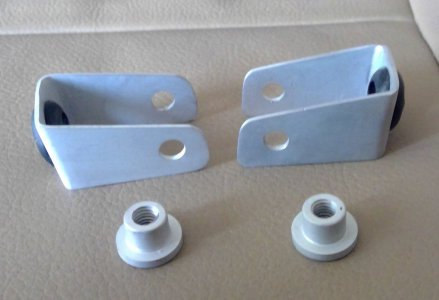
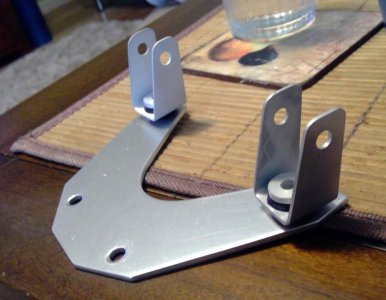
Finished off the rear carb mounts and anodised them. The brackets that attach to the carbs were brush finished prior to anodising, whereas the larger brackets was polished prior to anodising, so the finish is slightly different. Everything fits and works as intended, but it's very tight in there. The manifolds sit the carbs 10 mm behind the taps, so I had to swap the taps so the outlets faced forward. The small brackets attach to the larger bracket via a grommet and positive stop T nut, the larger bracket bolts to the front of the battery carrier which is rubber mounted. I also spun up a couple of brass 6mm to 8mm brash fuel line adapters.
Attachments
- Joined
- Mar 3, 2020
- Messages
- 506
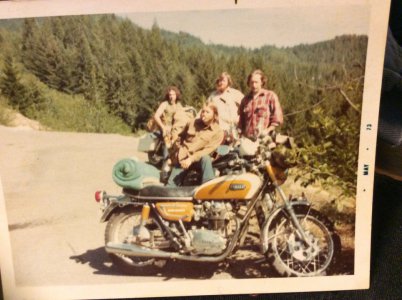
Just ran across this photo of my 1st Yamaha 650. It is a ‘71 (last year of Kick start only)
photo says may ‘73. Almost 49 yrs ago, sheesh....what a geezer...
Me in red plaid shirt, other 3 buddy’s on Harley’s, photo on Santiam Pass between Sweet Home & Bend Ore.
we were going over to camp on the Deschutes River for some fishing & beer drinking.
Your TX 650 is gonna look much nicer than they looked new")
photo says may ‘73. Almost 49 yrs ago, sheesh....what a geezer...
Me in red plaid shirt, other 3 buddy’s on Harley’s, photo on Santiam Pass between Sweet Home & Bend Ore.
we were going over to camp on the Deschutes River for some fishing & beer drinking.
Your TX 650 is gonna look much nicer than they looked new
Attachments
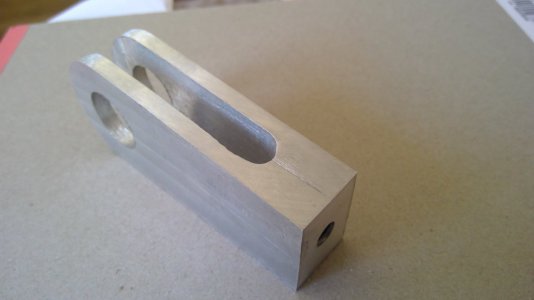
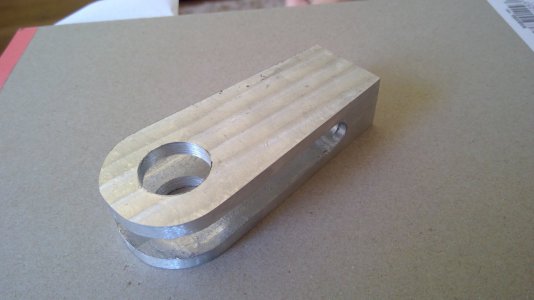
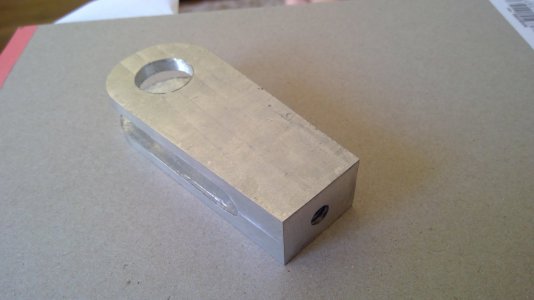
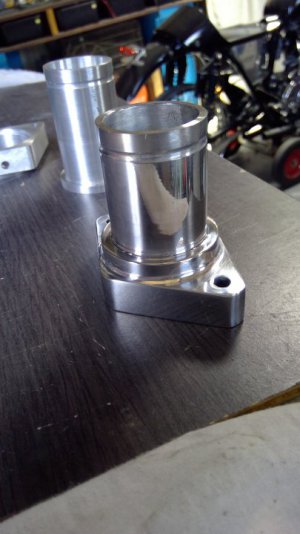
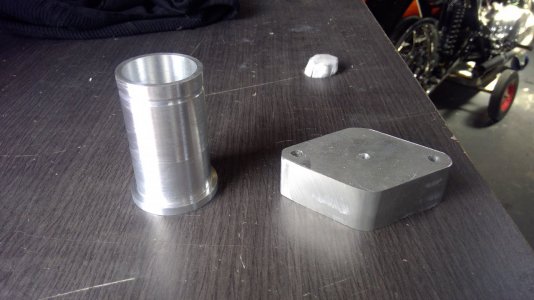
I made this this afternoon, total waste of time because this senile old fool made the slot too small. On the plus side, at least I know it's easily done and should look Ok in chunky, polished aluminium. Tomorrow I'll pay attention to what I'm doing and make one with the right size slot.