-
Welcome back Guest! Did you know you can mentor other members here at H-M? If not, please check out our Relaunch of Hobby Machinist Mentoring Program!
You are using an out of date browser. It may not display this or other websites correctly.
You should upgrade or use an alternative browser.
You should upgrade or use an alternative browser.
Some work on a TX650.
- Thread starter th62
- Start date
Ham fisted.
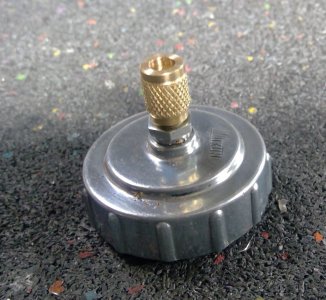
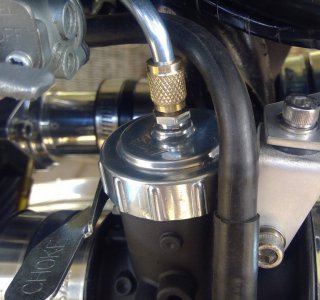
I broke the brass adjuster on the left hand VM, so had to make a new one. Instead of a hex head I knurled the head so I don't have to mess around with an 8mm spanner when adjusting. As you can see, the thread isn't much chop, the only M6 x .75 die I had was a non split die and carbon steel so the thread is a little undersize and a bit ragged. I've ordered a HSS die, so as soon as that turns up I'll make another, plus one for the right hand carb. Might make them from stainless though, stainless is bit hardier than brass. So much for the brass sleeves I made.
I broke the brass adjuster on the left hand VM, so had to make a new one. Instead of a hex head I knurled the head so I don't have to mess around with an 8mm spanner when adjusting. As you can see, the thread isn't much chop, the only M6 x .75 die I had was a non split die and carbon steel so the thread is a little undersize and a bit ragged. I've ordered a HSS die, so as soon as that turns up I'll make another, plus one for the right hand carb. Might make them from stainless though, stainless is bit hardier than brass. So much for the brass sleeves I made.
Attachments
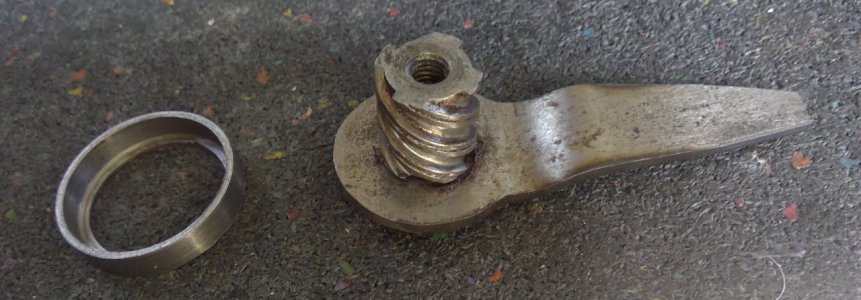
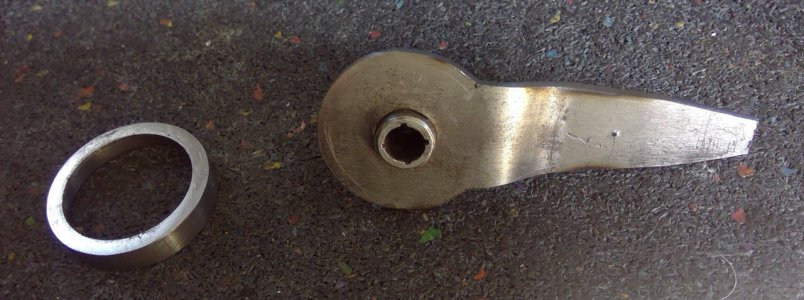
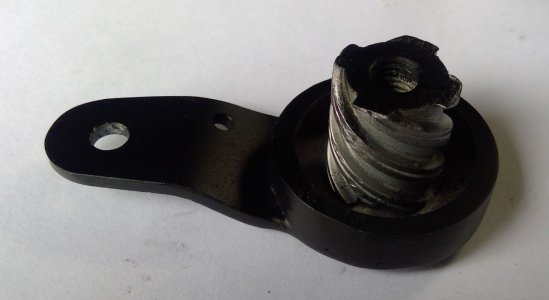
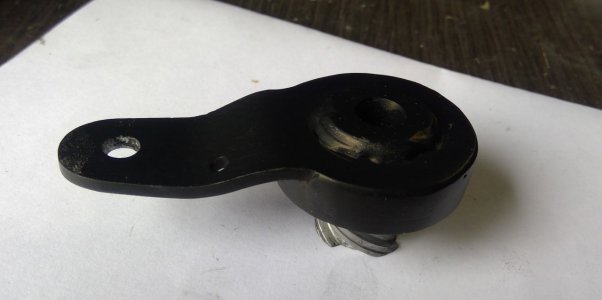
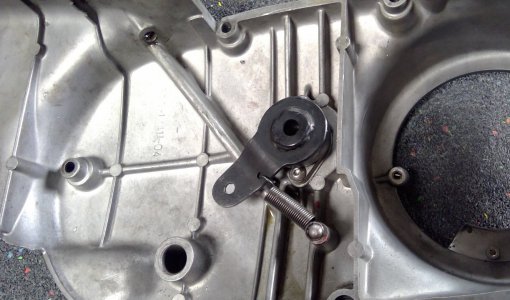
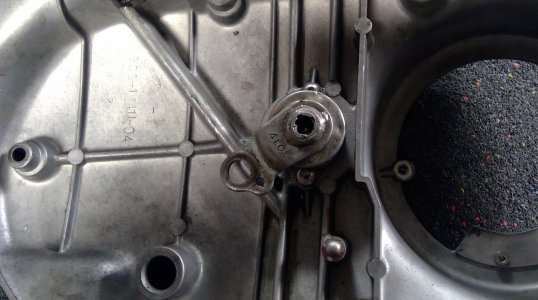
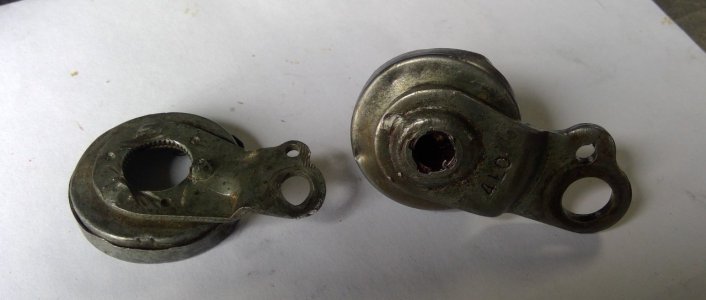
I have chronic RA so the clutch lever on the bike is too heavy to use comfortably, so I put the law of the lever to work.
The clutch lever's distance from pivot point to nipple centre is 30mm, whereas the clutch actuator lever's distance from screw, or pivot point, to nipple centre is 35mm, so the law of the lever is already at work, but not enough for me.
I had an old clutch actuator lever that came in a box of parts with the bike. I removed the original lever, cleaned up the damaged screw and turned down the head of the screw to 13mm.
After fashioning a rough lever I attached it to the screw, turned up a dust cover and welded everything together. As I wanted better leverage I drilled the pivot point for the nipple holder 10mm further out from the screw, 45mm.
Attached everything and pulled the lever, much, much better. The actuator lever, due to the increased distance between screw and nipple holder pivot actually moves the pushrod less than the original, but still separates the plates enough for the clutch to do it's job.
Attachments
-
 WIN_20220219_11_03_27_Pro.jpg126.8 KB · Views: 5
 -
 WIN_20220219_11_03_39_Pro.jpg152.4 KB · Views: 5
 -
 WIN_20220220_10_35_07_Pro.jpg82.9 KB · Views: 5
 -
 WIN_20220220_10_35_19_Pro.jpg75.9 KB · Views: 5
 -
 WIN_20220220_10_38_57_Pro.jpg165.1 KB · Views: 5
 -
 WIN_20220220_10_39_35_Pro.jpg158.1 KB · Views: 5
 -
 WIN_20220220_10_45_42_Pro.jpg82.9 KB · Views: 5
Last edited:
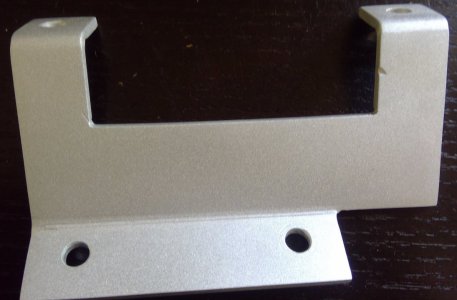
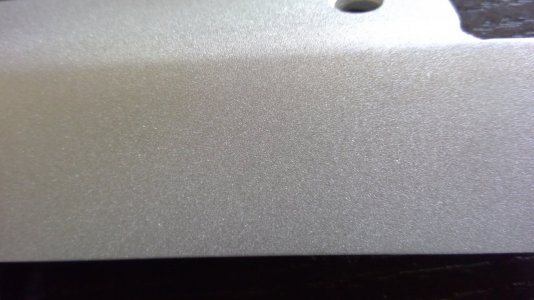
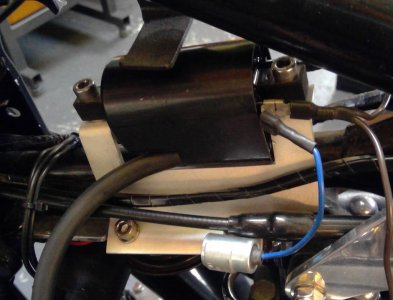
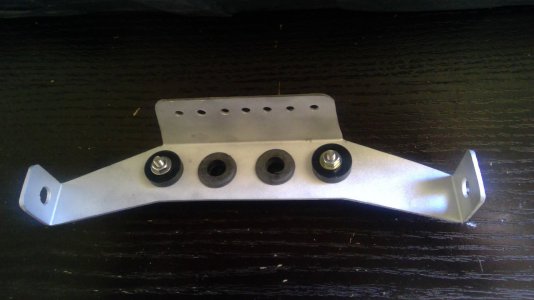
The coil on the TX went kaput, so I sent off for another CB 750 coil. It arrived yesterday so I went to install it only to find it didn't fit' the bracket I made a while back, the mounting holes on the new coil are 10mm closer together. Not much choice so I made another mounting bracket. Being as it's under the tank I anodised it instead of polishing it as I'd done with the original. Prior to anodising I rotary sanded it, then hit it with a scotchbrite wheel, then dumped it in the anodising bath. Unfortunately, anodising tends to greatly amplify any imperfections in the finish, whilst it looked great before anodising it came out showing the sanding scratches. Acceptable and not seen under the tank, but I wasn't happy with the finish, so rather than do it all again, I put it in the blasting cabinet and gave it a light blasting with glass beads. What a great finish this gave, still anodised so it won't oxidise, but boy, what a great finish. I still have to route the cables and harness neatly, that's why it looks a little untidy. I might also do the same with the top engine mounts.
Attachments
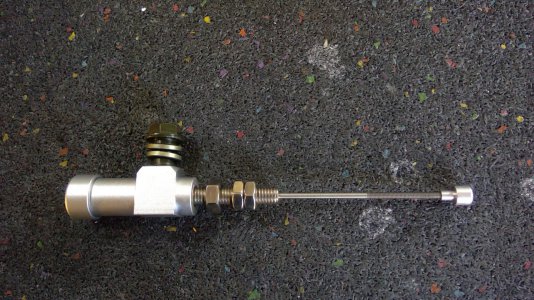
I sent off for a hydraulic clutch slave cylinder and some hoses, they arrived today and I was pleasantly surprised. The slave cylinder mounts where the original cable was and pulls on the lever attached to the course thread screw. It was cheap and is pretty darn good quality, just not sure it will work that well as the bore is only around 12_14mm. Tomorrows job.
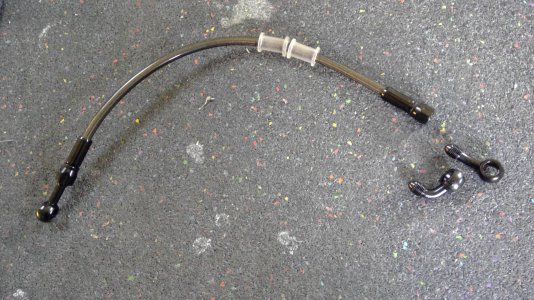
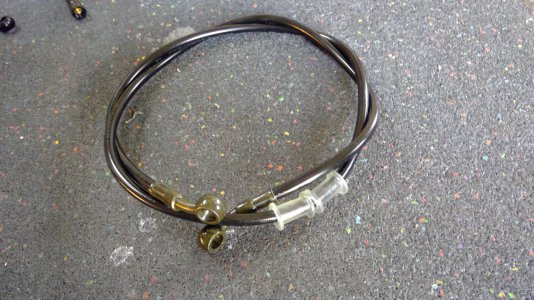
Some hydraulic hoses also arrived, these were advertised as 'braided' but certainly there is no external braiding. They are quite small in diameter and appear to be made of some sort of plastic with braiding of some sort under the clearish outer surface. The smaller of the two came with three banjos: straight, 28 degrees and 90 degrees. Again, they appear to be quite good quality.
The slave cylinder and hoses were only bought to play with, but if everything works ok, I may look at the hoses for brake lines. I'll be on the lathe again shortly to make a slave cylinder that pushes on the clutch actuating rod, not a fan of the course threaded screw actuator.
Attachments
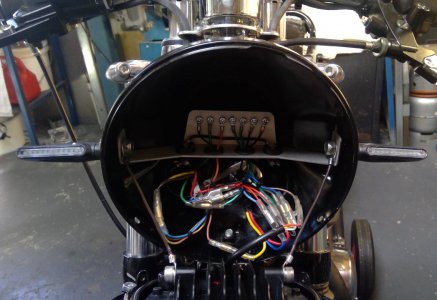
I've designed and put together a couple of much simplified harness' one for lights, the other for ignition, minus stuff I don't require, neutral light and so on. But still the spaghetti bucket lived up to it's name - untidy. I dislike untidy with a vengeance so made a bracket that sits inside the spaghetti bucket to try and keep things neat and make it easier to find and connect the wires.
Two grommets sit in the middle for routing earth wires through to earth connections and a couple of linked, Delrin, insulated terminal bridges sit either side of them for power connections. Mostly connected up, but still have to connect the headlight cables and speedo light cables, not sure about adding idiot lights, more procrastination needed there me thinks! The cables emanating from the switchgear are very, very light gauge, not sure if they'll handle the current, even though all lights are LEDs, so I may have to either solder in heavier gauge cables or change the switchgear.
Two grommets sit in the middle for routing earth wires through to earth connections and a couple of linked, Delrin, insulated terminal bridges sit either side of them for power connections. Mostly connected up, but still have to connect the headlight cables and speedo light cables, not sure about adding idiot lights, more procrastination needed there me thinks! The cables emanating from the switchgear are very, very light gauge, not sure if they'll handle the current, even though all lights are LEDs, so I may have to either solder in heavier gauge cables or change the switchgear.
Attachments
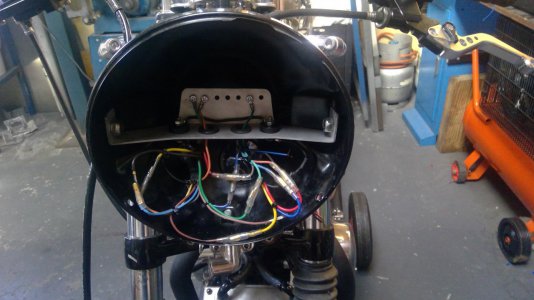
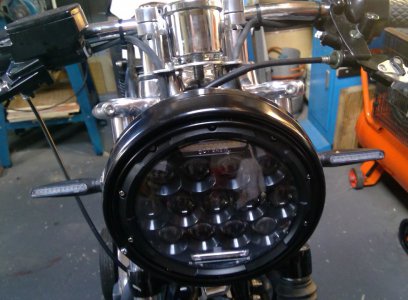
Finished off the front wiring and spaghetti bucket. Still looks a little untidy, but neater than most I think. I even mounted the lens on a couple of wire safety straps to stop it pulling on the harness. I had, to buy these double female bullet connectors from China, couldn't find anyone in OZ who stocks them. Trying to find sub 6mm eye terminals was a job, same with 3mm blade terminals, they stock female blades but not males. And they complain that everyone is turning to online shopping - no bloody wonder.
Got to attack the back end now, mount the indicators and plug them and the tail light into the lighting harness.
Got to attack the back end now, mount the indicators and plug them and the tail light into the lighting harness.