- Joined
- Aug 3, 2017
- Messages
- 2,437
I have a surface grinder, it is awesome. But I've never felt like a balancing setup was worth the cost, which basically amounts to the cost of the machine!
SO, I'm going to try making one from scratch. That's right, everything. For this, I need 3 parts as far as I can tell:
A U shaped balancing frame. These seem to run $500 on their own, but are pretty simple looking. The only important part is that it is 3-point levelable, and that the rails are coplanar. I have two thoughts on how to do that, and might end up trying both . I'll use the surface grinder, plus make it adjustable.
Second: an arbor. Presumably these are typically hardened. I'm just going to try turning one out of 12L14 and see how it does. The key here is going to be getting the taper in the middle correct.
Third, I need a way of balancing the wheels. The drill-bit mechanism seems silly, and the balancable arbors are expensive. Instead, I have an idea on how to cheaply/easily make my sopko style HHIP arbors adjustable based on a design I saw elsewhere.
I ordered stuff, and finally started working today. Not much work done, but it's a start
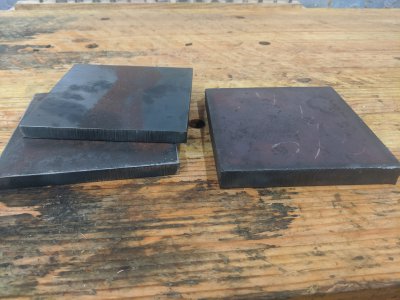
This is the material to the balancing fixture/frame. $30 of drops on eBay, downside is I think it is A36. I picked up 3/4" for the bottom and 1/2" for the sides. I'd put good money on this being way too thick on the bottom, but I'm going to go with it. Since my bench is a softwood table, the extra weight sounds like a good idea.
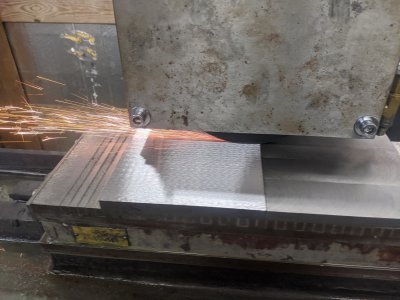
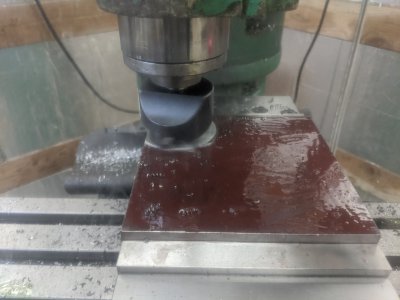
First step was squaring up the base plate. I used my flycutter on two sides to get something I could put against my jaws, then flycut the top/bottom. Finally, used an endmill for the other two sides.
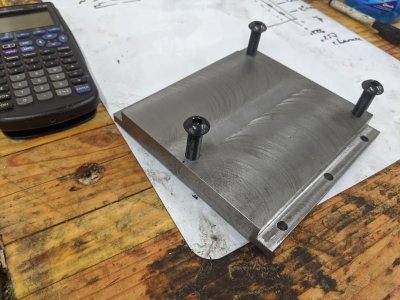
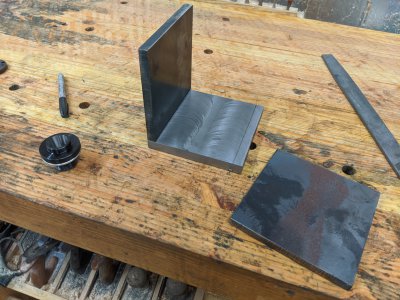
Here it is shaped and mocked up with the other plates. Final dimension is a little under 6" square by 9/16" thick. I still have some work left to do on this obviously, but my next step is probably to do the same on the next two pieces.
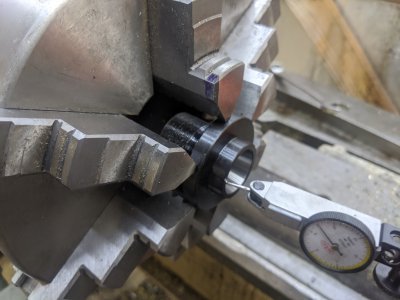
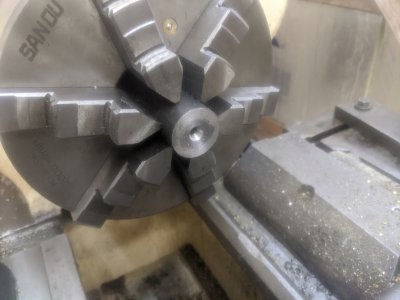
While that was happening, I faced and center drilled a ~7" piece of 12L14 for the arbor. I'll end up turning between centers when I get to it.
SO, I'm going to try making one from scratch. That's right, everything. For this, I need 3 parts as far as I can tell:
A U shaped balancing frame. These seem to run $500 on their own, but are pretty simple looking. The only important part is that it is 3-point levelable, and that the rails are coplanar. I have two thoughts on how to do that, and might end up trying both
Second: an arbor. Presumably these are typically hardened. I'm just going to try turning one out of 12L14 and see how it does. The key here is going to be getting the taper in the middle correct.
Third, I need a way of balancing the wheels. The drill-bit mechanism seems silly, and the balancable arbors are expensive. Instead, I have an idea on how to cheaply/easily make my sopko style HHIP arbors adjustable based on a design I saw elsewhere.
I ordered stuff, and finally started working today. Not much work done, but it's a start
This is the material to the balancing fixture/frame. $30 of drops on eBay, downside is I think it is A36. I picked up 3/4" for the bottom and 1/2" for the sides. I'd put good money on this being way too thick on the bottom, but I'm going to go with it. Since my bench is a softwood table, the extra weight sounds like a good idea.

First step was squaring up the base plate. I used my flycutter on two sides to get something I could put against my jaws, then flycut the top/bottom. Finally, used an endmill for the other two sides.

Here it is shaped and mocked up with the other plates. Final dimension is a little under 6" square by 9/16" thick. I still have some work left to do on this obviously, but my next step is probably to do the same on the next two pieces.

While that was happening, I faced and center drilled a ~7" piece of 12L14 for the arbor. I'll end up turning between centers when I get to it.


