Tailstock Alignment?

Kroll

Active User
H-M Supporter Gold Member
Joined
Dec 23, 2012
Messages
1,307
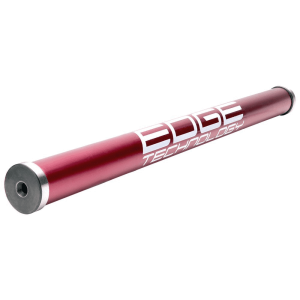
Guys just watch several Youtubes on how to do this which all seem very good.One way that I like which is little faster than other ways and don't have to use any stock to do so which I don't have.What I'm looking at is by Edge Tech. which looks to be an easy way and good for the beginner and can use it over and over again several yrs down the road.I was just wondering if anyone else has tried this and if you like it or not?Cost is 50.00 which I believe is a decent price,all have to do is take care of it.Any thoughts on this?
292117
 
Make your own, it is cheap and easy, and a highly accurate test bar can be made on an inaccurate lathe.

Look at this thread:
I made a test bar as per post #18, from DOM tubing with larger diameter mild steel plugs pressed into the ends. Made from drops I had on hand. Zero cost. Hardened and ground is not necessary for this tool, it gets no wear with the little it is used, never under power. Just needs to be protected in storage and in use from dings. Mine shows zero deviation using a .0001" indicator (no needle movement) when testing both ends alternately.

Post 26 in the thread above is also quite useful.

The Edge Technology will not be as accurate as the one I made for free, and I got to pick the length and diameter I preferred.
 
Most people would say to make the bar yourself and save fifty bucks. It's one of the chapters in Harold Hall's book and is also on his website.

I picked up an alignment bar with an MT2 taper at one end, made in India, for a little less. It is still center drilled (you just can't measure to the full end with the MT-taper) but also allows me to quickly check the alignment from either the tailstock spindle (MT2) or the headstock spindle (using an MT2 sleeve), though what I would do if the taper in either spindle is out of whack I don't know. On V-blocks on the surface place it doesn't have appreciable runout.

Still, cheaper to make your own: it may seem cart-before-the-horse, but really you just keep adjusting the tailstock until there is no (or minimal) deviation.
 
Another cheap alternative is to use a couple MT3 stub or machinable ends. Just make sure they are the same diameter.
 
Test bars mounted in the spindle taper and test bars mounted between dead centers are used for totally different tests. What do you want to test?
 
not sure how you use the MT2/3 alignment tool. do you put it in the tail stock and just dial it in across its length?
 
I would also suggest a mt style test bar over the edge technology style. You can use the mt style for headstock and tailstock. Mt style has center drilled ends in it so you can essentially do the same thing as the edge technology style just not as long. Mt style is more versatile and about the same price in my opinion.
 
not sure how you use the MT2/3 alignment tool. do you put it in the tail stock and just dial it in across its length?

Yeah. It's not the same as center-to-center: you're basically comparing the spindle taper on the tailstock to the headstock center, or the tailstock center to the headstock taper-and-sleeve (assuming your headstock is not also MT2).

To me this means it is more functional: I can verify that a drill chuck in the tailstock will be spot-on to the lathe (headstock) center, and I can mount the bar between centers for normal alignment. Downside of that last part is not being able to measure deviation on the taper end, but you know, swap ends and repeat.

There's another style that has MT tapers at both ends, so that you butt the headstock and tailstock up against each other, but it appears to be intended for woodworking lathes.
 
And it would not guarantee a perfectly straight cut after alignment; wear on the base of the tailstock effects taper by altering relative center height of the tool, causing taper. I have always used the cut and try method.
 
I have had one of the Edge Technology test bars for several years. I use in on a regular basis to center the tailstock after offsetting it to turn a taper. They're a bit more expensive than when I purchased mine. As I recall it cost about $35.00 shipping included. At that time they were still made in the US. They're now made in China. You can make one if you already have a lathe with a perfectly centered tailstock, or you can spend some time making test cuts and measurements and adjust the tailstock until measurements are equal on both ends of the test piece. In my case I thought it was cost effective to buy one.

If you look at the bar closely you'll see it's 2 hardened steel ends pressed into an aluminum tube, then ground to .0001". You'll want to be careful with it, because if you drop and dent it there's no guarantee you won't throw the ends out of alignment. It does come in a plastic sleeve for storage.

As a side note I did make one many years ago on a centerless grinder. Unfortunately I never labeled it. I just stuck it in a drawer. Somewhere along the way it either got put in a "special place" I've yet to find, or got mixed in with a pile of round stock. I looked for it for a few months and finally gave up. Since I no longer have the centerless grinder making a new one would be a bit more time consuming. In any case I now have a bright red test bar with the words "Edge Technology" printed all over it. It should be easier to find and identify wherever I put it.
 
Back
Top