The Giant Binocular

Sav,
have you looked at the various wetsuit repair kits available, might find something useful at a SCUBA shop. Must be a few in your area of the world.
John.

Yes, they are for sticking neoprene to neoprene. Works well for that but doesnt stick to the glass or aluminium.
I will experiment today and report back.
 
Savarin, I just tuned in to this thread. Wow! I'm impressed. You do such cool projects. I'll be watching the rest of it.
 
Many thanks.
The cut off blades are the thin "T" section ones, a bit more expensive than the flat ones but I'm starting to swear by them.

I've broken some of them too. I guess I need stronger Mojo or better skills.
 
The surface prep for your bonding tasks needs to be "right" so good luck with the research on that.

I hope you have a plan to glue up dummy assemblies to test procedures and longevity.

I wonder how you're going to get such large areas uniformly coated and mated without entrapping some air bubbles?

What force do you think will be needed to figure the mirror an you require?

I think it's an error to think of the epoxy as an 'extension' of the glass or the aluminum. I suggest you think of the epoxy as a 'buffer' between two dissimilar materials. The Coefficients of Thermal Expansion (CTEs) are greatly different between the materials, the faying surfaces are very large (IME) and the adhesive is the member that has to accommodate the differences.
 
dow corning produces some very good silicone adhesives.
i would place precise dots of silicone ( graduated syringe ) on a marked grid work on one piece and place the other upon it.
my 2 cents
Dan
 
still working on the adhesives so no definitive results there yet.
Time to make the focuser units.
Some years ago I made what is termed a helical Crayford Focuser.
It worked very well so as its a very low profile I want to do it again but this time with a bit more precision.
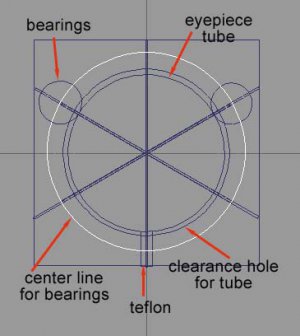
Heres a rough layout plan
layout.jpg
This part is easy but the holes for the bearing shafts have to be drilled at an angle.
The last time I angled the drill press plate to 2.5 degrees off of flat, eyeballed the line passing through the centre of the circle and bearing centre with the middle of the drill support pillar and drilled.
It worked but was not as precise as I wished.
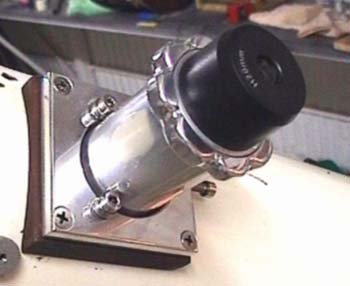
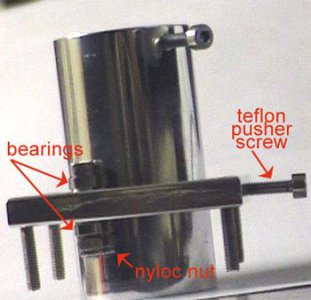
heres the original but the new version will have a circular plate instead of a square plate.
finishedL.jpgf3L.jpg

Can anyone help with a more precise method of setting up the 10mm plate to drill that doesn't rely upon my old worn eye-crometer?
 
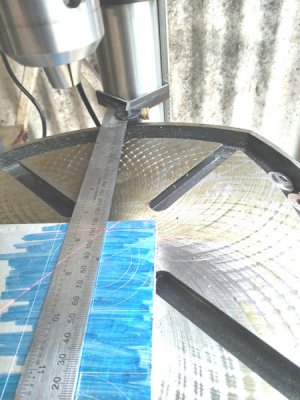
The best I can come up with is this.
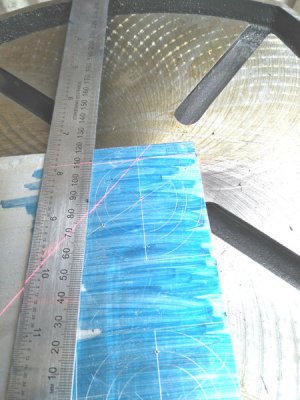
Align the laser cross hairs on the centre point like so
focus-drilling-1.jpg

Then use a centre finder off the support column to align the through the centre of the circle like so

focus-drilling-2.jpg

Can anyone see a problem with this method?
But when the table is tilted the rule wont sit flat so its a two person job, one to hold the centre finder against the column and the other to move and align and clamp the plate.
 
Would using some rubber bands (or inner tube strips) be useful for holding the centering head to the column?

I would start the "drilling" by creating a spot face with a center cutting end mill. That will give you a planar surface normal to the spindle.
 
Time to make the focuser units.
Some years ago I made what is termed a helical Crayford Focuser.

This part is easy but the holes for the bearing shafts have to be drilled at an angle.

heres the original but the new version will have a circular plate instead ...
Can anyone help with a more precise method of setting up the 10mm plate to drill that doesn't rely upon my old worn eye-crometer?

Very cute, grooveless helical motion!

If you have a drill motor that can be clamped in your lathe toolpost, hold
the plate in the 3-jaw and lock the spindle. One jaw of the chuck DOWN would
be a good position, gives clearance for exit hole, and easy to reposition 120 degrees.

Adjust the drill height to directly over the axis, drill shaft aligned with the
compound travel. Dial your entry angle on the compound.
Crank the compound to spot, drill, ream.
Rotate spindle 120, relock. Spot, drill, ream.

This is the kinda thing I'm envisioning...toolpost drill adapter

Same drill can be lowered to on-axis to do lockscrew and 'teflon' cross holes.
The design is fixed in the horizontal plane (only makes horizontal holes).
 
Last edited:
Back
Top