The Giant Binocular

Hi whitmore, I eventually got my head around what you were describing I think.
The vertical line through the centre of the circle to the centre of the bearing shaft would have to be vertical in the chuck, the compound set to 2.5 degrees and the drill must be set to drill parallel to the cross slide then either raised or lowered to meet the point it must drill then advanced with the compound?
A mute point as I dont have a tool post mounted drill. (good excuse to build one though)
 
Sorry, don’t know if I understand your help? Could you just put a pointed wiggler in the drill chuck for alignment? Re-layout your lines to compensate for the 2.5°. Again sorry…Dave
 
Hi Dave, I can get the point of the drill aligned with no problems, its ensuring the through hole doesnt point either inwards to the centre of that circle or outwards away from the centre of that circle.
The bolt that goes through that hole has to hold a small bearing against the tube that passes through.
That bolt has to be at the 2.5 degree angle and both bearings still have to bear equally against the tube.
With the two 2.5 degree holes at 120 degrees apart that gives 4 bearings pressed equally against the side of the tube.
If you look at the third image in post 67 you can see one of the pairs of bearings mounted on a bolt that passes through the plate, giving a bearing on each side of the plate.
If you looked at the plate from edge on that bolt actually passes through the plate at an angle, if it angles either inwards or outwards then only one of the pair of bearings will contact the tube.
This is what I am attempting to minimise, that possibility of the bearing bolt pointing inwards or outwards.
Post 68 is the best I can come up with. I was hoping someone could see a better or easier method.
 
Hi whitmore, I eventually got my head around what you were describing I think.
The vertical line through the centre of the circle to the centre of the bearing shaft would have to be vertical in the chuck, the compound set to 2.5 degrees and the drill must be set to drill parallel to the cross slide then either raised or lowered to meet the point it must drill then advanced with the compound?
A mute point as I dont have a tool post mounted drill. (good excuse to build one though)

Yep, that's it exactly. 'Twas hard to get the words straight (I had to re-edit the post when I
saw I'd said 'drill', not 'drill motor'), but that's the picture in my head.

Instead of a toolpost mounted drill, it might suffice to have a toolpost mounted drill guide
(and poke at the workpiece with a handheld pistol drill). Multiple different
size holes, though... is tough with that approach (not impossible, if you have 1/4" hex
shank drill set and a guide-able barrel-shanked driver).

I've got one battery drill, sans battery, earmarked
for a toolpost mount when I get the 'round tuit' that's required.
 
I've just done a quick test of my method as outlined above and it seems to work fine.
However, probably over thinking it I decided that to be as close as possible the point to drill should be a tad before the marked point so the halfway bit of the hole is midway between each side of the plate.
I drew this out and the distance the best as I can measure is a quarter of a millimetre or 0.010 inches.
Not a lot and virtually impossible to measure with hand tools. (leastways by me)
 
Havnt done much this last couple of weeks. Why?
Cos I stuffed up when I started the drawing all that time ago.
I originally drew the light cone of the 12" f6 as a 72" cone coming to a point and worked out all my measurements from that.
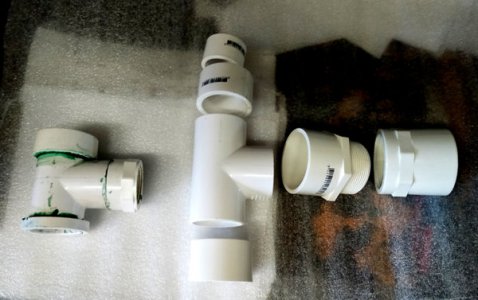
That gave me the allowances to make the tertiary mirror and focusser unit from 40mm plumbing fixtures.
which I then did.
tertiary-1.jpg
The 10mm thick aluminium is the plate for the focusser bearings as described above.
I was just working out where to drill and tap the fixing screws when I found out that the light cone should have been drawn as a 72" flat topped cone.
The flat being somewhere from 20mm dia to 10mm dia.
Upon re drawing this I found the new cone is much wider and the 40mm fixture will vignette the beam somewhat substantially.
It also means a larger secondary mirror, glad I havnt purchased it yet.
so this means going up to 50mm parts
tertiary-2.jpg
as can be seen some of the parts are a bit chunky and will require a fair bit of turning and trimming to neaten it all up..
Luckily the focusser bearing plate will fit with no problems so I wont have to remake those.
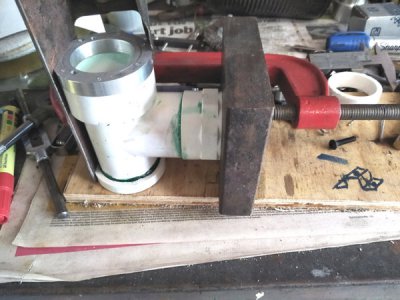
I need to bore out the cross piece on the "T" fitting to remove some internal bumps and shorten it but I'm having problems mounting it on the lathe accurately.
I think I can make some wiggle room but using a larger mounting hole on the fixing plate so it can be accurately aligned with the light cone..
It will also make the IPD wider so kids wont be able to use it but it is still ok for most adults. (He hopes)
 
Thanks Mitch but at $117 each plus postage to Australia for what is essentially a bit of plate and a couple of screws that is very easy to make is way too much for me.
The one I made years ago worked very well indeed until the salvaged bearings from old floppy drives rusted.
I'm still waiting for the stainless bearings for these ones.
Then again I think I suffer from an annoying compulsion to do everything myself and if I could refine the ore for the metals I would.:laughing:
 
Then again I think I suffer from an annoying compulsion to do everything myself and if I could refine the ore for the metals I would.:laughing:

Impressive idea but we don't have that kind of time to wait on your project!
R
 
Back
Top