I've had the mill for a couple of weeks now and finally received the squaring tool to start checking setup so I can prepare to start using it. I watched two videos on tramming, on what appeared to be knee mills at a minimum and I read the instructions provided with the machine.
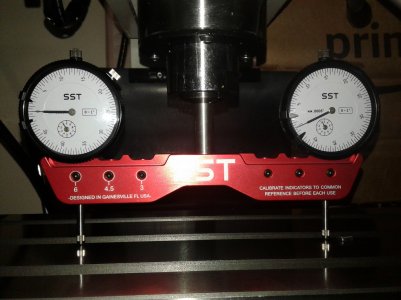
First, I locked everything down, gibs and quill and used a small flat magnet as 0 point for both gauges on the table, setting one and rotating the second gauge to that point for zeroing and then back to its position. I removed the magnet, lowered the head stock making contact with the table and checked the error. I got close but needed more repetitions to get the feel of the backlash and effects of loosening and tightening restraints.
I then tried the approach outlined in the manual, using the fine adjustment for the spindle and a 1-2-3 block, and that turned out bad with marked variance increase next to the previous result.
Somewhere in the process I came across info stating I should make the adjustment with the spindle near the position it would mostly be used. I did that, involving the fine feed again, but still didn't like what I was seeing.
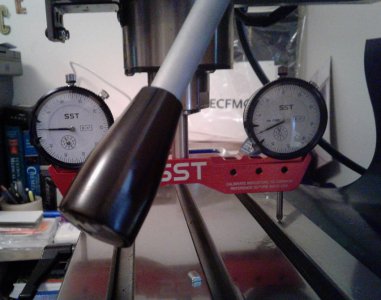
Finally, lowered the head stock until the gauge tips were just above the table, zeroed using the magnet and then used the fine adjustment to cover the short distance while all else was locked down. The end result is what's seen in the pictures.
I relieved the pressure on the gauges, cranked the air conditioner for about an hour while it all sat. I went back to check it before taking it down and the gauges were off by .0015, X and Y.
I know temps affect specs, but I'm not sure that's the case here. There may have been a 4 deg drop in temps.
I welcome recommendations on how to approach the process with this machine, headstock vs. fine feed for example, while keeping in mind a good quantity of patience is needed.
About me; I'm an enthusiast and have been discovering and creating in electronics and mechanics since I was a kid, back when television went to bed to. Purchasing a mill is a continuation along the same path of discovery and creativity. My motto, except where it's very dangerous, "If it's already broken, all I can do is risk fixing it.".
Informal skills I've acquired as a result: auto diagnostics, engine and transmission building, mig welding, decent home HVAC repair and one outboard motor rebuild to name a few.
First, I locked everything down, gibs and quill and used a small flat magnet as 0 point for both gauges on the table, setting one and rotating the second gauge to that point for zeroing and then back to its position. I removed the magnet, lowered the head stock making contact with the table and checked the error. I got close but needed more repetitions to get the feel of the backlash and effects of loosening and tightening restraints.
I then tried the approach outlined in the manual, using the fine adjustment for the spindle and a 1-2-3 block, and that turned out bad with marked variance increase next to the previous result.
Somewhere in the process I came across info stating I should make the adjustment with the spindle near the position it would mostly be used. I did that, involving the fine feed again, but still didn't like what I was seeing.
Finally, lowered the head stock until the gauge tips were just above the table, zeroed using the magnet and then used the fine adjustment to cover the short distance while all else was locked down. The end result is what's seen in the pictures.
I relieved the pressure on the gauges, cranked the air conditioner for about an hour while it all sat. I went back to check it before taking it down and the gauges were off by .0015, X and Y.
I know temps affect specs, but I'm not sure that's the case here. There may have been a 4 deg drop in temps.
I welcome recommendations on how to approach the process with this machine, headstock vs. fine feed for example, while keeping in mind a good quantity of patience is needed.
About me; I'm an enthusiast and have been discovering and creating in electronics and mechanics since I was a kid, back when television went to bed to. Purchasing a mill is a continuation along the same path of discovery and creativity. My motto, except where it's very dangerous, "If it's already broken, all I can do is risk fixing it.".
Informal skills I've acquired as a result: auto diagnostics, engine and transmission building, mig welding, decent home HVAC repair and one outboard motor rebuild to name a few.