Trying to organise a garage workshop...

MrCrankyface

H-M Supporter - Silver Member
Joined
Nov 7, 2019
Messages
433
I felt like taking a trip down memory lane so I'm going to try and document my journey as a hobby-machinist which has been one long project on it's own. :grin:
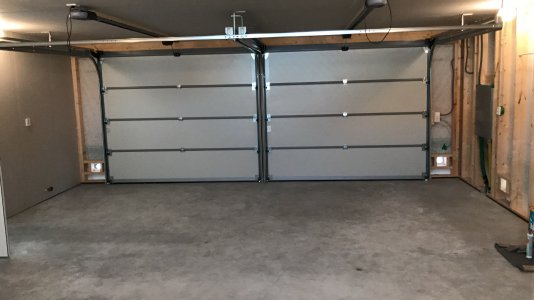
I've always been interested in making things so when we could finally afford moving to a house back in 2017 I aimed to make my dream come true in the 2 car garage.
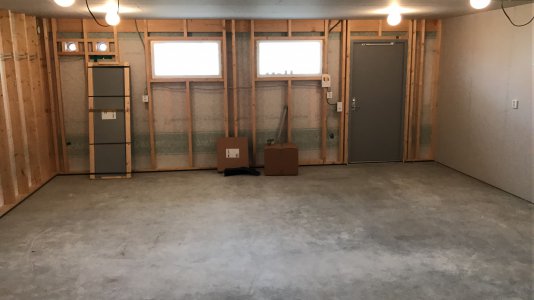
The garage was delivered "as-is" so fixing the walls was a priority, but I figured painting the floors would be easier before I did that.
1.jpg2.jpg'

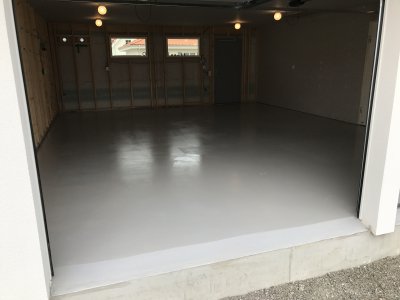
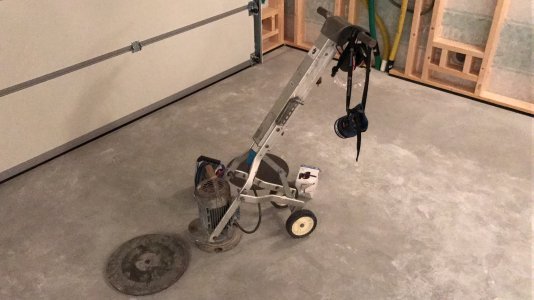
I roughed up the surface with some kind of steel disc and then epoxipainted the entire thing.
If I were to do this again I would've mixed the first layer of epoxi thinner so it gripped the concrete better and then done more/thicker layers after this for a more durable surface.
I even think it would be enough to just empty a bucket of paint on the floor and squeegee it around rather than carefully using a paint roller like I did.
After using this space for 4 years I've gone through the epoxipaint in some places.
3.jpg4.jpg

After this came the horrible part, glasfiber insulation. :rolleyes:
I didn't use a respirator so I can from experience tell you to WEAR A RESPIRATOR.
My lungs and throat itched for weeks, horrible experience.
This first layer of insulation is 90mm / 3.5" thick and then has a layer of plastic to stop moisture from traveling out. The rest of the house is built in a similar fashion so I figured I'd copy the construction.
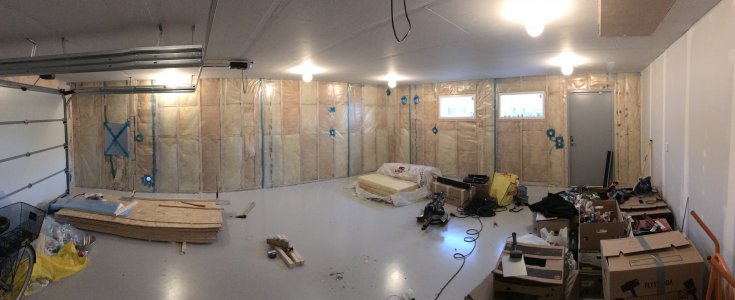
5.jpg

After doing more research I figured I would actually want more insulation than that and added 45mm / ~1 3/4" studs going the other direction from the other studs.
Apparently this helps stop thermal bridges ruining your total insulation efficiency.
You can also see some of my first investments here .. A proper shopvac and miter saw.
4 years later they're both still working well and have many projects behind them!
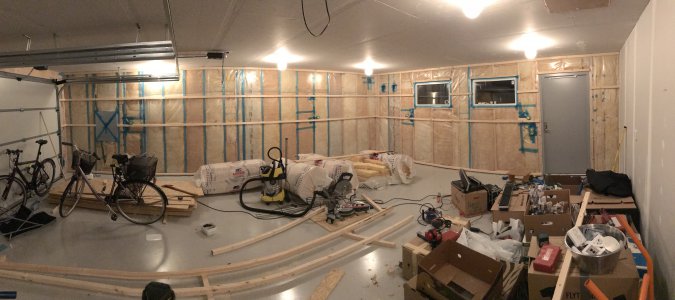
6.jpg

After stuffing all of those pockets full of insulation I started adding sheets of OSB.
Plywood would've been even better but not economically sensible for me.
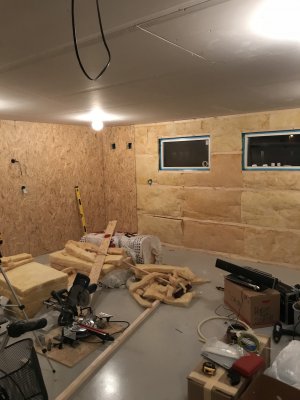
7.jpg

And on to playing with drywall, plasters and sanding.
All of my powertools lined up neatly below the windows. :grin:
Budget drill press, budget belt sander, budget tracksaw, budget stick welder my dad gave me and so on. :grin:
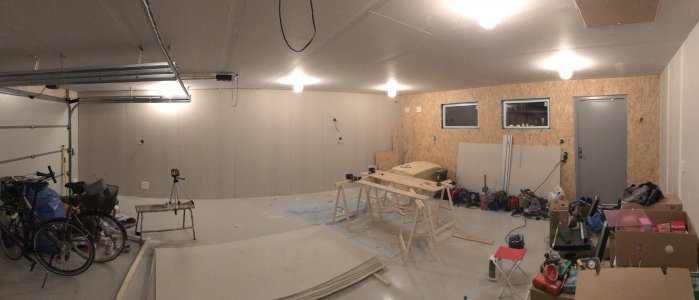
8.jpg


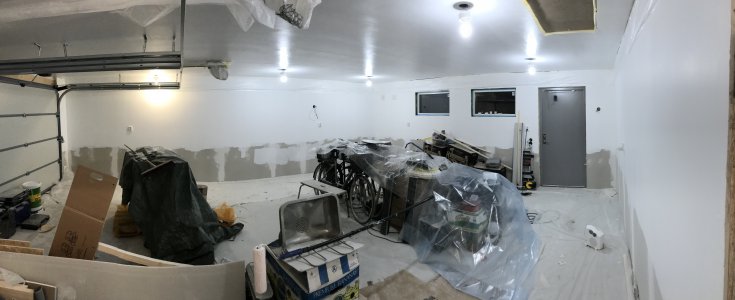
Some paint later and at least the walls are getting there.
Lower half is not painted for a reason I'll get to later.
9.jpg

To be continued soon.
 
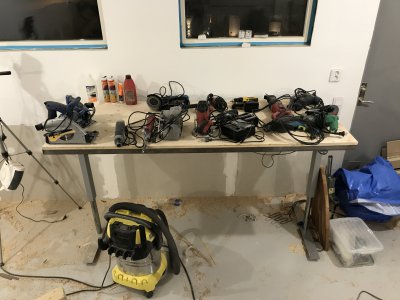
So in the middle of this mess, my brilliant mind decided that I should start up a project.
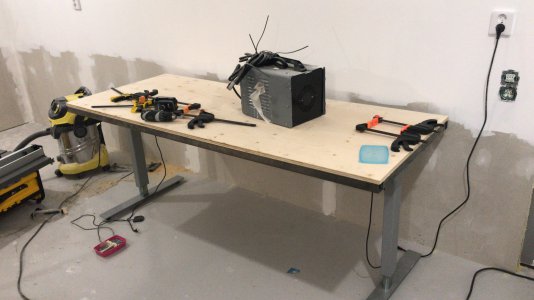
I found some steel scrap and a disassembled frame for an office desk.
Together it made a decent height adjustable worktable.
Definitely not sturdy enough for precision work but good enough for the time.
Biggest problem was as usual the legs, there's just too much play in the sliders for the table to be rigid, but at least I don't have to work on the floor.
10.jpg

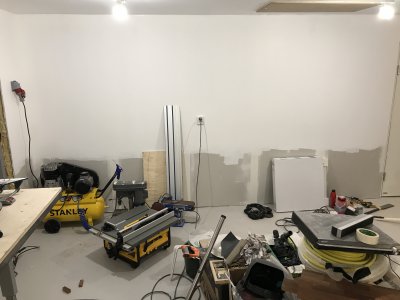
I then invested in a table saw, a planer and an air compressor since that's something I really wanted.
The table saw is quite good for it's size and even 4 years in I still like it.
The compressor leaves some to be desired but that's mostly because my needs have outgrown the compressor.
Some tools simply use much more air than this one can comfortably deliver.
If you think you'll be using a lot of air tools, definitely get something bigger than 3kw/4hp.
The planer was some half-budget tool but has been working out quite well for me.
It does produce some snipe or whatever it's called but there's ways to work around that.
11.jpg

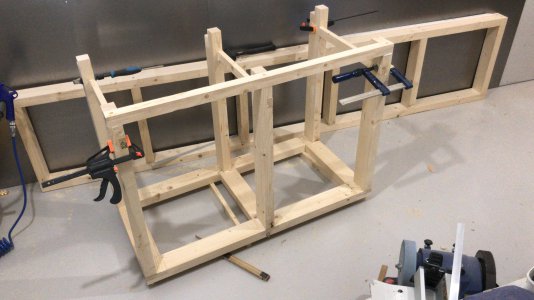
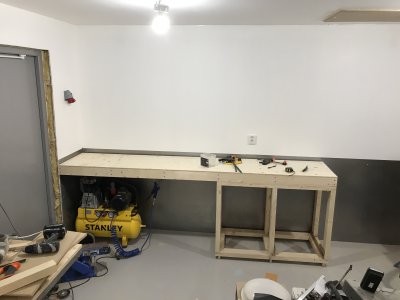
I was probably getting tired of the big pile of stuff in the middle of the garage so I started making a sidetable and storage.
This was a lot of work but it's super rewarding getting stuff exactly how you want them and also let me get used to the, back then, super scary table saw.
You can also see how I've started adding sheets of steel against the walls here. Bump and spark protection etc.
12.jpg13.jpg

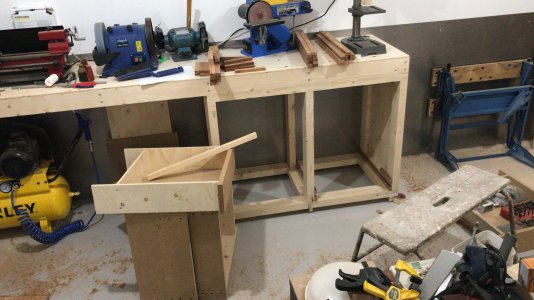
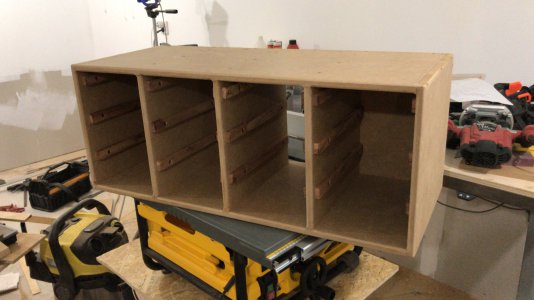
Working with whatever scrap I had laying around, I started making boxes.
Slides from some kind of oak I think.
Quite tedious making so many of the same parts.
Something I learnt over time here is that big boxes are almost worthless unless you need to store really big stuff.
It's much easier to keep things neat if the boxes are less tall and each item has it's own place in the box.
Otherwise you end up "digging around", quickly messing up any kind of order.
14.jpg

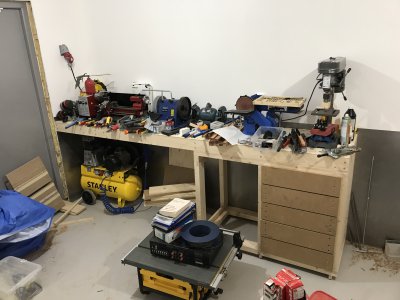
Pretty much my full collection of hand tools in two pictures, and most of the electrical ones(only missing one welder, the planer and miter saw). :grin:
Makes me really appreciate how much I've managed to grow my shop over the years...

15.jpg16.jpg

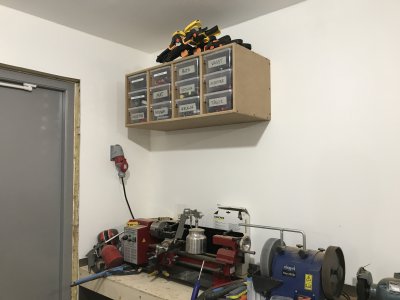
I was so tired of fabricating boxes/drawers that I started looking into some kind of pre-made solution.

Being way too cheap I wouldn't buy something finished but I found a shop that sold cheap plastic boxes with lids, so I designed this cabinet around them.
This let me store a quite large amount of stuff in labeled boxes, so it was easy to find things again.
This was yet another solution that I over time KINDA grew out off. I started taking "often used" tools out of the boxes and changing the contents to only having "less used" things.
Again, try to avoid having to dig in boxes to find common items, it makes a mess!
17.jpg18.jpg

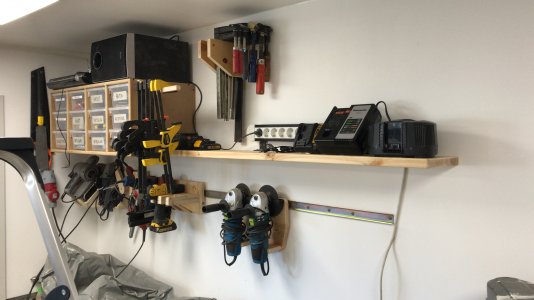
Kept working on this corner, adding a DIN rail underneath and making custom holders for machines to have them out of the way but still easy to access etc.
At the time I had a few different brands of battery machines, so the chargers quickly piled up on the shelves..
The clamp holder on the wall has a design flaw being completely horizontal, I would really recommend leaning it up a bit so the clamps cant fall off from vibrations or whatever.
Overall the shelf hasn't been the most space effective but still serves a purpose 4 years later.
The custom holders ended up taking too much time to make for it to be worth in the long run and tended to snap at the mount every few months, a design flaw on my part.
19.jpg

So at this point the garage is looking pretty nice!
All painting is done, steel sheets around the entire wall, LED lights in the ceiling and so on.
In the middle there's a MIG welder my dad gave me, not a good one but it worked for smaller stuff.
The LED's have started failing 4 years in, some of them will start blinking randomly and then work for a while more.
I think I installed 8x 40W but if I were to redo it, I'd add even more as they seem to have lost some power over the years, or it's the fact that I've added in tons of dark stuff in the shape of tools, parts and cars.
20.jpg


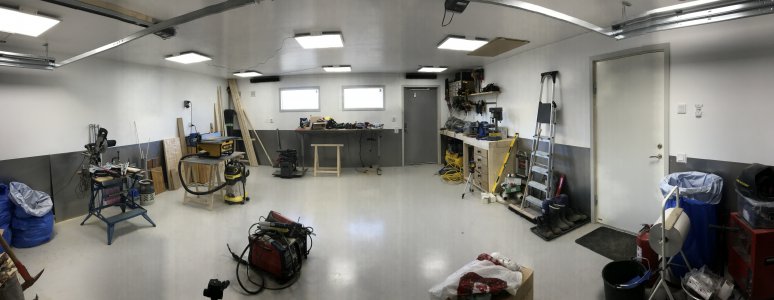
To be continued, we're roughly at april 2018 here, roughly 8 months from when I started working on the garage.
There's always other things to do so the workshop is on a lower priority.
 
Done well enough to live in......(with a little heat).

That should make a very comfortable shop!

It looks to be about 9m x 6m (30 x 20 feet) in floor space, right?

-brino
 
Done well enough to live in......(with a little heat).

That should make a very comfortable shop!

It looks to be about 9m x 6m (30 x 20 feet) in floor space, right?

-brino
Thank you and extremely close guess! It's 8.4 * 6-ish. :grin:
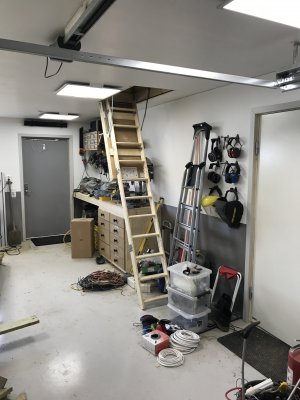
Ceiling height is only 240cm but definitely works.
 
The brown ceiling hatch in my last picture goes up to the crouch-height attic.
To the right of it I've started adding 3D-printed holders for various safety equipment.
I figured that the easier it'd be to access, the higher chance of me using it, like most people I'm a bit lazy and will avoid things that take too much effort.
21.jpg

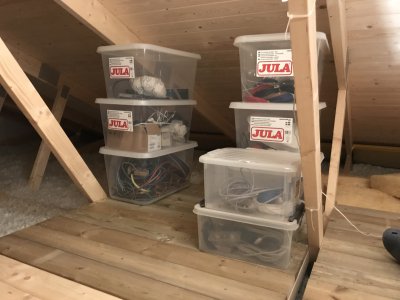
Up in the attic I started installign more flooring for 'very rarely used but good to have stuff' storage.
Up here it's OK for stuff to be bunched up in big boxes as you're rarely going to shift through it, just make sure you somehow know what's in each box.
I go up here maybe once a month or less, if I need a specific cable or seasonal tool.
22.jpg

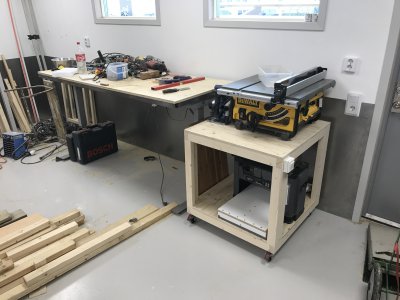
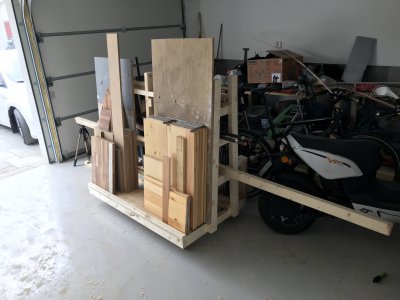
As I was getting tired of lifting the heavy saw and planer up and down from the work table when doing woodworking, I decided to put them on a dedicated rolling table.
It's funny how weeks of work can be summed up in one picture. :grin:
Every piece of wood has been cut, planed and sanded to be as close to perfection as I can make it.
The planers switch had broken when I accidently toppled the machine over, so it's now controlled by the switch on the side of the table and an emergency stop was later added that'd shut off both machines.
This was a good solution although a big bulky but as I moved more and more to metalworking, it was too rarely used to justify taking up that much space so it was eventually scrapped.
24.jpg

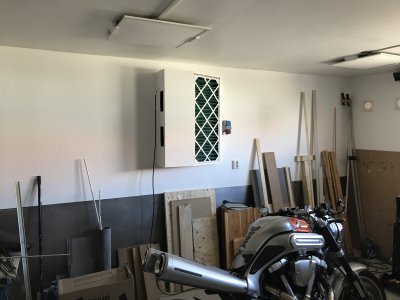
Doing quite a bit of woodworking at the time, I was getting real sick of all the fine dust, so I built this thing from an old ventilation fan, some scrap plywood and the biggest box filter I could find.
All it does is circulate the room air to catch the dust, makes an incredible difference and I would highly recommend having some kind of dust-catching equipment no matter if you're grinding or woodworking.
It does take up quite a lot of space on the wall but I will most likely be moving it to the roof in the center of the garage soon(a few years later relative to the picture).
25.jpg

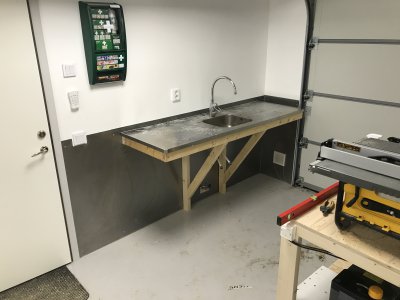
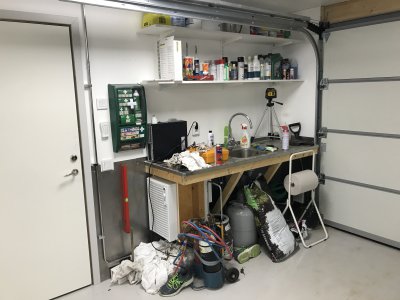
Another "game-changer" for me was having water and a basin..
Both tap and basin had been thrown out from an office getting renovated, the studs were leftovers that I cleaned up.
So much nicer being able to clean off your hands or clean things without having to take it outside or inside the house.
Later on working on machines and cars, this has been absolutely invaluable.
The first aid kit box has also saved me a few times, always count on injurying yourself eventually!
26.jpg

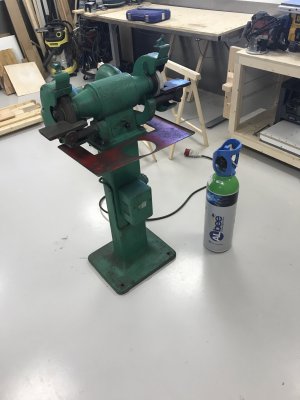
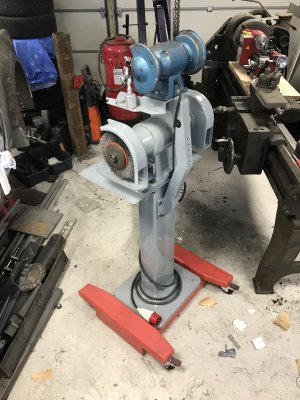
Here's a slightly funny investment I made. I was SURE I needed a big piedestal grinder, then I ended up not using it for months... :grin:
At least it wasn't very expensive and really heavy duty, also pictured is the first bottle of gas I ever bought.
27.jpg


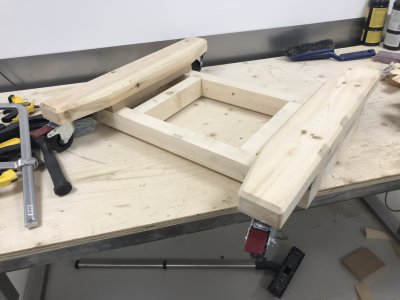
One thing I realized quite early was that if it's large and heavy, it probably need wheels, no such thing as permanent placement.
Since wood is easy to work with, this was the choice of material, reinforced with pieces on the sides going different directions.
28.jpg

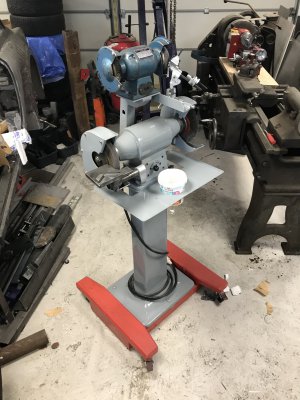
Jumping forward quite a bit, it got renovated with new electricals and a second smaller grinder added ontop.
The drill jig was poorly implemented and is hard to use, not sure if it's supposed to work better on the side of the wheel or maybe on a belt grinder.
29.jpg30.jpg

Back to where I was in time...
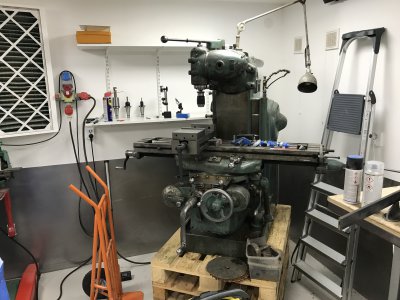
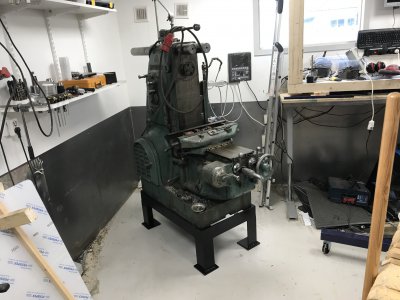
My next investment was this trusty old mill, quite worn but too cheap to not buy it.
This is the purchase that really kick-started my love for old machines, this one being around 72 years old or so.
I added some modular shelves behind it for mill-related storage, granted that it's always easy to be smart in hindsight(is that even a saying?) but having open shelves, next to a chip-spraying mill, is not a great idea.
If/when I redo this, the shelves will have covers or doors as they're always full of dust, oil and chips.
It's also quite difficult to get to when the table is out to the left and you need to change tools on the mill...
31.jpg
 
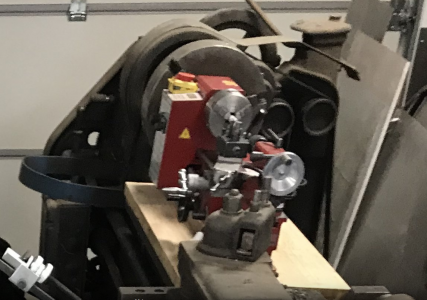
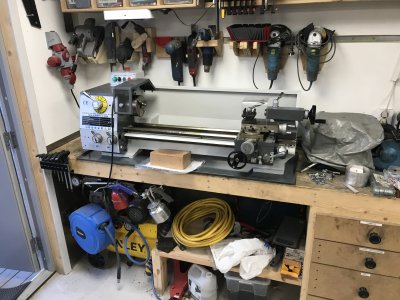
I've been watching the background of those pictures.

I saw the first appearance of a little lathe....then later this picture that really shows the difference in size:
1621427328497.png


Great thread, I am enjoying it!

Thanks,
-brino
 
Good catch there! :grin:

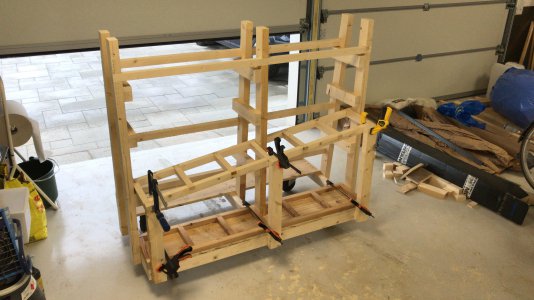
Around the same time as I got the mill, I thought that a material wagon would be a good thing to have, also on wheels for mobility.
As usual with hindsight, not such a great idea.
When loaded down with a few hundred kilograms of material, it's not very mobile even if it's on wheels.
Not to mention that it takes up a massive amount of floor space if it is to contain any decent amount of material.
32.jpg33.jpg

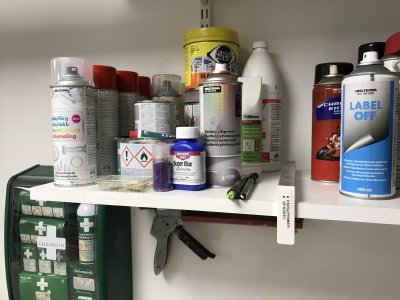
Trying to empty out the last moving boxes, I added some more shelves for chem stuff.
Whilst I still think shelves are a good idea for this, open shelves is still a bad idea in a garage/workshop, everything gets incredibly dirty after a while.
A bit later I added these compartmentalization bars and thought it was a great idea but it's just too much effort to keep everything here arranged as I use up and buy new different chemicals.
I haven't come up with a better solution yet though.
34.jpg35.jpg

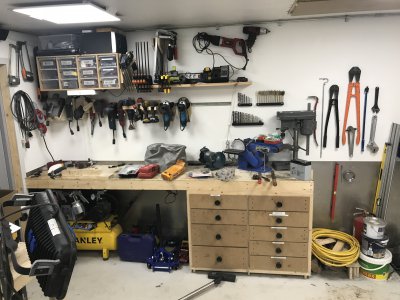
By this time I had really started putting things up on the walls.
Trying to make sure every single tool is easy to access and has a very specific place so it doesn't end up on the floor or on a bench, taking up valuable space.
Decluttering is super important to keep myself focused and happy.
36.jpg

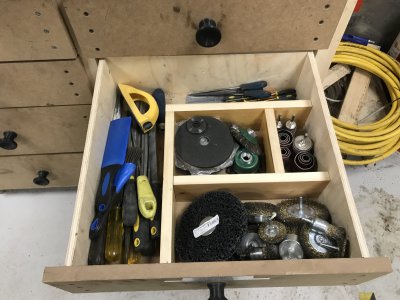
The deeper boxes I had started adding dividers to, so not everything woudl get mixed with everything else.
Granted that this was done in a hurry and the order wasn't perfectly clear, there's at least a better overview of it.
37.jpg

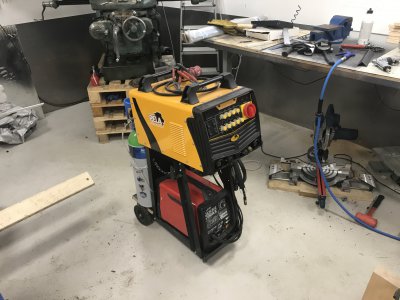
This was early 2019 when I found a used TIG welder for sale, with all the accessories you could want.
I modified my MIG welder cart and put the TIG ontop and both gas bottles behind, wobbly and difficult to roll around but at least it was more space efficient.
I'm really trying to consider the volume being taken up by things.
Vertical volume on something that rolls around isn't as valuable as horizontal volume(floor space).
By this time I've also invested in a small bandsaw for metal(4"x6" I think) which is hiding behind the welders.
Invaluable when you start working with thicker steel and aluminium.
38.jpg


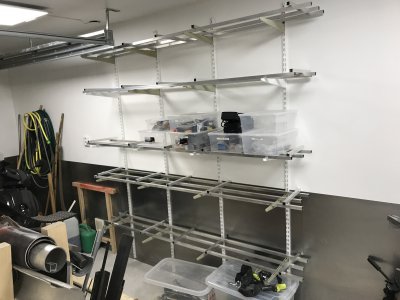
Up until this point, I had boxes of things kinda everywhere, so I decided that I needed a easy-to-access storage unit.
Simplest solution was this shelving system from whatever leftovers I had. No full shelves to keep the dustgathering to a minimum.
Where I needed more support(for odd shaped things) I added removeable planks between the aluminum tubes.
39.jpg

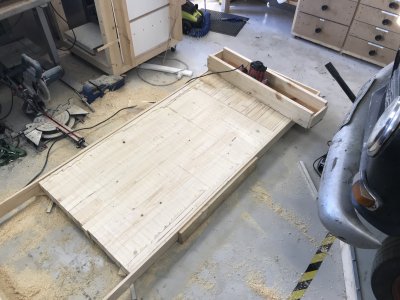
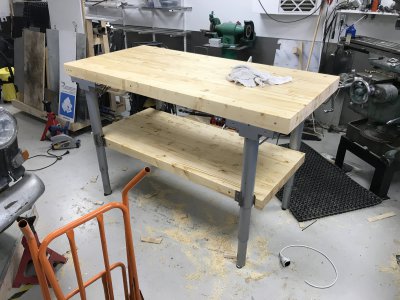
By this point I was getting real tired of the wobbly worktable I built earlier and wanted to try to build a really solid one.
I drew a lot of inspiration from various woodworkers I saw on youtube.
It's made from planed and glued 2x4's and came out quite solid.
40.jpg

For some reason I was still a bit obsessed with having it height adjustable and figured I could make it more sturdy than the previous version by using both thicker and more legs, so I combined this system from 2 different scrapped desks and also used the lower surface to bind them together.
This made it a lot sturdier than the previous version but still not as rock solid as you might want when pounding on things.
But at least this version was so heavy that you could excert A LOT of force without moving it.
One big problem with height adjustable tables is that any space under and above is sacrificed, and the lower area ended up as "misc storage" which is never efficient.
I still have the legs stashed away but ended up scrapping the table itself after ~1.5 year of use.
I simply valued the space higher for machines than I did for work surfaces.
41.jpg

To be continued ... We're currently at ~march 2019.
 
By this time I've owned my TIG welder for a while but still haven't used it because I don't own a watercooler for the torch, the only accessory I didn't get with it.
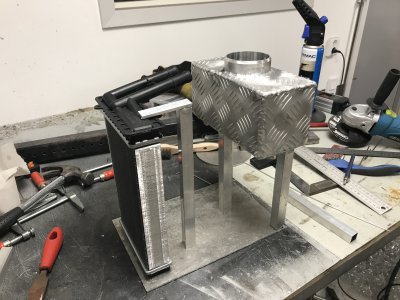
I used a very sketchy temporary setup of a big bucket of water and a aquarium pump so I could start building a dedicated unit. Works fine but oh boy is it difficult to move around :grin:
It was my first time TIG welding so took me a few tries to get the water tank sealed up.
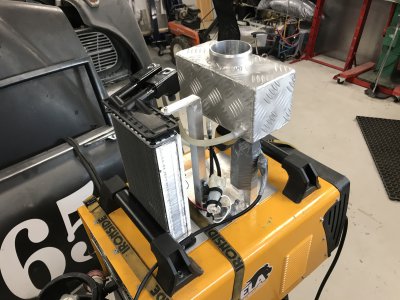
The cooler is a heater unit from an Audi 80.
42.jpg

It's a bit of an eye-sore but it works for now.. It has a lid that's been misplaced in the picture.
Came out an incredible amount cheaper than a commercial unit as well.
There's triple radial fans mounted behind the cooler, in a shround that covers the entire backside of it to push airflow through.
43.jpg

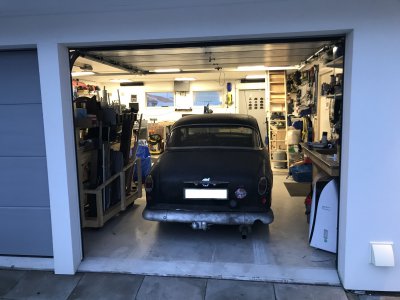
At the same time I started the long road of vehicle renovation and bought this thing, more about it in this thread: Volvo Amazon(131)
You'll be seeing this in the background a lot...
44.jpg

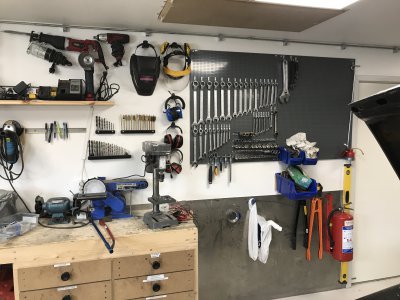
Having never really worked on cars before I needed to invest in some tooling, so a full set of metric and imperial socket and wrenches.
I had a bunch of stuff on the wall before that I replaced with this tool wall instead, figured it'd be more efficient and easy to use.
At the same time I'm trying to cram in as much as possible around here since I can't use the area for anything else because of the ceiling hatch that comes down here.
45.jpg


Looking back I must've been absolutely everywhere in the garage at the same time. :grin:
At the same time I've started renovating and upgrading my old milling machine.
It used to sit on a bunch of pallets, which definitely didn't inspire confidence when the machine was taking heavy cuts.
Moved it onto a proper steel base instead that I painted with hammerite.
I've also semi-started installing a DRO system on it, only X was connected here I think.
DRO is something I would recommend to anyone, on any mill. It makes such a difference!
Old table is still on the right here, so much things happening around the same time.
The "mill shelves" on the left are also really starting to fill up.
46.jpg

Lathe-wise all I during these years were that red 7x14" mini-lathe and whilst you can do impressive work with them, they do leave A LOT to be desired.
Being quite picky on the size and functions I wanted, it felt like my only option for an upgrade was to buy a new import machine.
So I took out a loan to be able to invest in this BL250G, max workable dimensions are something like 250x750mm and has neat functions like quick change gearbox for speeds and feeds, crossslide powerfeed etc.
This was the first time I ever took out a loan to buy tools, but it's really been worth it.
Not only has it allowed me to do things I could never do before but has also taught me so much about machining.
Always make sure you check interest rates and pay-off times before you buy things with loans, luckily I could get superlow interest rates that made the amount of 'wasted' money minimal.
47.jpg

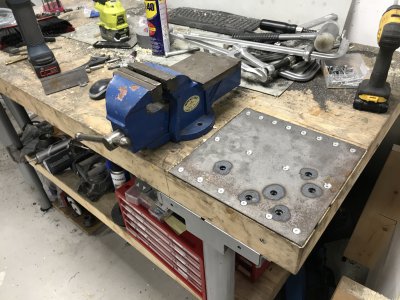
Here's a solution that I'm quite satisfied with.
I took a scrap 5mm plate and countersunk a bunch of holes for screwing it into the worktable and also welded nuts on the back on it.
On the table I milled out space for the nuts and sunk the whole plate down a bit as well.
The hole pattern where I welded in nuts works for a bunch of different things I have like vices, metal shears(the kind with a long lever ontop), sheet benders etc.
Real handy being able to throw them up on the bench and bolt them down, you don't even really need to sink the entire plate down, I just did that to have a perfectly flat tabletop when nothing is mounted.
48.jpg

On the topic of things being on wheels.
This easily let's me put big but rarely used items up against the wall, so I have more freedom to work on things around the shop and only roll out what's neccessary.
A kind of modular setup I guess.
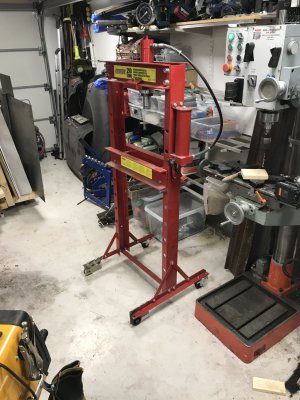
I've also purchased a cheap 20t hydraulic press here which also got it's own set of wheels later.
There's also a 2 ton workshop crane on wheels, hidden to the left, that's been absolutely invaluable in everything from moving machines to lifting really heavy items up on the worktable and mill.
49.jpg


When adding wheels to the press I had a serious design flaw because I cheaped out.(Picture is from a later date)
Caster wheels are expensive so I put two fixed wheels on one side and two casters on the other, I figured this wouldn't be much of a hassle but it really is..
It's suprisingly often you want to move the press sideways to get it out of the way, which of course is near impossible with this setup.
Lesson learnt, casters everywhere.
50.jpg

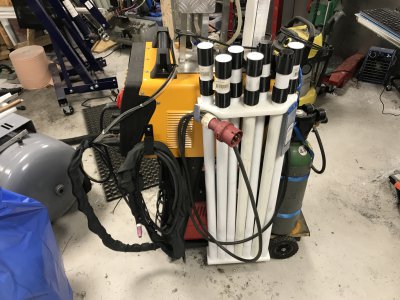
Eventually I took a second look at the welding wagon.
I figured the more welding-related-items I can keep on it, the less shelfspace I need to occupy.
One side has all possible TIG fillers and the other wise a whole bunch of MIG/Stick related things.
Filler tubes are just PVC sewage pipe with some 3D printed adapters and milled
Thick gloves, wirebrush, hammer etc, this has also been a very useful addition.
51.jpg52.jpg
 
I’m enjoying your progress journal. I’ve been through a similar process with my own workshop, slowly adding and making changes.
 
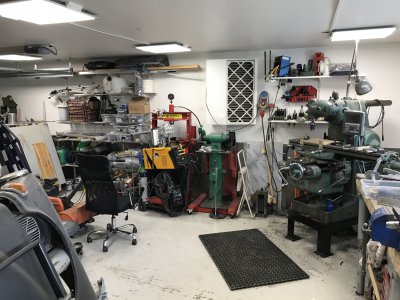
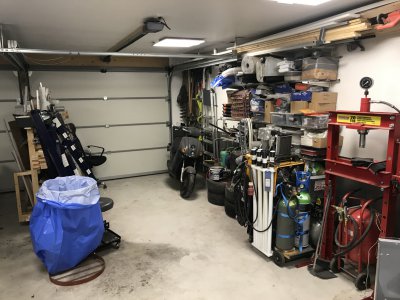
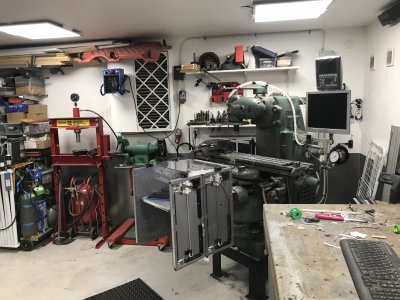
So time for an overview so you can compare to the earlier posts, just how much stuff you can fit in a 2 car garage. :grin:
54.jpg55.jpg


At this stage I had been thinking for a while about expanding my pressurized air setup.
For now I just had my compressor in the corner and a hose reel right next to it.
Not an optimal solution when you need air for a whole bunch of different things, some permanent and some less so.
My just recently CNC converted mill for example would be much better off always being connected than having to run the hose over there.
53.jpg

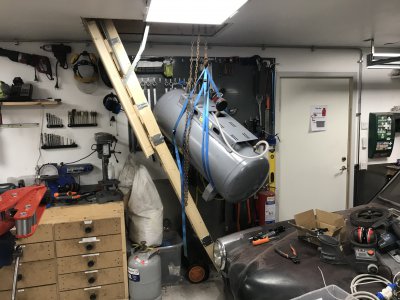
I came across a rather large tank being sold for cheap which sparked the idea of having more air storage up in the attic and then piping it back down.
But how do you get a seriously heavy tank up a very narrow attic door?
Winches!
It was such a narrow passage that I had to lower the tank back down again, go up ahead of it in the attic and hoist it from there whilst trying to steer it in.
Not a single aspect of this was smooth sailing but it worked. :grin:
56.jpg

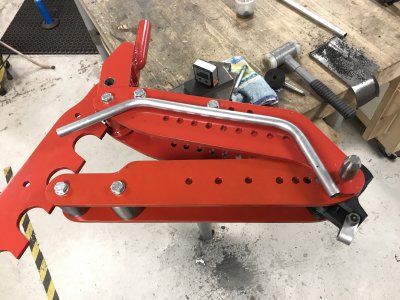
To hook everything up I somehow got sidetracked for some weeks and made this pipe bender you can kinda see in the previous picture.
Always good to have a heavy duty pipe bender I guess, I can make dies for different diameters further along as I need them.
With this I could then do some tricky bends so the current system works as this:
50 liter/3kW compressor sits in the garage and goes up to 10 bar, this goes through a moisture trap and then up to the 2 tanks(the big and one smaller) in the attic where a combined pressure regulator and moisture trap stores it at 6 bar,
This then goes back down into a hose reel, two quick-connects at the work table and a hose connection behind the milling machine.
The only upgrade I regret not doing was pulling a line to the garage gates but overall this has been great to use.
57.jpg

I thought a garage PC would be great to have for looking up information online, so with the help of a friend I connected a raspberry to this monitor and set up some kind of operating system.
With the flick of a switch the screen goes up towards the ceiling and gets shielded from whatever stupid things I'm doing in the garage(grinding or w/e).
Due to my wifi being unstable and other reasons I haven't used it as much as I wanted.
I did a short video about it here:

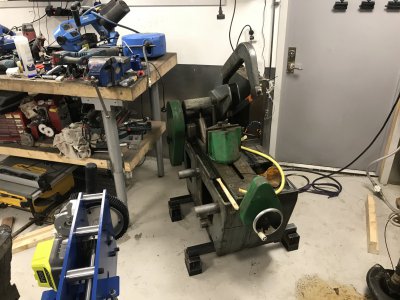
Shortly after this a neighbour randomly asked if I wanted a coldsaw he was about to throw out.
In my mind I had some small table-top machine.
Yeah, no. It was this >>>500kg piece of cast iron. :grin:
Biggest problem is that it didn't lower the saw arm and he didn't know what was wrong with it.
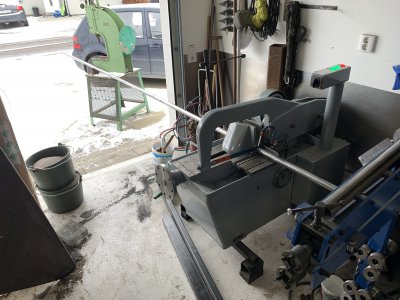
Turned out pretty nice if I may say so myself! A whole thread about it here: Renovation
Also moved it to the other end of the garage, so by opening the door and moving some lighter tools(bead roller etc) I can cut very long items.
It sits on big rubber pads to absorb all the rocking motion from the saw itself, if it was on wheels I'd probably have to chase it down everytime I cut something.
58.jpg59.jpg

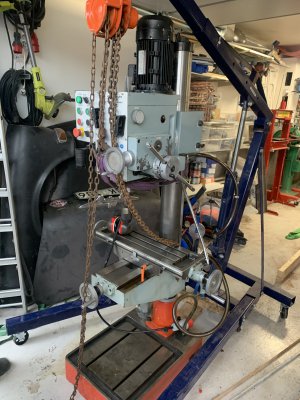
My next big investment was this drill press that can also do some milling with the right collets.
Several years into this garage I was still relying on my little 1/4 hp drill press to do that kind of work so this was a massive upgrade!
Eventually when I properly renovate the big mill I can use this for making parts if there's a need, always good to have a backup.
A proper machine that weighs in at close to 500kg, it was a bit challenging getting out out of the van and into the garage..
I'm hoping to put this on wheels as well in the future but use thick steel rather than wood.
The machine itself has various issues:
-It's missing cover plates for the Y screw.
-The coolant pump doesn't work(I fried it because I was being stupid with it),
-It has a tap-to-depth function where the endstop switches doesn't work anymore
-It has power downfeed where the gearbox is broken
I haven't felt the need to repair any of these yet.
60.jpg

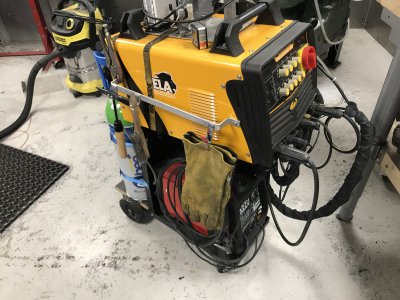
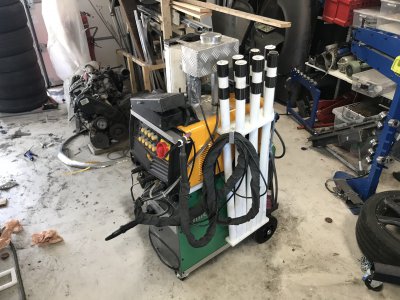
Getting real tired of trying to renovate a car and do various other welding jobs with a underpowered MIG welder, I decided to take some of the profits I've managed to work in and invest in a brand new MIG welder and move the TIG over ontop of that to make a new welding tower/cart.
There's plastic buffers between the TIG and MIG welders and the lower end of the filler pipes are not attached to the MIG welder, so no damage has been done to it.
Felt like sacrilege to instantly drill and screw into a new machine so I worked around it.
62.jpg

This is around a year ago, so we're starting to get up to date! :grin:
 
Back
Top