Valve Core tool and Parts Holder

cathead

CATWERKS LTD
Registered
Joined
Feb 7, 2013
Messages
2,485
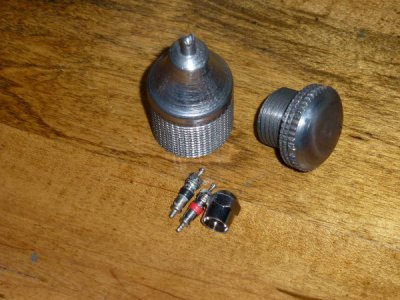
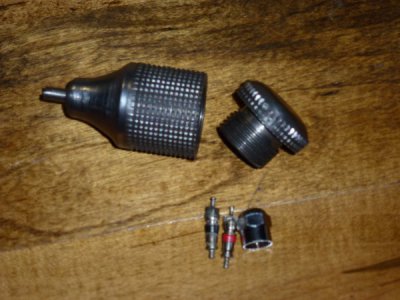
Yesterday was the day to wrestle with installing a new Bobcat tire. I took the old tire and rim to a friend
who has tire changing equipment and in the process, I saw a neat little tool on the bench for removing
valve cores and also a little compartment to hold valve cores and covers. Today I spent a couple hours
in the shop and made one for myself. It took a little while to figure out the order of operations but after
that was determined, it was a pretty straight forward build. A fun little project that will get some use
around the shop.
P1020474.JPG


P1020472.JPG
 
I used to have a four way multi tool wrench tap, die, and valve stem puller
handy little bugger, shop gremlins swiped it.....................:frown:
 
I used to have a four way multi tool wrench tap, die, and valve stem puller
handy little bugger, shop gremlins swiped it.....................:frown:

I remember those but havn't seen one for a long time. The threads on the valve cores are always needing attention so that would be
a handy tool as well.
 
Likewise, I have no idea where mine is. Haven't seen or used it in years. It didn't have the storage compartment though. I like the idea and will eventually build one when I work on trailer tires again. Read as motivated... ...
 
I actually used mine a couple of weeks ago, and know where it was put Have not looked to see if it was still there. They do have a tendency to go missing all the time.
 
AMAZON..................................Cal Hawk Tools "CAPVT 4-way valve tool" $2.93
 
OK, for you motivated folks, here is the order of operations I used:

1. Chuck up a one inch diameter piece of rod in the lathe. I used cold rolled steel, it's what I had laying around, 4 inches is plenty.
2. Run in a centering drill, medium size one is fine.
3. Then drill the hole. I used a .690 drill so I could use a 3/4NF tap and made the hole 1.125 inches deep.
4. Chuck up the tap in the tail stock and make the threads, I did it manually by turning the lathe chuck in neutral by hand using the chuck key.
5. Next, I cheated and used my other lathe to machine a short 1 inch diameter piece of stock to 3/4 inch and added some threads to the end of it.
6. Then I threaded the male and female pieces together in the original lathe. (The cheating saved an operation or two...:grin:)
7. Next I cut off the excess material and used a forming tool to get a nicely curved top piece.
8. Then I did the knurling on the cover and body in one fell swoop or possibly one swell foop.:rolleyes:
9. After that I contoured the part to what I thought was acceptable and machined the tip piece to the exact diameter that at the moment I don't
remember. (I took the measurement off an existing core removal cap.) Then I severed the part using a cut off tool in the lathe.
10. Next was to remove the excess stock from the lathe and install the basically completed part in with the thin tip outwards. This was
so I could use a tiny centering drill and then drill in about a quarter inch deep with a small bit.
11. The final slot on the tip was done on the mill using a tiny four flute end mill.
12. A little sanding and polishing was in order but not to the extreme since this is a utilitarian tool.

Instead of conventional knurling, I machined a row of grooves .060 inch apart and went over the grooves with a straight knurl. This
is easy to do and provides ample grip.

Hopefully some of you motivated folks are heading for the shop right now to whip out your own version of a valve stem tool. Of course
you can buy such a tool for a couple bucks but you would be shorting yourself on the satisfaction of making your own tool.:)
 
Back
Top