Volvo Amazon 1965 (Volvo 13134)

Gotta love having machines around..
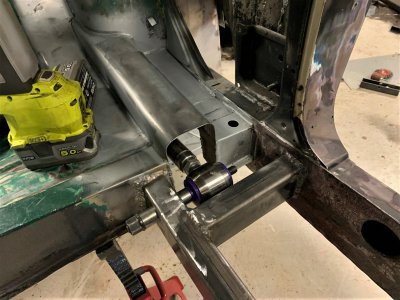
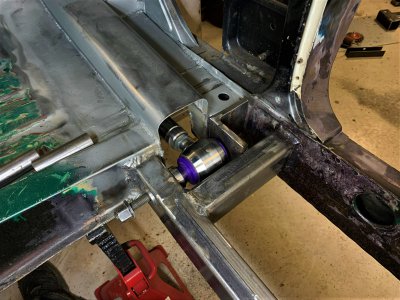
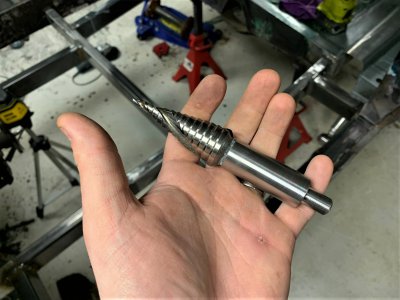
Made an extender for my stepdrill so I could drill the frame to 30mm.
IMG_0647.jpg


Initially I made it 25mm and made a tube for the bolt. At 25mm it didn't look right and just felt puny.
Mechanically I'm sure it could handle the shear forces without a problem, but looks are important. :rolleyes:
IMG_0645.jpg

Second revision, through-hole is 30mm and the tube is 39mm where it faces the lower link.
Looks a lot more fitting with the chonky link-head.
The angle iron to the right is still a work in progress, will be smoothened out a lot before I weld it in place.
IMG_0649.jpg
 
I've been absolutely swamped at home lately with various projects around the house and a couple of customer jobs so haven't really had time to look at the volvo in weeks.
Whenever I have some time over(breaks at work and such) I'm trying to do research related things so at least some progress is being made.
Currently working on a new electrical layout, fuel system, control system for the pneumatics and so on.
It's all in Swedish but it's just the basic stuff.

Battery will go into a 100A relay that activates when ignition is on, this feeds a fusebox(säkringslåda) that so far has 10 fuses.
This will feed ECU, fuelpump, ventilation fan, powersteering, aircompressor/control, all kinds of lights, window washers, dash etc.
A second fusebox is directly coupled to the battery and will only feed the horn, cooling fan, Relay R6, stereo and a button to light up the cabin.

Relay R6 will go active when the car is unlocked, this will allow all kinds of lights to be on.
A small module will control the cabin lights and will light up the cabin if either door is opened or the car has just been unlocked, for 30 seconds or so.
Then a bunch of switches for lights under each door, in the trunk and under the hood if any of them are opened.

The right picture is mostly to aid myself when it's time to make the loom to keep track of turn signals, low/high beam, brakes etc.
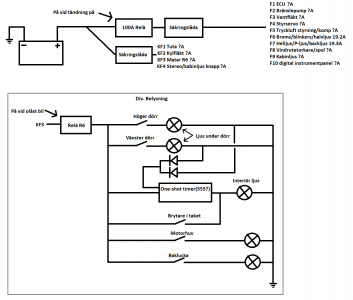
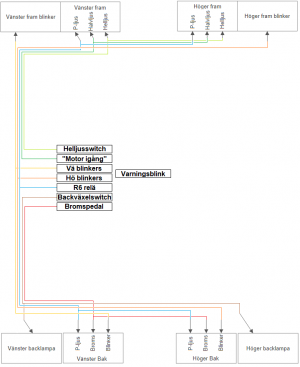
elschema_fuse_lights.pngelschema_fuse_lights2b.png


Seperate from those schematics I'm also working on the pneumatic module.
This will get current from the relay controlled fusebox.
The idea at the moment is to a level sensor at each wheel and allowing this module to inflate/deflate the bags to maintain the car perfectly level at whatever ride height you select.
The bags got internal bumpstops so the idea is to have a 'Slam' mode which is basically parked car with empty bags.
'Low' would be low as possible but still driveable.
'Normal' would be a height that allows you to casually drive, speedbumps shouldn't be an issue etc
And finally 'High' setting if you're on a gravel road or what not. I don't imagine this getting used a lot but good to have.
Once a setting is applied, the module will check if the speed is below 10kph(or whatever seems to work IRL) and then start leveling the car to the new height.

I need to finish a deck build at home then re-organize my entire garage/workshop because it's a complete mess and I can't concentrate when I'm constantly looking for the tools I need etc.
After that I can hopefully get back on the Volvo.
Honestly feels like crap not having the time to work on it when it's so close to having wheels again, but that's just life.
Sometimes other things take priority. :confused:
 
Honestly feels like crap not having the time to work on it when it's so close to having wheels again, but that's just life.
Sometimes other things take priority.

We all know that feeling..... and some priorities are beyond our control.

We will be here when you get time!

-brino
 
that's really cool, thanks for the update! Every project goes through a lull, whether intentional or not, so it's great to hear that the wheels/ gears are still turning. Normally I'd say that the electrical is the part that slows people down the most (that and upholstery) but it looks like you have a solid handle on it! Looking forward to the rest of the project :)
 
I wouldn't say solid but I'm definitely stubborn enough to finish it somehow. :grin:
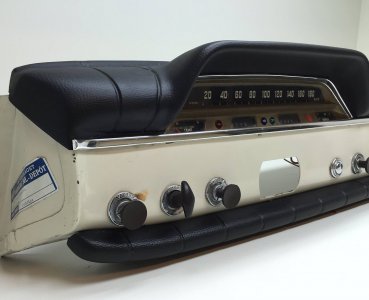
Ever since I tore the interior down I've known that I wanted to do something really different with the dash.

The original looks something like this, quite minimal and vintage looking.
dash.jpg

What I want to do is make the interior feel like a modern car, but still give some kind of homage to the original car.
More and more cars seem to use displays rather than 'real' gauges and I really love the look, not to mention that you can easily change things up if you get bored and I could possibly add in menus to control things in the car.
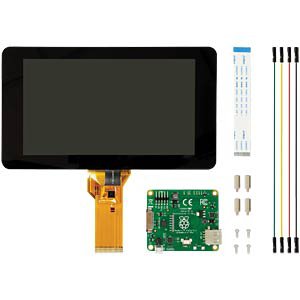
I'm way out of my depth on this but started doing some research, probably going with some kind of raspberry pi that can take care of all the various inputs and display them on the dash.
Should let me hide a 7-10" display within the dash and then show whatever I want.
RASPBERRY_PI_7TD_01.jpg

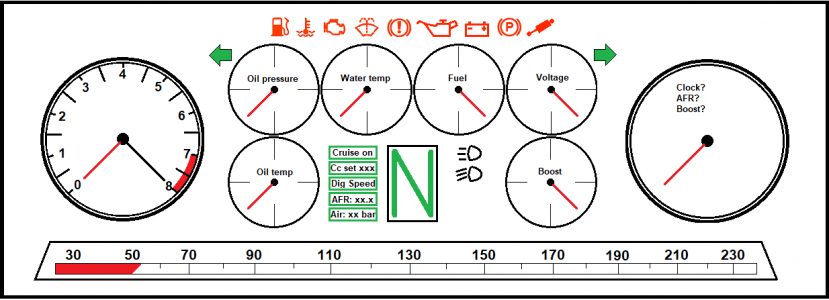
Trying to visualize what I want has been more difficult than I imagined so I started playing around in paint just to get an idea for myself.
I think it'd be fun to keep the original style of speedometer but then implement all other various alarms and functions I will have implemented in the new drivetrain and penumatics.
Not final in any way, just brainstorming with myself.
Speedometer.png
 
this'll be interesting to watch! How are you going to interface with the computer to change functions? It'd be neat to have old school switches and the like controlling some of the high tech stuff you're putting in. Also, make sure you have a solid voltage suppression buffer of some sort between the car ~12VDC and the raspberry pi power supply.
 
With my brain scattered over 15 different projects, I figured it'd be fun to get my mind back onto this for a while.
One thing keeping me from resuming work is that I haven't been entirely sure how I want to tie together the broken rear body and modify the rest.
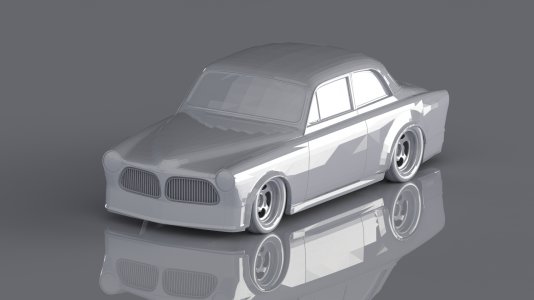
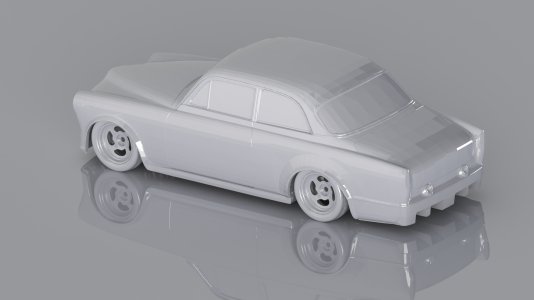
So I spent a few evenings in various 3D programs to get an idea, I think this will be pretty close what I want as an end result!
zon2.JPG

Frontend is stretched out towards the ground.
Might add foglights to the stretched down front.
The sideskirts have been widened to match the wheel wells better.
Splitters added on the rear bumper just for looks.
Entire rear end has been stretched down to form a sheet metal bumper and give it a more slammed look.
Those are most major tweaks I will try to incorporate into the final body.
IRL I will smooth the front wheel arch a lot more than it is in the render, I want it to look similar to the rear arch.
zon3.JPG


This made me so motivated that instead of working on the car, I started making a youtube video about the process from the start, my brain works in mysterious ways. :grin:
 
Been pretty close to working on the car but need to prioritize finishing a few of the other things first to not get overloaded...
I did have a few hours today where I needed to physically rest though, so I spent it stitching another video together.
 
Another resting period between classes so slapped this together.
A more indepth look at how I repaired the wave-shaped hatholder behind the rear seats.
 
Back
Top