warping

I don't think it really matters. For ease I think I would anchor 2 pieces as firmly and accurately as you can. Clamping to a couple of pieces of angle iron is not a bad idea. The tacks should be real short - about 1/4" and as such shouldn't do much of any warping. After getting 2 pieces tacked together tack the 3rd then the 4th in place. Just seems a lot easier to hold 2 parts in position than 4!!
After you release the clamps you can tap, bend, force or whatever the metal into straightness before welding. Keeping the project firmly clamped wherever you can when welding will help a lot too.
One last thought. When positioning for welding set things up in the easiest and most comfortable positions as you can. If you watch Jody's videos, he always makes dry runs so he knows he will not be putting himself in awkward positions.
You'll do fine. If it comes out really warped you can always support the ends on 2x4s and drive over the high side with your car!!! (I've done that and worse).
 
I would get two sides fitted and clamped but use a few short tacks . Then I'd do the other half . After there tacked up I'd clamp those together and tack the two sides with short tacks turn over make a few more tacks till you only have to fill in , but keep it even all around by not getting anyone area glowing hot. By not producing super hot spots to the opposite cold areas keep the heat from getting to cool insights the pulling affects of heat in one area.
Even then things at times will have some warping if it's small mill it square.
 
Hi Guys - I am pretty new to welding

i wish to make a 5"x 5"x 26" long column as part of a pedestal stand for a belt sander - material is 1/4" flat stock, mild steel (HR)

Yow! That's gonna use a lot of steel. 5" square, 1/4 thick, means 17 lbs/foot? I'd downscale
to a T section, 4" by 4", or just an ell. No belt sander I'm familiar with would make that
buckle...
 
There are a lot of ways to make it less expensive. I agree that these dimensions are overkill as far as strength and support go. My suggestions are only about how to weld it using your parameters without distortion. It would be good welding experience if you have the materials (for free or cheap).
For example, I made a stand for a 1hp 6" bench grinder using 3" square 0.120 wall steel tubing, and that is stronger than it needs to be. That would be about $30 mail order and weigh around 15 lbs total.
 
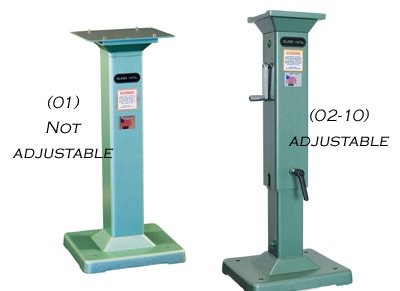
WH - where were you this morning?? - everything purchased - i followed the design of the oem pedestal, who was kind enough to give me the measurements

here is a picture

newpedestalstands12.jpg

my base will just be a flate plate (same 1/4") on leveling casters

at the top it is just the plate on the column...no fancy apron (is that what you call it?) like they have like a Greek column

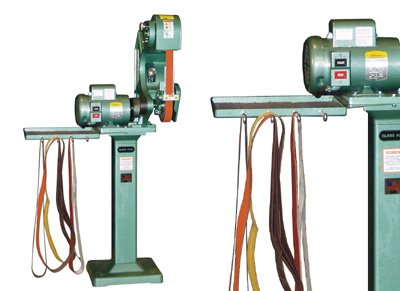
i'll copy this tray to the side (that is the same belt sander i have, but mine is about 20 years older! - still looks identical - still made in the us of a - make is Burr King)

newtooltray.jpg

here is the material list as purchased - i am curious how this compares to steel prices in other parts of the country?

View attachment 238406 View attachment 238406
 

Attachments

  • material bill.pdf
    189.3 KB · Views: 3
If 1/4 thick clamp with inside edges touching making an open square on the outside to allow place for weld.

Clamp against angle iron to position for welding and if you have enough clamps clamp all 4 together just to confirm fit.

Tack one corner at one end then tear down to just the two parts and carefully clamp along angle iron with deep reach clamps and be sure edges touch all the way and as you tack them and these beads need to be short.

If MIG higher than normal feed and amps to insure fast and deep weld as you want the heat to dissipate fast.

Repeat for each panel so the shape will be good before you tack next panel and let it cool a bit between welds.

For finish welding maybe having it partially submerged in a bucket of water to keep it cool and again short weld long wait.

Does not need full length and bonds is your friend .


Sent from my SAMSUNG-SGH-I337Z using Tapatalk
 
ok - so far so good - i have two right angles

is there a tip or trick to clamping those 2 together to do the final two seams? - every time i try and tighten up, the pieces overlap - that is, i try to line up the 2 seams so the inner edges are touching to then weld in the gap on the outside - when i apply clamping pressure it wants to slide a little so that one edge overlaps the other

is there a trick here that i am missing

as an alternate path, i used some 90 degree magnets but nothing is quite straight at the moment and so i end up with gaps...push to close one, it opens up somewhere else

this seems basic...kind of embarrassed to even have to ask
 
Just tack the inside of the right angle in (minimal tacks) with only the corners touching. A spacer the same thickness of the material is handy for this. A quick square or 90º magnets will also help. Do this twice creating two halves. Clamp the two halves together using C-clamps over a piece of wood or tubing (inside demential spacers) with the same inside corners touching. Tack the four sides (end of each section, center, then the the center of that section again for five tacks per corner joint). If your Mig welding you could either weld in the horizontal position or vertical down (faster less heat). Weld 2-4" on one side, rotate 180º and weld opposite end keeping the heat zone to a minimum. I been back welding/tacking for many years and it becomes standard when building. Most of the time you can control the direction of pull by using this technique. Read this or search for another article on the subject.http://www.twi-global.com/technical...rol-prevention-by-fabrication-techniques-036/. By bringing the corners together avoiding overlap, you will yield good penetration and have plenty of weld material to grind either round or square making the column look as one. You are going about this the long way, but there is some learning to be had that will help you on another project requiring a corner weld that gets profiled without compromising the weld joint.
Welding will always cause some distortion. Its all about controlling the direction and amount of distortion.

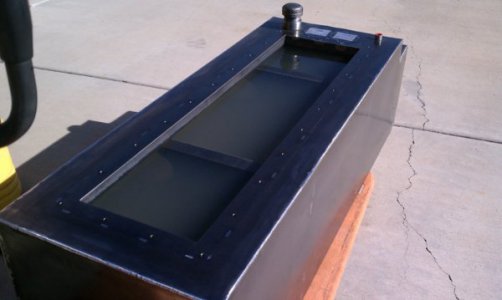
Example:
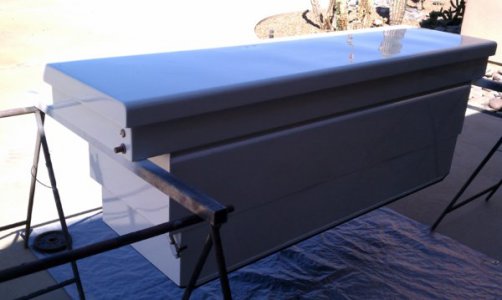
This fuel tank was welded using a corner joint weld and back step welding. The tool box bottom was cut out and the slip fit was very good. The corners where ground to a slight radius and held pressure on the first attempt. You should have a penetration bead along the entire inside of a corner joint. Many time you will have a "key hole" just ahead of the weld puddle if your speed/heat is right. Notice the water level is about two inches from weld joint to also aid in distortion control.
IMAG0246.jpg IMAG0269.jpg
Like I mentioned, back stepping is a good technique to learn and will save you time in the long run.
Turn and burn!
Paco
 
Back
Top