
I've just been getting used to my new Smithy. done a bit of turning, but realized Aluminum is not the best to start with. Have milled quite a bit and figuring out the controls and power feeds. Over the weekend replaced the grille in my truck after a turkey took it out, found out a bracket behind the grille was also broken, no one had it in stock locally so just milled a new one. Having fun. Should be finishing up my step block project this weekend.

-
Welcome back Guest! Did you know you can mentor other members here at H-M? If not, please check out our Relaunch of Hobby Machinist Mentoring Program!
You are using an out of date browser. It may not display this or other websites correctly.
You should upgrade or use an alternative browser.
You should upgrade or use an alternative browser.
What job did you do today in your shop?
- Thread starter HMF
- Start date
- Joined
- Feb 27, 2014
- Messages
- 2,124
Welcome to the forums. What kind of issues are you having with Aluminum? 95% of what I work with is aluminum. I had a few issues when learning. Mostly about feeds and speeds. I think I would have had issues with any metal until I had a better understanding of the basics.but realized Aluminum is not the best to start with
Welcome to the forums. What kind of issues are you having with Aluminum? 95% of what I work with is aluminum. I had a few issues when learning. Mostly about feeds and speeds. I think I would have had issues with any metal until I had a better understanding of the basics.
First of all, I don't exactly know what the aluminum makeup is. I just bought some one inch round stock off amazon. I just received my Machinist Handbook small version yesterday. I knew it was a speeds and feeds issue, I just was jumping in before I'd researched. I'll hopefully be able to try again this weekend with better results.
- Joined
- Feb 27, 2014
- Messages
- 2,124
My biggest mistake early on with aluminum was too high of speeds and feeds and poor chip evacuation. This caused the tool to overheat, then the aluminum would weld to the cutter and nothing good after that. With experience, I learned speeds/feeds where this no longer happens. I might not be going the fastest that I could but my time is cheep in a retirement hobby shop and tools are expensive. For the mill, I also use a Fog-Buster system to help clear chips and remove heat. For the Lathe, I cut dry or use WD-40 with the exception of tapping, where I use Tap-Magic.
Be sure to share some pictures of your work. Pictures are the primary currency here on HMF")
Be sure to share some pictures of your work. Pictures are the primary currency here on HMF


- Joined
- Oct 16, 2019
- Messages
- 6,570
Decided to make a sine bar for my lathe. It's 3/8" aluminum with 10 mm pins on 3" centers and 3 neodymium magnets. Haven't tried it yet but should work for my needs
View attachment 447612View attachment 447613View attachment 447614
I saw Matty of Matty’s Workshop using something similar to set his compound to cut a taper. I’m still a bit unsure how they are used since they seem to replicate the edge of the compound.
What key points am I missing?
- Joined
- Nov 24, 2014
- Messages
- 3,152
You put a gage block stack, the height of the desired angle sine (x3), under one pin . Then rotate the compound while indicating the edge of the sine bar. This assumes the travel of the compound is precisely parallel to the outer vertical surface of the compound. Easy enough to check.I saw Matty of Matty’s Workshop using something similar to set his compound to cut a taper. I’m still a bit unsure how they are used since they seem to replicate the edge of the compound.
What key points am I missing?
Edit: I should have added that you indicate the face of the sine bar with the indicator grounded (on the tailstock or spindle, for instance) and while traversing the carriage (not the compound).
Last edited:
- Joined
- Sep 8, 2019
- Messages
- 4,392
Machining 3/32” landings on 5/8” beveled plate. Obviously a quick, easy job. 1590 spindle RPM, 1/4” 6-flute solid carbide endmill, 11 ipm feed.

The plates were beveled to a knife edge. Touch off, one .020” pass, check for consistency (i.e. if the touch off was consistent with the previous touch offs), one more .020” pass, debur & clean with acetone.
The plates were beveled to a knife edge. Touch off, one .020” pass, check for consistency (i.e. if the touch off was consistent with the previous touch offs), one more .020” pass, debur & clean with acetone.
- Joined
- Sep 8, 2019
- Messages
- 4,392
I set up my outside welding area. It looks really fun in person, but kinda sad in the photo.
I try to have everything in reach while I’m sitting in the chair because I like sitting down.

I try to have everything in reach while I’m sitting in the chair because I like sitting down.
- Joined
- Oct 16, 2019
- Messages
- 6,570
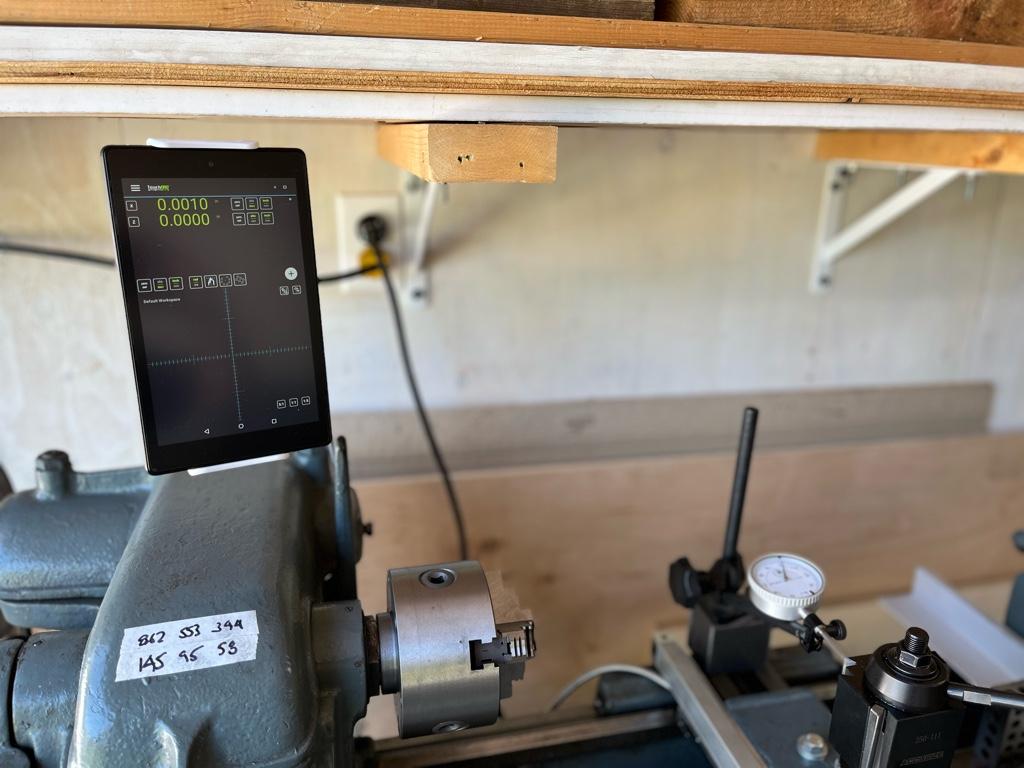
Got the X axis DRO scale calibrated in TouchDRO.
Now onto making the cover.
Ignore the vertical tablet orientation. The tablet I bought for the lathe is too small for the holder I had.
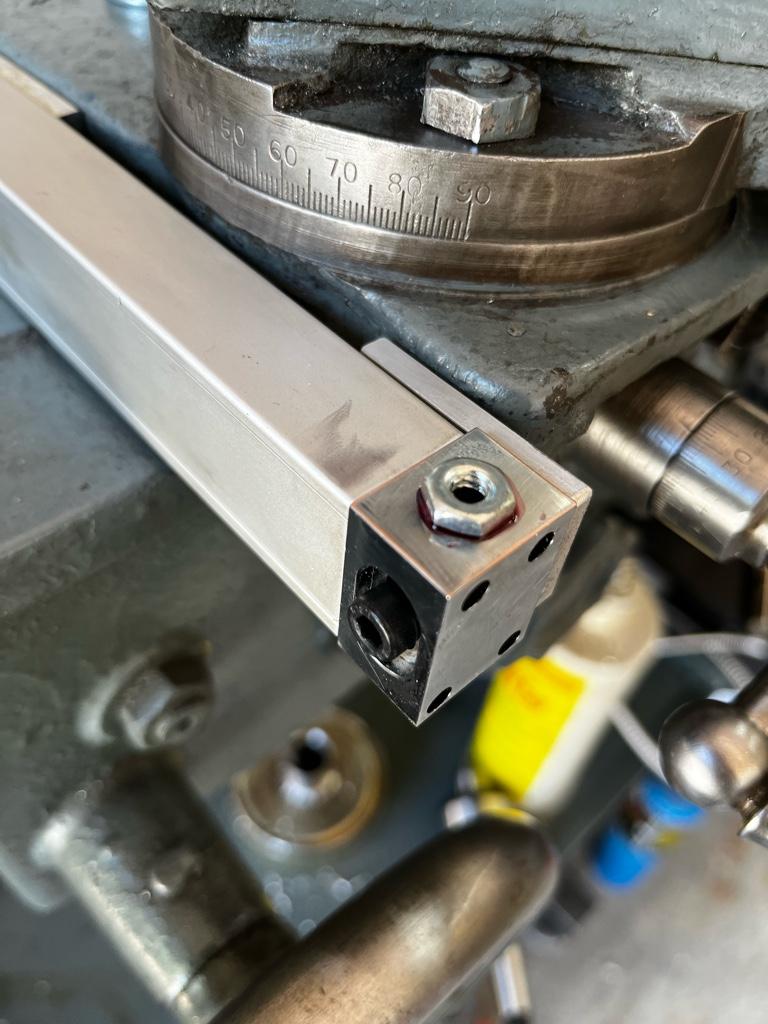
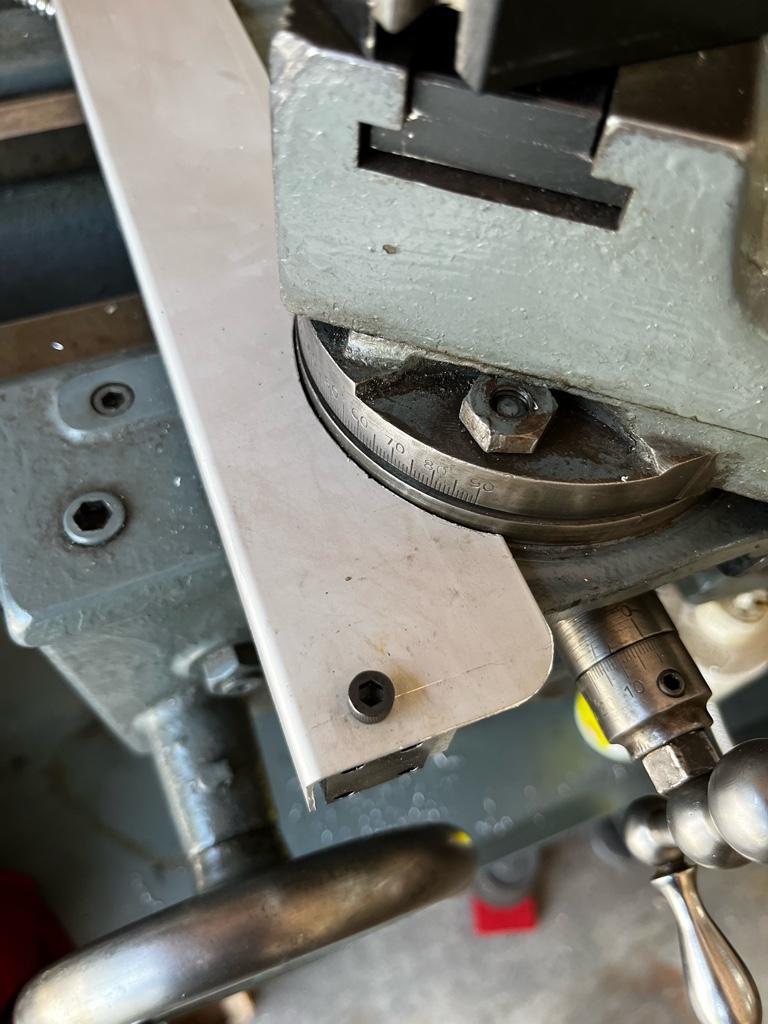
Cover on
I used Loctite 262 to glue on two 10-32 nuts to the scale end caps.
Loosened the compound and slid the cover into the gap between the cross slide and the compound. Scribed the circle, cut it out on the bandsaw and fine tuned with a half round file. Put a radius on the corners to save my hands.
Now onto making the cover.
Ignore the vertical tablet orientation. The tablet I bought for the lathe is too small for the holder I had.
Cover on
I used Loctite 262 to glue on two 10-32 nuts to the scale end caps.
Loosened the compound and slid the cover into the gap between the cross slide and the compound. Scribed the circle, cut it out on the bandsaw and fine tuned with a half round file. Put a radius on the corners to save my hands.
Last edited: