X2 CNC Conversion

I picked up the ballscrews today at FedEx. The young lady looked at my name and asked if I was related to David Fxxxxx. I replied that he was my son. She introduced herself as David's girlfriend's sister. Small world, but cool.

<Back on topic>
I wasn't surprised to find that the ballscrews were just cut lengths - no bearing surface or threads on the business end. They weren't specific lengths. In fact, the longest piece (1050 mm) is long enough to use for all three axes. Hopefully, they aren't hardened. A file does cut the steel, but not like soft steel.

I tried a bit of cutting on the lathe. It is possible with carbide inserts, but I'll have to be gentle, considering the interrupted cuts involved with turning a threaded rod. Lots of fun dialing in a threaded rod in the four-jaw. One strip of pop can under the jaws, one strip riding on top between the shaft and the dial tip to average it out.
 
Be wary. You want to align the races, and not the outside surface of the screw. Some tips I have heard are to wrap wire (copper or aluminum) around in the root and use a collet to hold. I have also heard of people using a DTI and setting the lead screw up to thread the same TPI as the ball screw. Put the tip of the DTI in the toot of the screw, and check alignment that way (with the carriage driven by the lead screw).

I was playing around with cut off piece of screw left over from my quill conversion (to see if I could actually turn the stuff). It worked pretty well with carbide. I took light cuts. I also found that cranking the speed _way_ up (I was running at about 2500 rpm) worked well. Wear a face shield, as you can very easily get yellow hot chips. Once I was through the crusty outer layer, the inside was soft, though it did not machine really well, kind of like frozen pre-owned bubblegum.
 
DMS,

Good suggestion on the wire wrap. Maybe #10 copper. I don't have through-collets, so dialing in will be required.

I've never tried machining frozen pre-owned bubblegum. Could make good seals for something. :thinking:
 
DMS,


I've never tried machining frozen pre-owned bubblegum. Could make good seals for something. :thinking:

Free samples to practice on can often be found on the underside of bench seats and tables at cafes. ;)


M
 
Ah, yes ... recycling.

There are so many projects within this project that I need to pick one and finish it off. I started turning down the Y-axis screw today. I figured I should check the runout on the bottom of the races before I took it out of the chuck. As DMS suggested, the DI was set up to travel with the carriage. TIR turned out to be only 0.002", so no more fiddling needed. The couplings I'm going to make can handle that amount.

I need to pick up an M12 x 1.25 die. I got some metric nuts today, but my sets don't have anything that fine. 1.25 mm pitch is 20.32 TPI, so I started by single-pointing the threaded portion to 20 TPI and will chase it with the die.

Tonight, I need to make a two-stage voltage regulator to drop the 25 VDC output of the power supply to 12 volts to run the two cooling fans. I'm adding a 4 1/2" fan in the cover of the box and I might as well run the small one on the board from the same supply to take a bit of load off the on-board supply. Then I can drill and tap to mount the fan supply and the main power supply. After that, I can assemble the control cabinet.
 
it sounds like your making good progress
steve
 
I downloaded D2NC and played with it a bit. Right now, my motors are slowly tracing out an adjusting lever for my cutter grinder. Too bad they're not attached to the mill.

I can see that I'm going to have to increase the length of my Y-axis sometime in the near future. This stuff is addictive, and I haven't even started to make chips with it yet.
 
I think I'm okay as far as a lathe is concerned. But then, that's what I thought about CNC in general. :thinking:

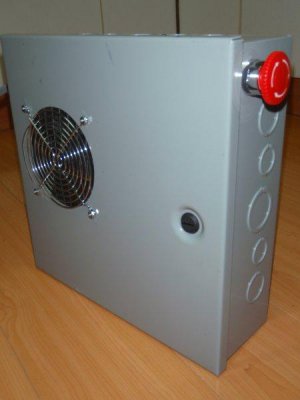
I've gotten this far without pictures, but I think the mods are getting ready to revoke my parking pass. I got the control box done today. The setup has been running the adjusting lever for about an hour and the fan on the power supply hasn't come on yet. The big fan I put in the control box is doing it's job.
PC090664a.jpg

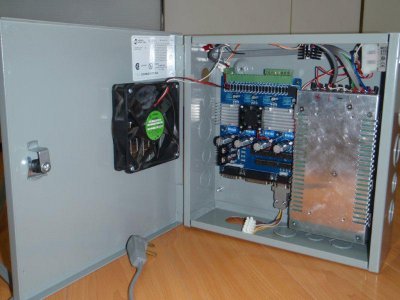
A 12 x 12 junction box is just the right size for the power supply and control board, with a bit of room for small extras. The white terminal strip at the bottom will handle the connections for the homing switches.
PC090662a.jpg

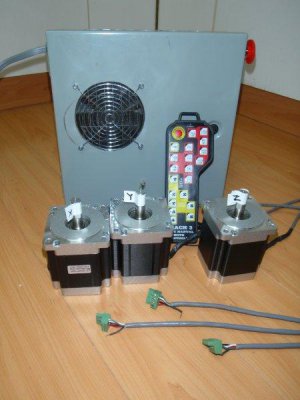
You can see how big the stepper motors are. Overkill for sure, but workable. The pendant is a nice addition.
PC090665a.jpg

PC090664a.jpg PC090662a.jpg PC090665a.jpg
 
Nice clean installation in that box. I can never find good deals on those boxes when I need one.

Chris
 
Back
Top