-
Welcome back Guest! Did you know you can mentor other members here at H-M? If not, please check out our Relaunch of Hobby Machinist Mentoring Program!
You are using an out of date browser. It may not display this or other websites correctly.
You should upgrade or use an alternative browser.
You should upgrade or use an alternative browser.
X2 Mini Mill CNC Conversion?
- Thread starter MGP
- Start date
- Joined
- Apr 30, 2012
- Messages
- 2,401
measure the shafts to see what size they are so your couplings are right
flats are required if the couplings are set screw type to make removal easy
if your couplings are compression type leave them round for more gripping area
steve
flats are required if the couplings are set screw type to make removal easy
if your couplings are compression type leave them round for more gripping area
steve
- Joined
- Apr 30, 2012
- Messages
- 2,401
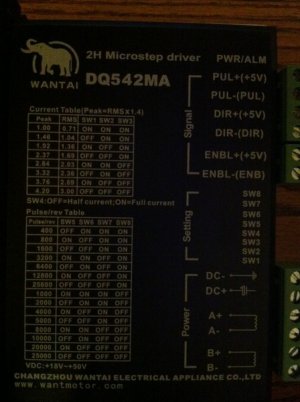
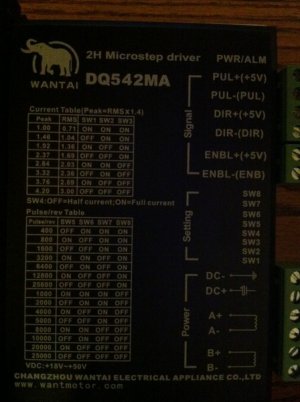
I would bench test the motors and drives first
so if you have your wire follow the video and wire everything do not connect the power supply untill you first check the output voltage.
the drives should mount on their sides in the case try fitting everything in planning to put a fan blowing in on the front panel perforations and the other fan blowing out the rear cover all other holes with tin
see how things fit and post a pic.
but dont mount anything untill tested ok?
steve
- Joined
- Apr 30, 2012
- Messages
- 2,401
e-stop and limit switchs are not required to test everything and once wiring and switch settings are confirmed everything can be completely mounted on the machine and run without them just make sure you have a main power switch
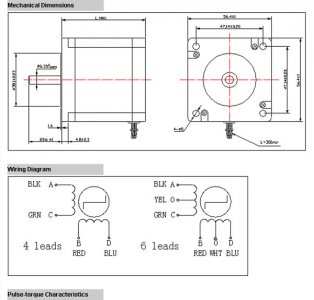
if there will be no plug at the motors, i would wire them putting the heat shrink on each wire and a larger one that fits over the sheilded wire. but not heated yet so we can verify color codes. connect and solder everything leaving them well seperated and scotch taped to a piece of cardboard for checking
six feet of wire to each motor will probably do matters where your enclosure will be located.
steve
- Joined
- Apr 19, 2012
- Messages
- 189
e-stop and limit switchs are not required to test everything and once wiring and switch settings are confirmed everything can be completely mounted on the machine and run without them just make sure you have a main power switch
if there will be no plug at the motors, i would wire them putting the heat shrink on each wire and a larger one that fits over the sheilded wire. but not heated yet so we can verify color codes. connect and solder everything leaving them well seperated and scotch taped to a piece of cardboard for checking
six feet of wire to each motor will probably do matters where your enclosure will be located.
steve
Ok should i solder the 6ft wire leads on the motors now then? Ill be back soon.
- Joined
- Apr 30, 2012
- Messages
- 2,401
ok
did you get your wire ? if so tell me the colors of each wire
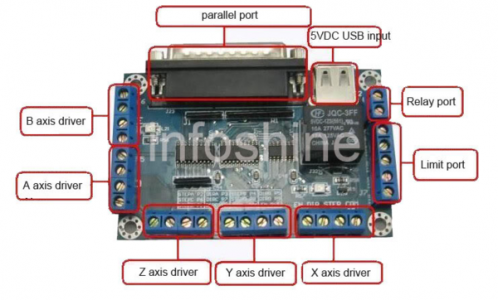
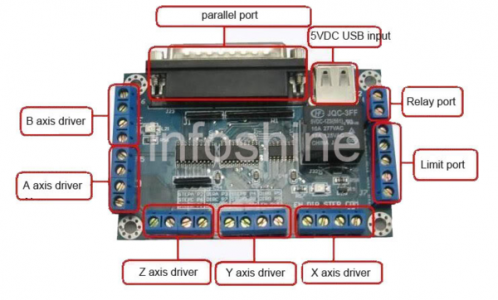
take a good pic of the breakout board and post it
I will look up everything and post a wiring diagram with wire colors and where they connect for you
dont wire anything yet.
we will go slow making sure to wire each motor the same color codes first.
then progress
If some of the things seem a bit simple about what i'm telling you thats good
I'd rather say things you already know than assume you know and forget to say it
we are going to do this with no mistakes the first time
steve
I have to go for a while will be back in about an hour and a half
i will message you when i'm back


