Hi guys,
After a long long wait I finally got my PM-1236 delivered here in France near Paris. I can't tell you how excited I am as I've been willing to jump into the metal lathe world for almost a decade now. I got hooked by aluminium then titanium flashlights in 2005 thanks to http://www.candlepowerforums.com/vb/forum.php.
Long story short, never had the place for a metal lathe until a year ago, when I ordered the PM-1236, and the delivery of my machine tool that long.
The machine crate arrived safe and sound but it was on a stack of two pallets and those pallets were almost completely crushed. In the delivery truck I discovered a machine tilting maybe 20 degrees to one side
After it made the trip to my garage (an interesting moment I must say) I used a car jack and some wood lumber to lift one side at the time, place a support underneath each end, and remove the pallets entirely. What I removed was pieces of crushed wood, barely recognizable as a pallet.
Here is how it looks now :
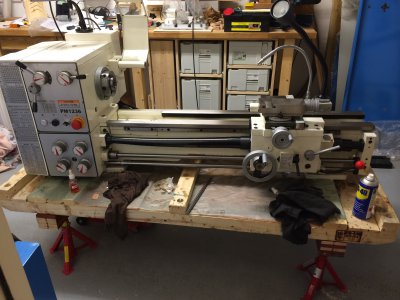
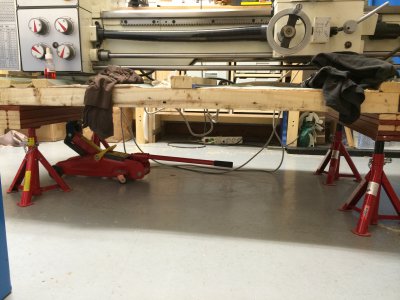
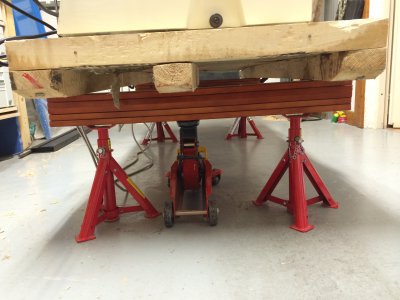
I removed the tooling and the tailstock to get a clear view on the machine itself, as well as the 3 jaws chuck (came out quite easily with just gentle tapping with a wood mallet).
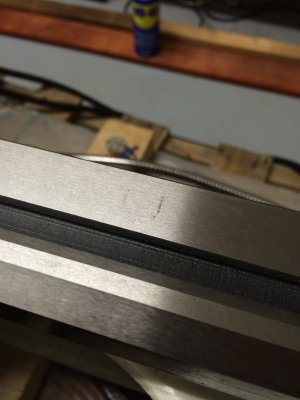
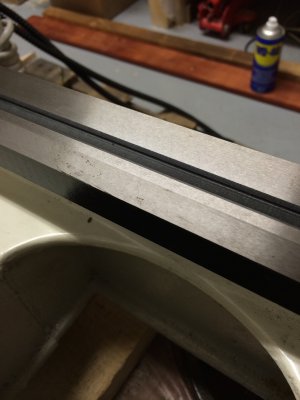
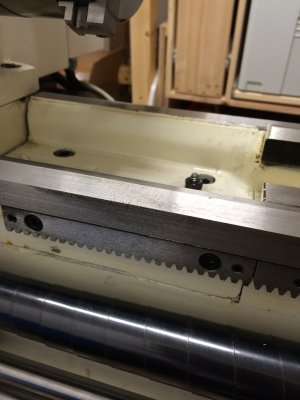
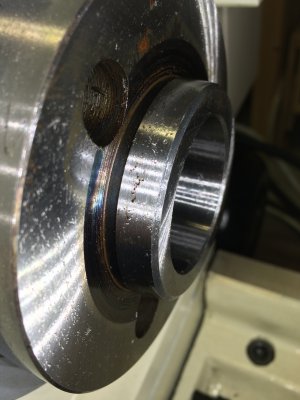
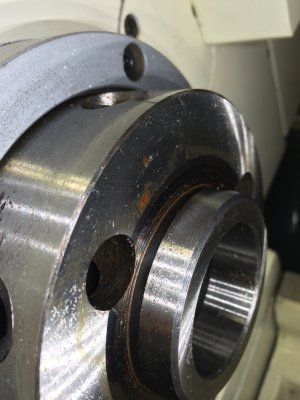
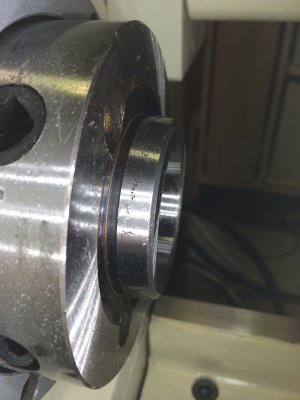
Now there is no obvious damage to the lathe but there are a few rust spot both on the bed ways and on the spindle nose :
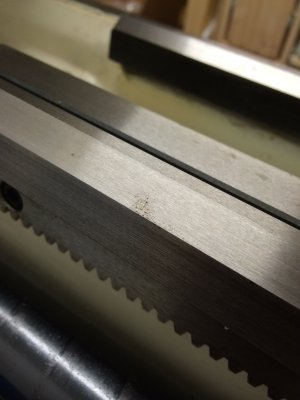
What do you guys recommend to make them go away ?
I would rather use a chemical solution than scrubing
Now I need to rent an engine hoist and install the lathe at it's definite location. How much room do you suggest I leave from the wall at the back ?
Overall aside from an obvious lack of attention to details (paint job, paint mist on several spots, crude junk in place you would not expect, bent dial lever...) the machine seems sound. After some good cleaning and maybe refinishing of some parts I'm confident it will be a good machine for me.
Thanks for your advise
Cheers


After a long long wait I finally got my PM-1236 delivered here in France near Paris. I can't tell you how excited I am as I've been willing to jump into the metal lathe world for almost a decade now. I got hooked by aluminium then titanium flashlights in 2005 thanks to http://www.candlepowerforums.com/vb/forum.php.
Long story short, never had the place for a metal lathe until a year ago, when I ordered the PM-1236, and the delivery of my machine tool that long.
The machine crate arrived safe and sound but it was on a stack of two pallets and those pallets were almost completely crushed. In the delivery truck I discovered a machine tilting maybe 20 degrees to one side
After it made the trip to my garage (an interesting moment I must say) I used a car jack and some wood lumber to lift one side at the time, place a support underneath each end, and remove the pallets entirely. What I removed was pieces of crushed wood, barely recognizable as a pallet.
Here is how it looks now :


I removed the tooling and the tailstock to get a clear view on the machine itself, as well as the 3 jaws chuck (came out quite easily with just gentle tapping with a wood mallet).
Now there is no obvious damage to the lathe but there are a few rust spot both on the bed ways and on the spindle nose :


What do you guys recommend to make them go away ?
I would rather use a chemical solution than scrubing
Now I need to rent an engine hoist and install the lathe at it's definite location. How much room do you suggest I leave from the wall at the back ?
Overall aside from an obvious lack of attention to details (paint job, paint mist on several spots, crude junk in place you would not expect, bent dial lever...) the machine seems sound. After some good cleaning and maybe refinishing of some parts I'm confident it will be a good machine for me.
Thanks for your advise
Cheers


