Finding The Center Of A Boss On A Small Casting

tomw

Registered
Registered
Joined
Jan 24, 2015
Messages
239
Dear All,

I have a smallish casting in my steam engine kit that requires I find the center of a boss to drill a hole. I am curious as to how folks approach this problem. The casting and the applicable drawing is in the attached photo. Sorry I cut off the drill notes.

Thanks,

TomCrossHeadCap.jpg
 
well if you could indicate 3 sides and make them all equal I would think you would be close enough to center. I have no idea how accurate the casting is but that is what I would do and then just touch the center drill to the part to see how it looks.
 
I can't tell what that center hole looks like, but I would start by dialing the part in straight along one axis of the machine.

1. I would pick up the center or the existing hole using a dial indicator in a drill chuck.
2. Using a travel indicator on a mag base or DRO, I would move .75" to the center of one boss spot drill it just enough to make a mark.
3. Use the travel indicator or DRO move 1.5" back to the other boss and spot drill that one the same.
4. I would then use my dial calipers to double check the distance between the spots and that the spots are close to the center of the cast bosses.
5. If it looks good, drill one hole then the other.

You could try to dial into each boss instead of the center hole, but it's a rough looking casting. If you do that still spot each hole and check the distance between the spots before you drill.
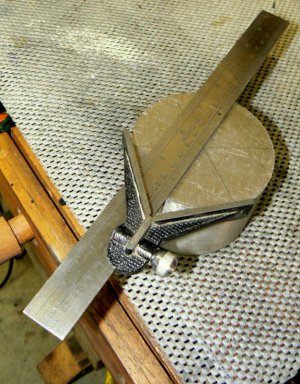
 
Use the centering head on your combination square. Draw a couple of lines at at least two different angles - the intersection is the approximate center of the diameter.

If you don't have a centering head, a normal square can be used. Measure and mark 1/2 of the diameter with the square at several different locations. The center of the constellation of dots is approximately the center of the part.

P1050012.JPG
 
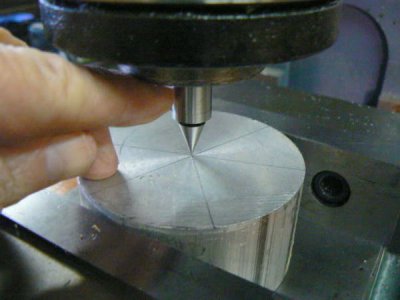
After locating and center punching the diameter to be processed, this is a handy way to center up the work in mill or drill press:

P1020226.jpg

A center finder like this one is almost always to be found in edge-finder sets, even the inexpensive imported ones. (Note that old-timers used a "wiggler" to do this and that method also works well.)

The point of the center finder is lightly lowered into the punch mark and the part (or the X, Y handwheels) moved to center the mark under the spindle. Running your finger nail down the side of the center finder, it's easy to tell when the end is misaligned with the body and adjust accordingly.

A DTI could be used for more precision but locating a center-punched location doesn't imply a lot of precision :) The "fingernail" method is said to be able to detect errors as small as .002. I've never measured the error myself.
 
Does what you are attaching the casting to already have holes that can be transferred?
 
These methods are all well and good, but these are carpenter's dimensions. Why overkill the project?
 
Randy,
The parts are too small for that approach, at least for me. The large bosses (bossa? bossae?) are about 5/32 in diameter. I like the use of the edge finder to find the punch mark. Neat trick.

Plane, I was planning on using these parts to transfer the holes to the other casting!

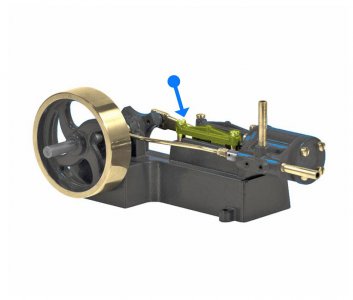
I also should have mentioned that I was trying to find the center of an end boss, then the hole on the other end is measured from there. The hole to hole distance across the larger bosses is the only important dimension. The highlighted part in the picture below is the one I am trying to machine.

STEAM-ENGINE-3A.jpg
 
You can just set a caliper to a little more then the radius and scribe 2 or 3 lines in the center and where they meet is center
 
Back
Top