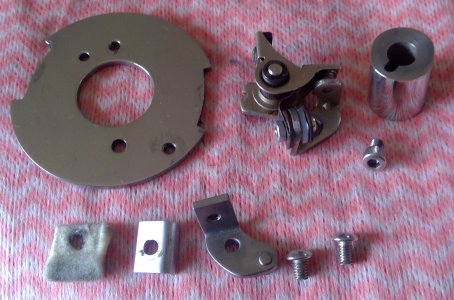
74 TX650. This is how it was made:
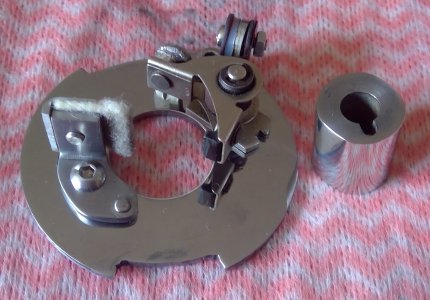
The backing plate is about a simple as it gets to make, you could use the original if so inclined. I made a new one. The cam is another matter, far from simple and very time consuming. I started with a short piece of stainless, because stainless work hardens, so it should wear pretty well. I started off by facing both end, then drilled through 7.5mm followed by 8mm, this gives a nice fit on the advance/points rod which is imperative. The cam was then transferred to the mill and 2.5mm slot cut to a depth of 5mm on one end. The advance/points rod was then mounted on the lathe in a four jaw chuck and centred, again very important this is spot on. The cam blank was then mounted on the rod and snugged up tight and turned down to 18.10mm. Again very important, the cam blank must be turned down on the advance rod.
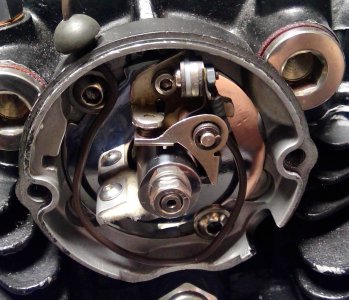
The rod and cam blank were then assembled on the bike and timed at 15 degrees BTDC, the firing point. Points were gapped to .14mm and a line scribed on the cam by running a sharp blade across the cam blank under the points heel. The motor then turned over 90 degree after the firing point and another line scribed on the cam under the points heel, that gives a 90 degree dwell. After that it’s a matter of using a file to file the area flat between the two scribed lines, a micrometer used to keep the filing under .5mm. The rod and points were then assembled again on the bike. That’s the easy bit, now comes the difficult bit, where one swipe of the file can destroy all the work.
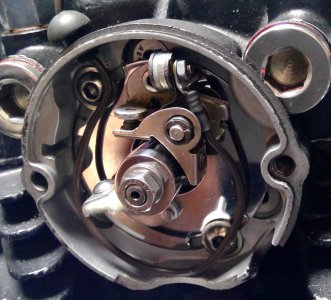
One again with the timing correct, I scribed a line on the cam above and below the points heel, then filed very carefully between the scribed lines using a micrometer so I didn’t go below .10mm, checking with an LED as I went. I did this at least a dozen times for each lobe, removing replacing, checking. When the light came on I rounded off the apex, then used a nylon fibre wheel to smooth over the file marks and gradually lower the apex until the LED light s up on the correct timing. Then I completed for the other cylinder.
This is a very time consuming mod, you have to be careful and check dozens of times as you progress. One swipe of the file can ruin all the work. If patience isn’t one of your virtues, don’t attempt this mod. I probably made around half a dozen of the cams before I got it right, it’s very easy to file too much off and ruin your work.
To finish off I polished the cam.