- Joined
- Apr 21, 2015
- Messages
- 894
New tap talk addon was installed this morning.
New features? Bug fixes? Anything different now?
New tap talk addon was installed this morning.
Bill,
Please elucidate your intended meaning of "the wife's plow harness". The mind reels.
Finished up Mark's Arbor press stand. I decided to add a handle, receiver, and cut a shelf from some 16 gauge sheet. I also decided to build a single outrigger that fits into the receiver for added stability and can be stored vertically when not in use to reduce the overall footprint.
A piece of 5/8" CR round bar was used for a handle with 2.5" legs to keep the business end open and clear. The iron worker was used to break the solid stock.
View attachment 131128
The break table I built has holes for the alignment pins to square up the stock to the break. The pins can also be set at 45º to the break as well. These make it quick and simple for multiple pieces during production. The back of the break has a back gauge that also comes in handy for repeated multiple bends.
View attachment 131129
The finished handle.
View attachment 131130
The shelf was cut using a HF power shear rated at 14 gauge. I purchased these when we started the building construction (shop) as all skins required cutting for door openings.
At $45 they preformed flawlessly during the building construction and I have used them a lot in the shop for quick simple cuts in a variety of sheet material. I have cut .120 aluminum with zero distortion, that said I give this tool a A+ for the money spent. If anyone is undecided in purchasing a power shear for thin gauge sheet, this ones for you.
View attachment 131131
The receiver was drilled and capture nuts welded for securing the outrigger leg.
View attachment 131132
The receiver used has .120 wall for rigidness, It also serve as a center support for the shelf. Two 5/8" capture nuts where welded to bottom of base plate for securing the press body. No need for a backer wrench.
View attachment 131134 View attachment 131133
The outrigger in use allowed me to hang off the front of the unit without tipping. The round foot on the outrigger is 1/8" above floor allowing the unit to be rolled around but prevents tipping if one cranks on the lever.
View attachment 131135
This shows the outrigger in the stowed vertical position (front or back). No tools required with the 3/8" round welded to the bolts.
View attachment 131136
I'm 100% confident this will not tip on the user when pressing to its maximum.
Thanks for looking, as always, any comment, questions, concerns are welcomed.
Paco
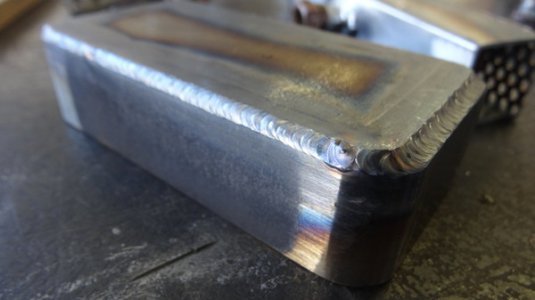
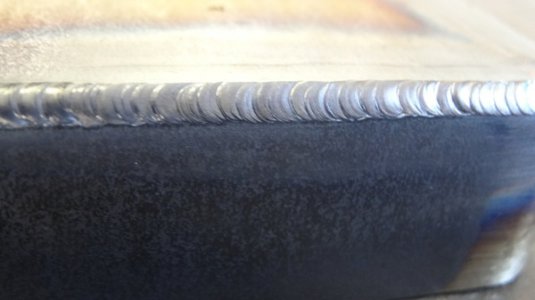
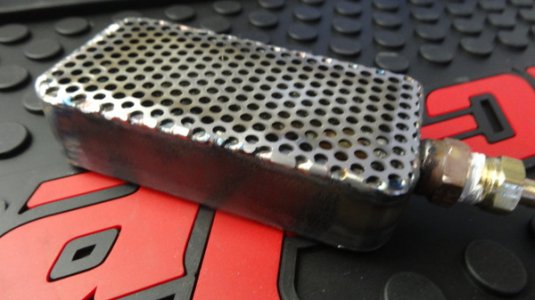
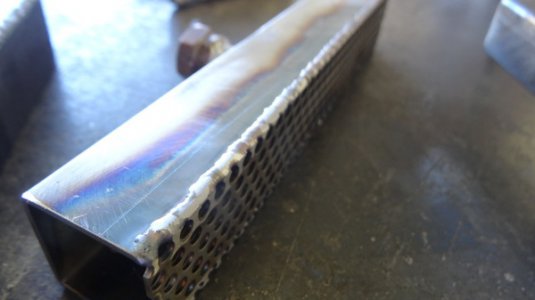
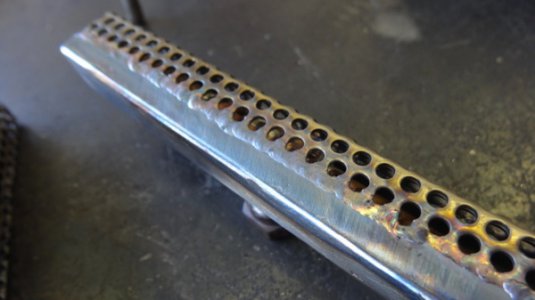
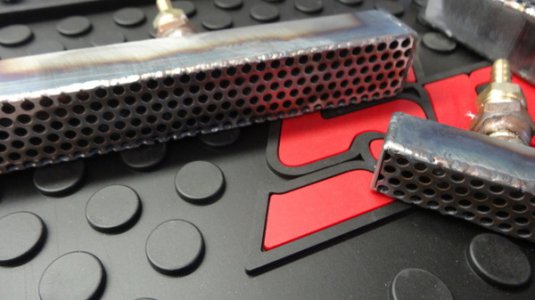
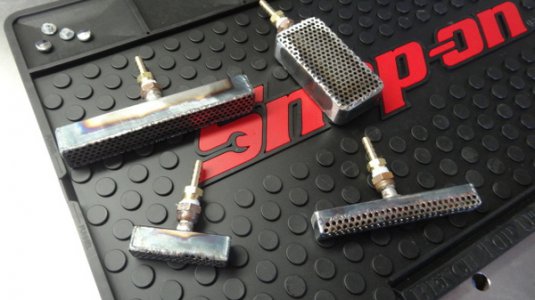
Completed my argon purge/backer boxes last night.
Finished up Mark's Arbor press stand. I decided to add a handle, receiver, and cut a shelf from some 16 gauge sheet. I also decided to build a single outrigger that fits into the receiver for added stability and can be stored vertically when not in use to reduce the overall footprint.
A piece of 5/8" CR round bar was used for a handle with 2.5" legs to keep the business end open and clear. The iron worker was used to break the solid stock.
View attachment 131128
The break table I built has holes for the alignment pins to square up the stock to the break. The pins can also be set at 45º to the break as well. These make it quick and simple for multiple pieces during production. The back of the break has a back gauge that also comes in handy for repeated multiple bends.
View attachment 131129
The finished handle.
View attachment 131130
The shelf was cut using a HF power shear rated at 14 gauge. I purchased these when we started the building construction (shop) as all skins required cutting for door openings.
At $45 they preformed flawlessly during the building construction and I have used them a lot in the shop for quick simple cuts in a variety of sheet material. I have cut .120 aluminum with zero distortion, that said I give this tool a A+ for the money spent. If anyone is undecided in purchasing a power shear for thin gauge sheet, this ones for you.
View attachment 131131
The receiver was drilled and capture nuts welded for securing the outrigger leg.
View attachment 131132
The receiver used has .120 wall for rigidness, It also serve as a center support for the shelf. Two 5/8" capture nuts where welded to bottom of base plate for securing the press body. No need for a backer wrench.
View attachment 131134 View attachment 131133
The outrigger in use allowed me to hang off the front of the unit without tipping. The round foot on the outrigger is 1/8" above floor allowing the unit to be rolled around but prevents tipping if one cranks on the lever.
View attachment 131135
This shows the outrigger in the stowed vertical position (front or back). No tools required with the 3/8" round welded to the bolts.
View attachment 131136
I'm 100% confident this will not tip on the user when pressing to its maximum.
Thanks for looking, as always, any comment, questions, concerns are welcomed.
Paco
Apparently whatever it did, it did not resolve the missing photos ("red x") issue for photos posted from tapatalk but viewed from a web browser. This started right at the same time as the forum migration (though there was a tapatalk app update at the same time). If you "reply" to such a post with a missing image you can then view the image in the draft of your response, so the photo is online and working, but somehow XenForo doesn't think it's working and displays the red x icon instead (outside of the reply draft).New tap talk addon was installed this morning.
