2016 POTD Thread Archive

Bruce, I'm too blind to notice the coupling nuts (and too dense to figure out what the caps are for). I like your way of keeping shorts better then the gap I'm using, even if it takes up a little more much space. The gap can be a pain to find the exact rod that you want.
 
Hey Jim, just stuff a wet shop rag into the seal. Can't get too hot that way. Welded many a cylinder that way. If it's a big weld, or takes a while, you might have to re-wet it, but it works to keep it relatively cool.
 
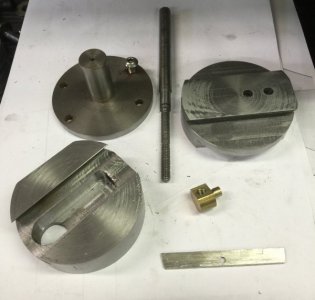
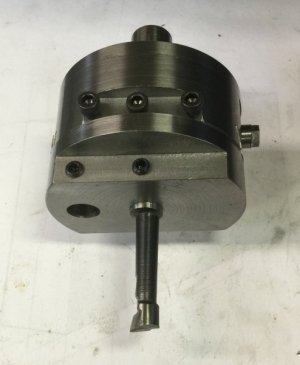
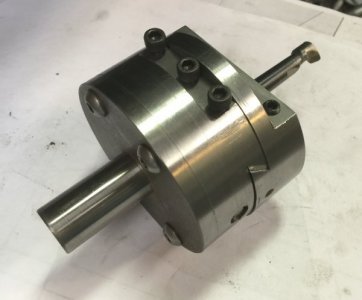
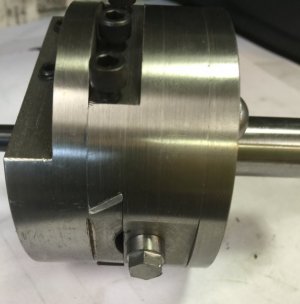
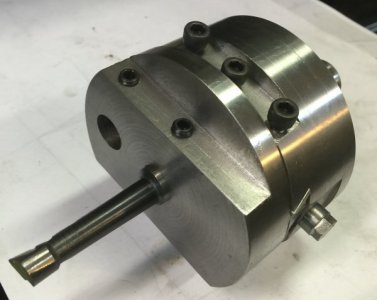
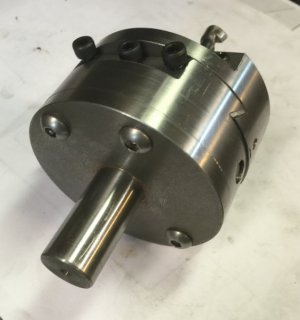
About a year and a half ago , I decided to make a pancake boring head for my Burke mill. There is not enough room to use the 2 or 3 inch boring heads for sale out there. Anyway, I had abandoned the project and threw it in the junk box after nothing working right. The dovetail was good but everything else was off or crooked or just didn't fit. It was a big failure. I need a boring head for a part I am making so today , out of fraustration, I picked the piece of junk up and started looking at it again. Now I have more and better tooling and tools so I thought I may be able to save it. I put it in the mill and started recutting things to straight, made a new nut , did some drilling, milling , and reaming and by golly.... Things started looking up. After about 4 hours work.... I got it done and it even works. It is a lot shorter which is good for a Burke mill.
image.jpeg image.jpeg image.jpeg image.jpeg image.jpeg image.jpeg The only thing left to do is put the little dial on to show the movement.

The complete head is only about 2 1/4" from back to front.
 
Had to take time off real work for a honey do.
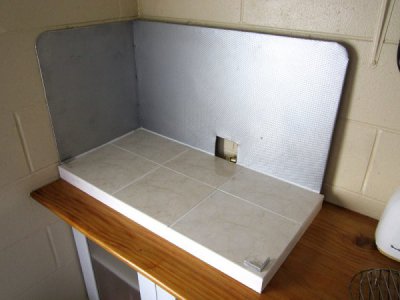
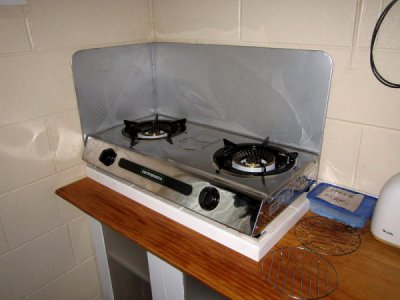
The new wok burners required a new stand and splash back as it required a metal or ceramic surface to sit upon.
Total cost $Zero. My kind of price. All materials were left overs from old projects and the aluminium was a found item.
I thought I would post it as it has some metal work. I rolled the edges of the aluminium to make a false wired edge for safety.
The little aluminium right angles are stuck in place with aquarium silicone to prevent the stove from moving with vigorous actions.
splash-back.jpg

And with the burners, nice and neat and won some kudos from SWMBO
cooker.jpg
These throw out some serious heat, hopefully a fry pan wont chill as soon as the food goes in.
 
.... I got it done and it even works. It is a lot shorter which is good for a Burke mill.
View attachment 133180 ...

The complete head is only about 2 1/4" from back to front.

Nice! How thick is the flange on the shaft? Did you turn them as a single piece?


Sent from my Nexus 6 using Tapatalk
 
Nice! How thick is the flange on the shaft? Did you turn them as a single piece?


Sent from my Nexus 6 using Tapatalk
The flange on the shaft is about .300" thick. The flange and shaft was turned from a single piece of 3" bar stock. I bolted it to the assembled head( using set screws recessed in the clamp holes ) and turned the outside diameter of the assembly to get everything true. Then made the nut, bolt and milled all the steps in it . The clamp screws at 10-24 SHCS. I tried set screws but the wrench was too small and this worked better. The recess keeps the bolt heads within the boring head diameter.
 
Back
Top