Clausing 8530 paint

calstar

Active User
H-M Supporter Gold Member
Joined
Sep 26, 2013
Messages
408
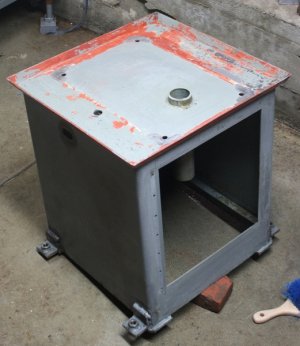
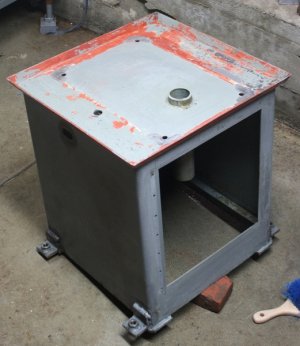
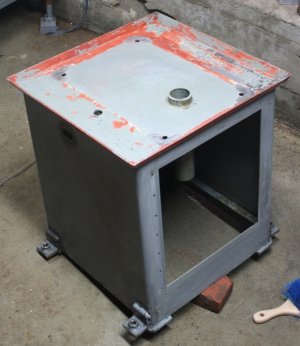
Finally started to paint my 8530 after having it sit in parts for more than a few months. I'm not going nuts on the paint, lots of dings and scrapes were left in the original paint(which is not removed) my goal is only to have a nice looking mill, not a full restoration with perfect paint. I've painted more than a few machines(metal and wood) using roller, brush and rustoleum with pretty good results, thought I'd share my method.

I degrease the parts using thinner in a spray bottle and scotchbrite pads, then sand with 120 and wipe down with acetone. Using rattle can primer on this one as I had a couple of cans from other projects, three light coats. Let dry a few days and then thin the paint(rustoleoum smoke gray) about 5-10% thinner, first very light(no possibility of runs) coat is rolled on(6" long "weenie" 1/4" nap roller) and let "flash" dry for only a few minutes, second light coat rolled on a a section at a time and brushed out before I go on to the next section to smooth the roller nap marks, pics here are the results of those steps. I'll let that dry for a few days, lightly sand with 320, and repeat the very light/light roller method and that should do it for what my goal is. I remove the masking right after painting, this prevents the masking from lifting off any paint as it sometimes done if the paint is dry, takes so little time to remask its worth to me. The paint then cures for around a month before assembling, hard not to rush this step but less likely to ding it badly when reassembling.

All painting is done outside as any oil based paint fumes are nasty, lucky that I live in socal where this is possible year round. I'll post a few pics as I move through the job. Almost forgot, I don't worry about paint getting in the threaded holes as I have plenty of taps to chase the threads, makes it nice to reassemble with clean threads.

Hopes this helps a few out, it really isn't hard to get a decent durable finish this way using multiple light coats.

Brian

f4a0429d-dbc6-40f2-8065-abe68920730a_zpsea92dc5c.jpg

aed47076-31f5-42a1-8bbb-f2a87d8b4b7c_zpsa7c3d60b.jpg

0718437a-c75c-4336-8f60-191d2a6a99ac_zps28d00b67.jpg

381a1d3f-de3c-4972-b59f-fce4b9aa80a3_zps46b209e9.jpg

7d9fa9ee-2f4a-405b-ad10-974155e0a923_zpsd78bd808.jpg

f4a0429d-dbc6-40f2-8065-abe68920730a_zpsea92dc5c.jpg

f4a0429d-dbc6-40f2-8065-abe68920730a_zpsea92dc5c.jpg

aed47076-31f5-42a1-8bbb-f2a87d8b4b7c_zpsa7c3d60b.jpg

aed47076-31f5-42a1-8bbb-f2a87d8b4b7c_zpsa7c3d60b.jpg

0718437a-c75c-4336-8f60-191d2a6a99ac_zps28d00b67.jpg

0718437a-c75c-4336-8f60-191d2a6a99ac_zps28d00b67.jpg

381a1d3f-de3c-4972-b59f-fce4b9aa80a3_zps46b209e9.jpg

381a1d3f-de3c-4972-b59f-fce4b9aa80a3_zps46b209e9.jpg

f4a0429d-dbc6-40f2-8065-abe68920730a_zpsea92dc5c.jpg

7d9fa9ee-2f4a-405b-ad10-974155e0a923_zpsd78bd808.jpg

7d9fa9ee-2f4a-405b-ad10-974155e0a923_zpsd78bd808.jpg

aed47076-31f5-42a1-8bbb-f2a87d8b4b7c_zpsa7c3d60b.jpg

0718437a-c75c-4336-8f60-191d2a6a99ac_zps28d00b67.jpg

381a1d3f-de3c-4972-b59f-fce4b9aa80a3_zps46b209e9.jpg

7d9fa9ee-2f4a-405b-ad10-974155e0a923_zpsd78bd808.jpg
 
Last edited:
I have both and 8540 and an 8520 both need some serious work. I had hoped to find advise on resurrecting them here at some point
 
few more parts cleaned/primed.... Brian

as found

51fbee85-d8e6-4167-b3ed-89bfc7f40159_zpsd4bb586f.jpg

bbf846c2-7a4f-457f-97d9-a07be12cf156_zps51f406a1.jpg

cleaned with thinner, sanded(#220), acetone wiped

db2461af-79ce-4f75-85cd-87851d4e12e9_zps76155679.jpg

37c7381b-9f27-40fa-adbe-fc217b062706_zps57796620.jpg

first very light "tack/flash" coat, full coverage is not necessary so don't be concerned if you have "holidays"

37820d68-bc46-4a3a-adec-d293ac75864f_zps424c238c.jpg

08bd25c5-55a3-4426-a728-36e1c4956afa_zps5c109c31.jpg


2nd and 3rd coats applied within one hour as per rattle can instructions

scratch on lower front was made in wet primer, easy to sand that out(way easier than sanding out scratches in original paint)
IMG_6849_zpsd587df0b.jpg

7ceb7f5e-5afc-4a58-bcfc-002da91cc1b3_zps39cb323d.jpg

51fbee85-d8e6-4167-b3ed-89bfc7f40159_zpsd4bb586f.jpg

bbf846c2-7a4f-457f-97d9-a07be12cf156_zps51f406a1.jpg

51fbee85-d8e6-4167-b3ed-89bfc7f40159_zpsd4bb586f.jpg

db2461af-79ce-4f75-85cd-87851d4e12e9_zps76155679.jpg

bbf846c2-7a4f-457f-97d9-a07be12cf156_zps51f406a1.jpg

37c7381b-9f27-40fa-adbe-fc217b062706_zps57796620.jpg

db2461af-79ce-4f75-85cd-87851d4e12e9_zps76155679.jpg

37820d68-bc46-4a3a-adec-d293ac75864f_zps424c238c.jpg

37c7381b-9f27-40fa-adbe-fc217b062706_zps57796620.jpg

51fbee85-d8e6-4167-b3ed-89bfc7f40159_zpsd4bb586f.jpg

08bd25c5-55a3-4426-a728-36e1c4956afa_zps5c109c31.jpg

37820d68-bc46-4a3a-adec-d293ac75864f_zps424c238c.jpg

bbf846c2-7a4f-457f-97d9-a07be12cf156_zps51f406a1.jpg

IMG_6849_zpsd587df0b.jpg

08bd25c5-55a3-4426-a728-36e1c4956afa_zps5c109c31.jpg

db2461af-79ce-4f75-85cd-87851d4e12e9_zps76155679.jpg

7ceb7f5e-5afc-4a58-bcfc-002da91cc1b3_zps39cb323d.jpg

IMG_6849_zpsd587df0b.jpg

37c7381b-9f27-40fa-adbe-fc217b062706_zps57796620.jpg

7ceb7f5e-5afc-4a58-bcfc-002da91cc1b3_zps39cb323d.jpg

37820d68-bc46-4a3a-adec-d293ac75864f_zps424c238c.jpg

08bd25c5-55a3-4426-a728-36e1c4956afa_zps5c109c31.jpg

IMG_6849_zpsd587df0b.jpg

7ceb7f5e-5afc-4a58-bcfc-002da91cc1b3_zps39cb323d.jpg
 
looks great. and a nice job besides. i only wish i had the patients to do that too. my mind floats towards epoxy or base / clear making it much more complicated that need be. i do however have a Croix Air heated hi voluum / low pressure system that is great for exactly what your doing, but alas, it sits unused for whatever excuse i can come up with. :)
 
Looks like it coming along nicely. I noticed yours has the belt guard, wish mine had stayed but it was lost along the way...

Your doing a good job - thanks for sharing the pics and the progress.
 
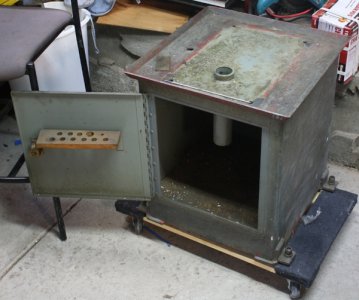
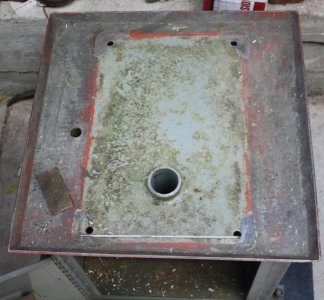
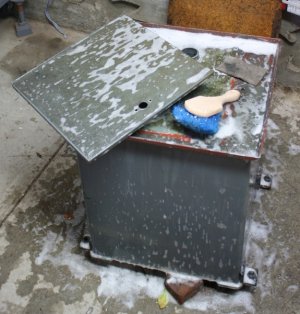
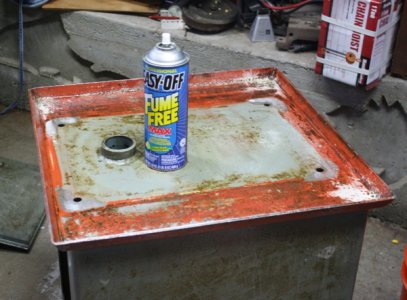
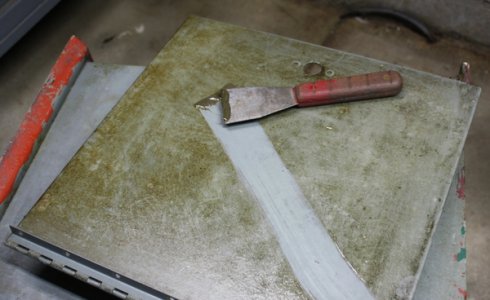
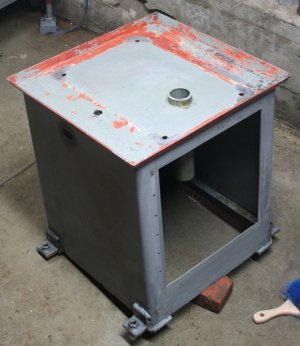
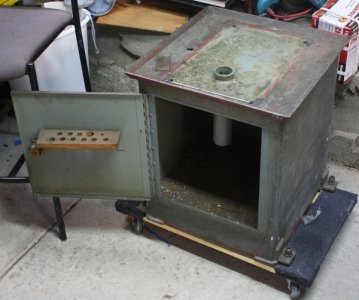
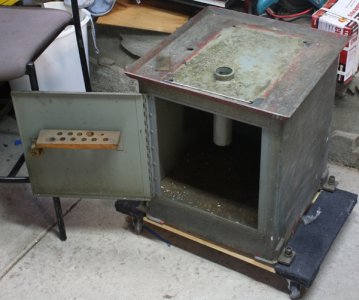
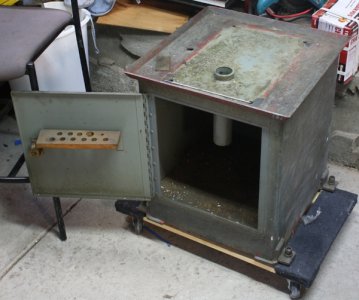
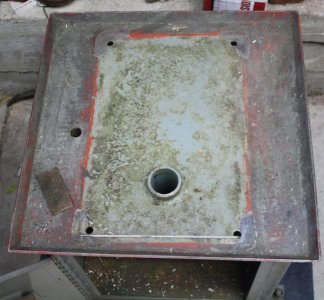
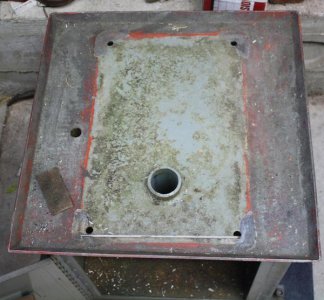
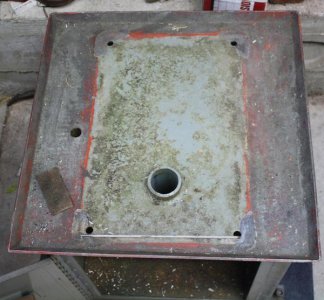
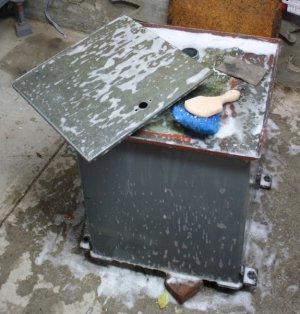
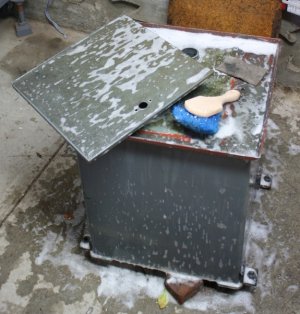
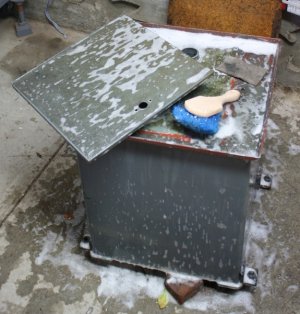
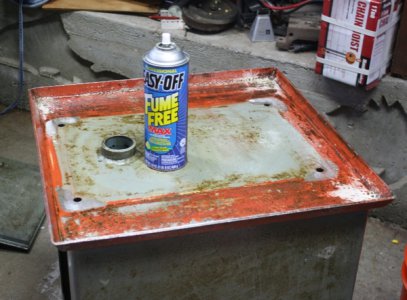
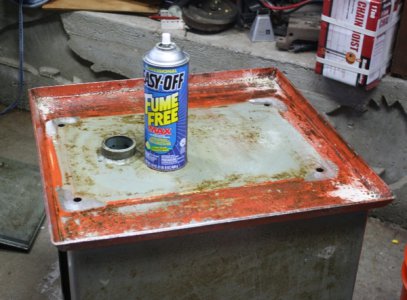
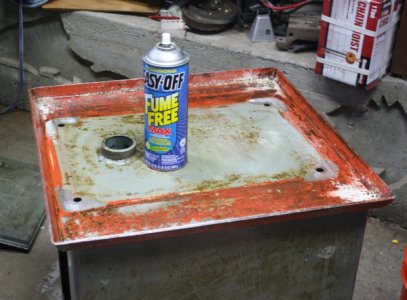
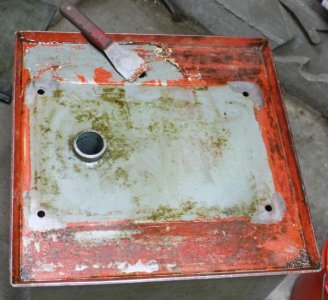
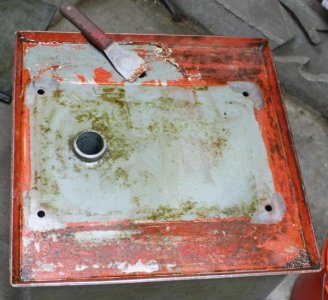
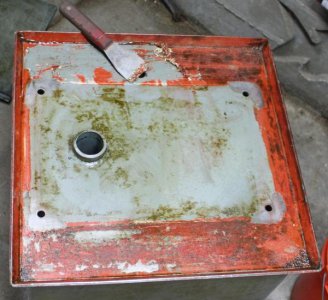
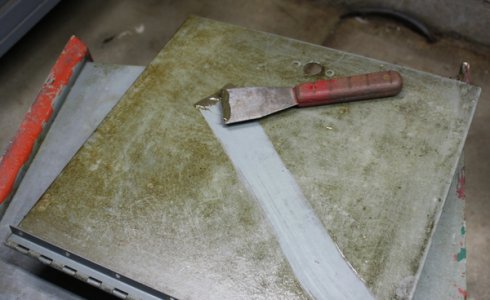
Todays work, base which was tough to clean, first scrubbed with hot water/detergent,rinsed, tried thinner and scotchbrite on top, spent too much time trying to make it work. Went to fallback for tough cleanup, cold application EasyOff oven cleaner, let sit for two hrs, stiff scraper and 40yrs(+-) of hardened crud melts off. Obvious but I only use the scraper on flat surfaces. Two solid hrs of work.

Brian

pics showing the steps


as purchased, pretty scuzzy
3fc48fae-7a74-45c1-978c-8334f8b0b211_zps757315bd.jpg

IMG_6851_zpsc50b39d2.jpg

hot suds did not do squat
c889c9fd-79bd-43c1-8196-ab67448e0ae9_zps4019ae3e.jpg

wasted too much time to get this far with thinner and scotchbrite, break out the Easy Off
487074da-364c-4585-ad66-73dd478ab1de_zps9f46689b.jpg

IMG_6860_zpsa7be66f0.jpg

89b132f1-5386-4eae-beb0-0e289d5d306c_zps35f2cbb6.jpg

rinsed, next steps sanding, acetone wipe, prime
f7a661cd-319f-441f-b422-2f3c76355516_zpsa58e9860.jpg

3fc48fae-7a74-45c1-978c-8334f8b0b211_zps757315bd.jpg

3fc48fae-7a74-45c1-978c-8334f8b0b211_zps757315bd.jpg

3fc48fae-7a74-45c1-978c-8334f8b0b211_zps757315bd.jpg

IMG_6851_zpsc50b39d2.jpg

IMG_6851_zpsc50b39d2.jpg

IMG_6851_zpsc50b39d2.jpg

c889c9fd-79bd-43c1-8196-ab67448e0ae9_zps4019ae3e.jpg

c889c9fd-79bd-43c1-8196-ab67448e0ae9_zps4019ae3e.jpg

c889c9fd-79bd-43c1-8196-ab67448e0ae9_zps4019ae3e.jpg

487074da-364c-4585-ad66-73dd478ab1de_zps9f46689b.jpg

487074da-364c-4585-ad66-73dd478ab1de_zps9f46689b.jpg

487074da-364c-4585-ad66-73dd478ab1de_zps9f46689b.jpg

IMG_6860_zpsa7be66f0.jpg

IMG_6860_zpsa7be66f0.jpg

IMG_6860_zpsa7be66f0.jpg

89b132f1-5386-4eae-beb0-0e289d5d306c_zps35f2cbb6.jpg

89b132f1-5386-4eae-beb0-0e289d5d306c_zps35f2cbb6.jpg

89b132f1-5386-4eae-beb0-0e289d5d306c_zps35f2cbb6.jpg

f7a661cd-319f-441f-b422-2f3c76355516_zpsa58e9860.jpg

f7a661cd-319f-441f-b422-2f3c76355516_zpsa58e9860.jpg

f7a661cd-319f-441f-b422-2f3c76355516_zpsa58e9860.jpg
 
Last edited:
I just noticed that in the last picture some "feet" were added on the outside, perhaps to add "levelers"? Is this correct?

On mine the feet and levelers are just inside on the corners. Is your base the same? Are threaded holes just inside at the corners?:pondering:
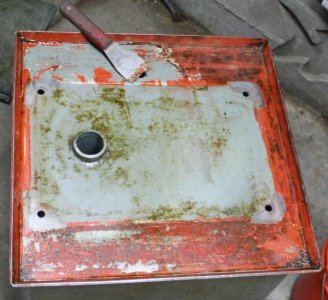
 
When painting mine we computer matched the color. Rustoleum Machine Grey and 3 shots of Black pigment. Perfect Match.

"Billy G"
 
I have both and 8540 and an 8520 both need some serious work. I had hoped to find advise on resurrecting them here at some point

Would consider selling some parts for the 8520? I need both quill feed handles. Thanks.
 
I just noticed that in the last picture some "feet" were added on the outside, perhaps to add "levelers"? Is this correct?

On mine the feet and levelers are just inside on the corners. Is your base the same? Are threaded holes just inside at the corners?:pondering:


Yes. Brian
 
Back
Top