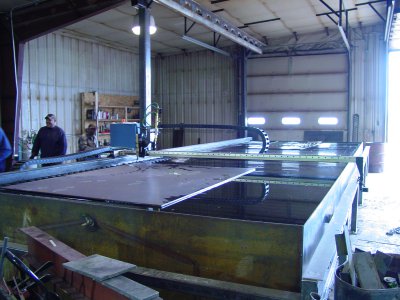
CNC Plasma Cutting When You Have No Space

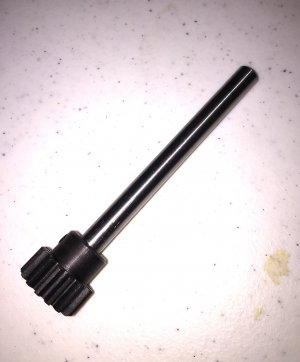
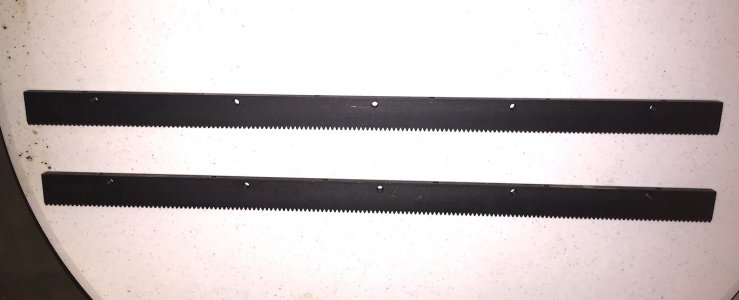
You will need two spur gears (20 pitch, 15 tooth, 5/16" ID 20 deg. pressure angle). I used gears with set screws, although you can knurl the shafts and press them on if you prefer. You will also need two 24" lengths of corresponding gear rack. All of this can be purchased on eBay from the seller CAROLBRENT. They currently have auction no. 332347670951 up which contains 3 racks and one spur gear. They also sell spur gears individually, and other combinations of racks and gears.

You will need two 4" long pieces of 5/16" diameter drill rod. 5/16" dowel pins would work if you could find them 4" long. The spur gears must be mounted on the end of the drill rods as shown. I reduced the length of my gear racks to 21" each, as this was my desired X & Y axis travel. The X axis could be slightly longer, but any longer on the Y axis and you risk cutting your table frame.

You will not use the existing holes in the gear rack. Instead, drill three 1/4" diameter holes 1/2" in from the non-toothed side of the rack. Place them about 1 1/2" from each end, and one in the center.

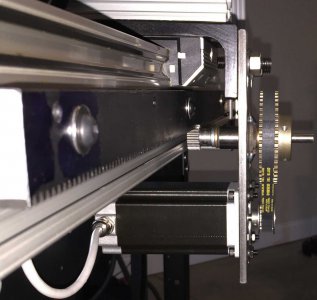
The idea here is for the spur gear to disengage from the end of the gear rack before reaching the end of travel. This eliminates the need for limit switches, and is more foolproof than limit switches.
 

Attachments

  • IMG_8825.JPG
    IMG_8825.JPG
    171 KB · Views: 38
  • IMG_8831.JPG
    IMG_8831.JPG
    94.9 KB · Views: 32
  • y axis2.jpg
    y axis2.jpg
    138.1 KB · Views: 34
Tmate, thanks for sharing the very detailed build information.
 
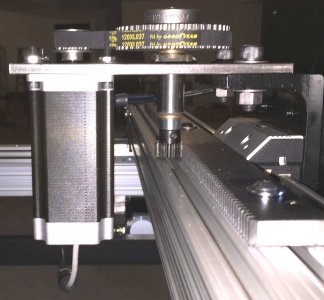
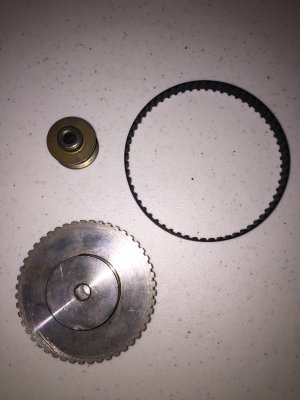
You will need two large timing pulleys (48 XL 5/16" ID), two small timing pulleys (14XL 1/4" ID), and two timing belts (120XL). These are all readily available from MSC, McMaster-Carr, and other industrial supply houses. Non name brand equivalents can be found on eBay.

This will all fit together as shown in a couple of previous pictures, and here again. Note that the X axis gear rack is fitted upside down and attached to the upper channel in the 8020 extrusion. This reduces the amount of plasma dust that can settle into the gear rack teeth.
 

Attachments

  • x axis drive.jpg
    x axis drive.jpg
    150.6 KB · Views: 32
  • IMG_8826.JPG
    IMG_8826.JPG
    852.7 KB · Views: 34
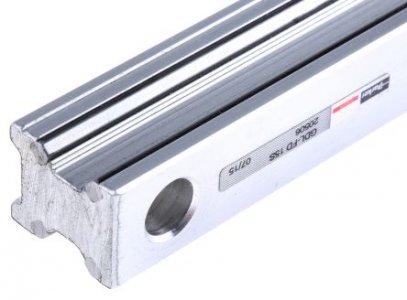
The Origa/Parker linear rails consist of four hardened stainless steel rails embedded in an aluminum bar as shown in the photo below. The mounting holes for the FD25 rails accept 1/4" socket head cap screws, and are pocketed so the screw heads are beneath the surface of the bar.

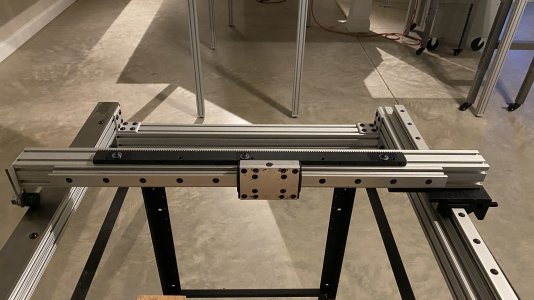
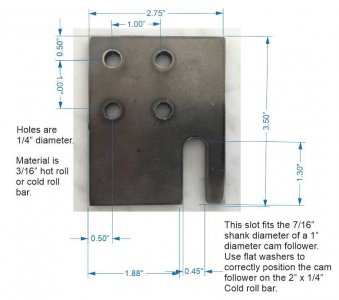
The gantry is simply a 32" long 2" x2" 8020 extrusion, the same as the others. One end will have four 1/4-20 holes tapped into its end to accommodate the end support bracket, which is pictured below. I cut both of my linear rails to 26" which, allowing for the width of the cassette, gives me 21" of travel on both axes. As I mentioned before, this could be increased slightly on the X axis, but the Rockler table width of 24" limits the length of Y axis travel that is possible.

The cam follower has the following MSC part number: 92610583. They can be found for a fraction of the MSC price on eBay.

Well, I believe this provides most of the information needed to build a little machine like mine. I hope it proves helpful if you decide to undertake the project. Other than fabricating the five brackets, the rest of the work could probably be completed in a couple of hours -- mainly just cutting some things to length, drilling a few holes and bolting things together. We dealt with the physical table here, and the electronics and software are something you will have to research independently.

If anyone has further questions regarding the table, please don't hesitate to post them here, and I will try to answer them.
 

Attachments

  • F3111800-02.jpg
    F3111800-02.jpg
    23.6 KB · Views: 32
  • Gantry.jpg
    Gantry.jpg
    2 MB · Views: 30
  • gantry support bracket.jpg
    gantry support bracket.jpg
    49.7 KB · Views: 48
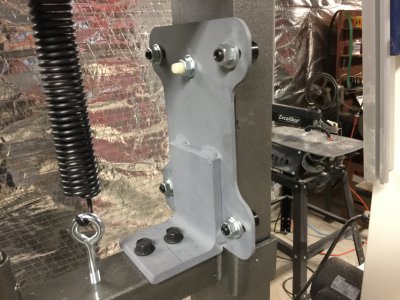
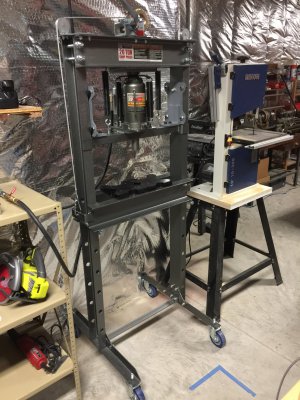
I posted these photos in another thread, but I cut out these guide brackets for my hydraulic press a couple of weeks ago.
 

Attachments

  • IMG_8771.JPG
    IMG_8771.JPG
    2.1 MB · Views: 47
  • IMG_8767.JPG
    IMG_8767.JPG
    1.2 MB · Views: 58
This is a lot of great information. Thank you very much for sharing it. I have been trying to put all your posts into a chronicle file for future reference.

Just doing some quick numbers. It appears as though by the time you were finished the cost, without the torch, runs somewhere around $3500 to $4000. Does that seem about right? Maybe a little more as I don't have the experience with CNC that you obviously do.
 
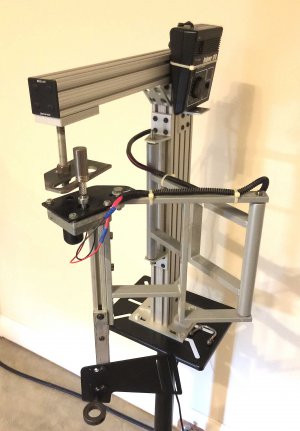
It's not CNC. but I previously built this pantograph plasma cutting machine using the same type of 8020 aluminum extrusions. Controls are a model railroad transformer and a Grainger (Dayton) 50:1 gearmotor. Magnetic tracer was made using iron boron rare earth magnets, a 3/4" diameter cold roll steel reflector plate, and a rotary file. This particular torch holder was made to fit a Hypertherm Powermax 30 hand torch. I installed a remote switch into the torch trigger circuit.

I can also share plans for this, if anyone has an interest. It's cheaper to build than the one above!
 

Attachments

  • pantograph plasma cutter.jpg
    pantograph plasma cutter.jpg
    400 KB · Views: 70
The above CNC table itself, worst case, should be less than $1,000. The electronics and software are the main expenses.

The electronics can be purchased turn-key, or assembled from parts. Either way, check out the following links:


Also Google "cheap CNC control software."

CorelDraw, almost any version, will produce dxf files that can be imported by the software that drives the machine. CorelDraw early versions are available on ebay for next to nothing. I was not under any particular budget constraints, so I never really shopped for dirt cheap driver software.

If you can afford a full electronics/software package, such as those sold by FlashcutCNC, your total cost for the machine will probably be $3,500 or more. Of course you can always move everything to a bigger table later if you so desire.

If you are willing to research what it takes to pull together a system from sites such as those at the above links, you could probably end up with a total of $2,000 or so invested. If you do fabrication for a living, you would be far better off using the finished machine to make money rather than spending many hours or days trying to do it on the cheap.
 
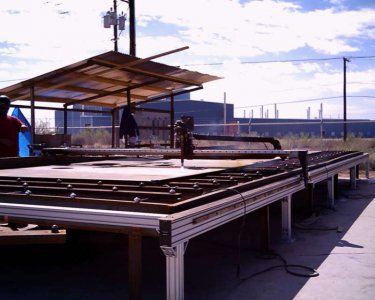
Another. Note that when the machine was this size, we used two X axis motors.
 

Attachments

  • DSC00918.JPG
    DSC00918.JPG
    494.2 KB · Views: 56
Back
Top