cylinder head milling machine indexable cutters

jumps4

Global Moderator
Registered
Joined
Apr 30, 2012
Messages
2,401
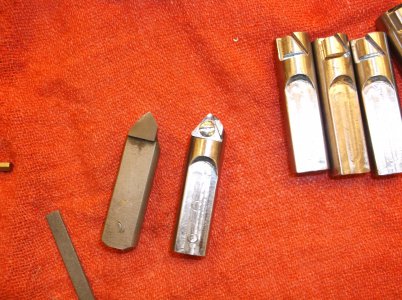
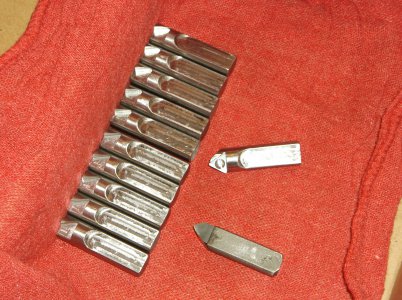
A friend of mine who owns a machine shop came by yesterday. I was showing the axa indexable tool holders i had made for my lathe and he asked me to make a set of 10 cutters for his cylinder head mill because the brazed tools cost so much. i went to the shop and measured all the angles needed to use a standard ammco insert like used in a brake lathe. these inserts are pretty low cost and available at most auto parts stores. the brazed tools are about $18 each compared to a box of inserts ( 10 ) for about $25 with 6 usable surfaces. the brazed inserts cut well but are prone to shattering on interupted cuts. I made a test tool last night and took it by this morning and it worked really well. I just put the new one in above the others and ran a test cut with only it contacting. I dyechemed the cutter first and made a short pass to check contact points and everything looked good so we set at low feed and let it do the head with only one cutter and it was really smooth finish. As i made the test tool i made a jig to hold the cutters all at the same angle and distance and started machining the cutter pockets today. the outside of the pocket was cut with a 1/16 endmill the the center taken out with a 1/8. tomorrow i will drill and tap the screw holes before going any further, the screws are 4-40 so whats the chance of a problem?. i purchased a taping head a few weeks ago and it worked perfect on the test part, i'll see how i do at 10 in a row. after i drill and tap all the holes i'm will do the final pass on the pocket bottoms. if all the bottoms are good i'll make the relief cuts. this will be a good test of my knowledge of cutter geometry ( little to none ). joe didnt have a new cutter so i reground one of the old ones in the jigs that came with the machine and used it to determine the angles required. these fit in a 12" face mill.
steve
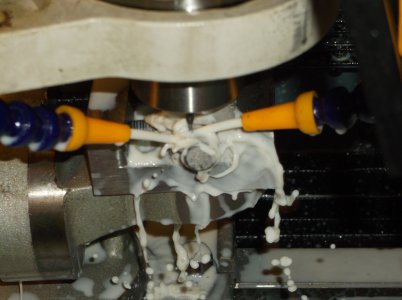
DSCF0574.JPG DSCF0576.JPG DSCF0577.JPG DSCF0579.JPG
 
another thing i have learned so far is how to tell when a 1/16 endmill is dull... it disappears
so far 4, 1/16 endmills and 2, 1/8 i dont think that is bad in 01 tool steel
steve
 
If those are countersunk screws, I'd recommend swapping to a FH socket cap screw. Although the hex key will be a little small, they will probably outlast and be safer than a slotted machine screw, which are soft by comparison.

Is there a setting fixture to put these holders in the flycutter? They should be pretty close to the same to get a good finish.
 
the sockets they fit into are spring loaded and there is a fixture. I have sharpened and reset them before and it is pretty easy. ammco uses these screws because they are soft. the screw is in a through hole and the manual says to use a standard bit from the backside to remove a broken screw. every new insert comes with a new screw.
steve
 
Last edited:
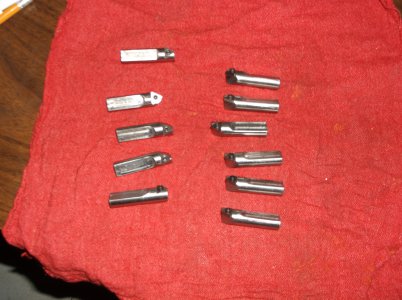
I took tonys advise and replaced the screws with hardened cap screws and finished all the tools today with 1 spare
it took 7, 1/16 endmills and a 4/40 tap i broke and ruined one of the spares, i dulled 2, 1/8 carbide endmills
all together i think it went well. I also made 12 more blanks for a set of round inserts he has i may do later.
it was a good project for me because making 10 things exactly the same is hard to do so i had to make all my machining the same.
the cutter i made to try yesterday had the bottom relieved after installing it I could see it was not needed so i left that step out of the other 10.
these install at 45 degree angle, so only the top half of the radius will contact.
i'm not sure if i can install them tomorrow it may end up monday
steve

DSCF0583.JPG
 
Last edited:
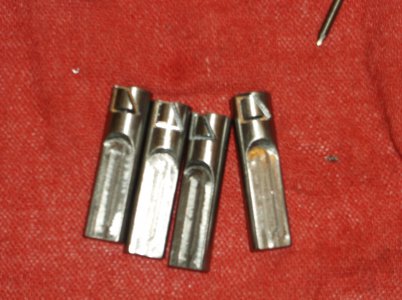
before installing these i'm going to number them so if there is a problem with breaking inserts i can see if it the idea and type or the holder itself. if the same holder keeps breaking one it is the holder not the inserts.
steve
 
Good idea numbering them to see if there is a problem with only one of the holders. I imagine the round (buttons) will yield a much smoother finish on the heads, which is recommended for some, but not all heads. Keep us posted. I like seeing workarounds to poor factory planning. well, poor for the end user, great for the machine builder and tool sales.
 
well i put the cutter in today and tried them..... fail
the face angles are all correct but there is an alignment problem
they cut great but not smooth, the problem is the cutter height is set with the mic but the top and face of the edges have to come to a point at the center line of the tool. if they are not exactly on center they stick out at different lengths. the top on the insert does not do the cutting the face does so the have to all align or they take different depth of cuts each
big surprise today he pulls out a manual.... my buddy! well seeing the special tool that he does not have, that came with the machine originaly it makes sense now. the tool holds the cutter on center line and only allows the same amounts to be removed from each face and maintain center.
so since the point is replaceable carbide inserts it cant be done right without still touching them up..
i'm going to make a grinding jig to sharpen the cutters once installed and set to even heights. then the grinder will face each cutter to the perfect length.
since they have owned this machine (15 years ) they have never got it to cut right and they even made their own sharpening jigs. now i know why nothing they tried worked. if they purchased cutters from the manufacturer they were perfect untill dull and never worked right after sharpening. the reason is they are not coming to a point on center.
i'll scan the manual and post a few pics of what i'm saying.
now that i know whats wrong i can fix it and the easiest and most precision way will be to sharpen while mounted in the head on the machine.
my cutters and inserts will work but have to be touched up after installing.
it's still better than $300 a set for 10 factory cutters. the aftermarket cutters he was trying for $189 were not sharpened on center either
steve
 
That's kind of what I was afraid of, and why I asked about a setting fixture. Normally the holders on a cutter like that would be indexed to rotate in the pockets to be the same alignment, and a gage to set the height so they all cut the same depth. Of course, a single one is just a fly-cutter, so no problem with all of that, but once you get a set in a multi-inserted cutting head, it does become an issue. Even on some factory multi-inserted cutters...I remember using a 12" Sandvik that had replaceable pockets that had to be "set" to hold the inserts at the same depth. If you didn't, one or more inserts would cut deeper than the rest, and it was apparent in the surface finish.

Are these precision ground/honed inserts, or as sintered? Most of the factory Ammco inserts aren't precision, not needed on a brake lathe since you use one at a time.
 
Last edited:
there is nothing there precision enough to maintain center line.
my holders were all made in the same jig on the cnc but I cant see them being as precision as required but close enough a touch up will be enough. the precision is why their cutters are $300. i'm just going to make the grinder to sharpen on the machine then they will all be the same length and height. so if he breaks one it will still have to be toughed up after installing a new insert right on the machine. If i make a good jig for the grinder it should solve the problem. the two cutting edges are only 1/32 wide 1/16 max everything else is relief so it is just touching them to get the edge.
steve
 
Back
Top