

- Joined
- Jun 29, 2014
- Messages
- 4,059
I need a surface grinder for a project I'm about to resume and have had my heart and mind complete wrapped around the Sanford SG for a number of years now. Why?
For you big city folk, I'm about to wrap this story in Vermont context...so skip ahead if you can do without the yokel blathering on here...
The Sanford was in possession of Ken Millay at Springfield Tool, in Springfield, Vermont. For those of you who recognize that town, it is the former home of such companies as Fellows Gear Shaper, Cone Bryant, etc. My grandfather used to work for Cone as a mechanical engineer, he gave me some of his old gear tables that he had to make up for himself while doing his engineering. I'll post those someday in the downloads, but they are huge blueprints. I worked in the Gear Shaper building for a telecom mapping company - this was long after Fellows had gone away. If I recall, there was a bingo hall and gymnastics studio in the converted assembly halls, karate studio and an architect firm in the office areas and the little engineering company I worked for on the second floor. I'm sure there was more but the building was mostly empty. When you drive in and around the "Precision Valley" you really can feel that something great went on there many, many decades ago. It is a bit of a ghost town now and it is kind of sad. Up the road (vernaculur for 20 miles north) is the American Precision Museum. Springfield Tool is out on the backroads, up in North Springfield, where the Precision Park is located with a number of old, unkept buildings, with the exception of Springfield Tool. This is truly a holdover of the old days. Ken is in his eighties, is an old Tool & Die maker and a really nice guy - and my goodness does he have some tooling! One of the funny coincidences we discovered is that Ken asked what I did for work. When I told him I managed the Edlund Co. he was floored. Edlund happened to be one of Springfield Tool's first customers and that his father-in-law was best friends with my predecessor (from the 1960s-80s). When you hear the colloquial, "It's a small world!" - that's Vermont. Back to the Candystore - I counted six to eight aisles of tooling cabinets and shelves. Out back is his tool and die shop and high bay warehouse - MORE machines and stuff everywhere. He says that his goal is to sell off everything over the next couple of years on eBay and from what I can tell he is set up well to do so.
He came by the Sanford by way of an estate sale a few years ago and claims it was one owner. I believe him. It is in good, working condition, doesn't appear to have been abused, it was well oiled, has been fitted to a heavy cast iron (non-Sanford) stand and has the original electro-mag vise. I bought this from him for $500. I consider that a good deal. He claimed the only thing potentially wrong with it was that the belt could use some work.
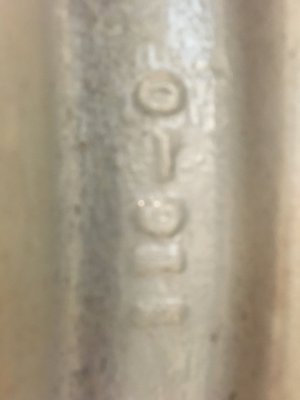
Serial number:

Can anyone confirm that the mfg. year is 1956, and this is the 2016th unit built?
_______________
Belt Condition:

The belt is Sanford OG. They continued to operate through the eighties. The SG310 belt listed in the manual (thank you @DAT510) suggests this is the correct size for units made with serial number up to 161 (again, assuming that means 1961). So the belt is correct, but it is frayed along the sides and I had to trim off the pieces. The belt works for now, but first thing I buy for this is a replacement belt.
_________________
Longitudinal Table Ways:

Not pretty, but oil grooves are intact. If you look closely on the flat way, you can see a dark band along the right side of the flat. That is higher then the rest, so quite a bit of wear. You can see two dark bands either side of the v-way. Same thing there. Wiped down with a little degreaser, and when I placed the table back onto the cross table, filled the oil cups with SAE-10W.
_________________________
Cross table:

The v-ways and flat on the cross table, that support the sliding longitudinal table. Some scraping to facilitate oil entrapment on the ways is evident here, both on the flat and v-way.
Since these ways are slightly narrower than those on the longitudinal slide, you get the dark, unworn bands of uneven wear. This doesn't seem like a problem at all to me - so more de-greaser, a nylon brush to clean up the oil pockets and will re-lubricate later.
____________________

The v-ways supporting the cross table. I'm a little worried about these -but it is mostly appearances along the edges. They are fairly ragged. Is stoning the edges a good idea? Or leave it well enough alone? The action is smooth and no problem from what I can tell.
_______________________
Bottom of Cross table:

All of this looks good. De-grease, reinstall and oil.
________________
Cross Table Installation:

The table is attached to the lead screw nut by those two cap screws between the flat and v-way.
_________________

The motor bracket removed and exposing the back of the column. Here you can see the back of the spindle and belt. Also, the three cap screw column arrangement is one of the giveaways that this is a second generation Sanford. It was early enough though that it retained the bronze lead screw nut which was replaced shortly after this unit was made - judging from the serial numbers.
When we tested the unit in Springfield, Ken was saying the leadscrew might need some work because he didn't feel the unit was precise enough. He said the leadscrew was dropping a thousandth or two after you turn the feed wheel. After removing the motor bracket, I understand why. It was loose - and my guess is that the motor bracket provides some resistance to backlash on the screw and nut when it is properly torqued. Once I had done that, the feed wheel appeared to hold its position. Actual measurements after grinding will be the true test.
_________________
The Not Original Base and Janky Risers:

I'm not a fan. I will either re-purpose this base at some point in the future or sell it. Would be interesting to know what it's original purpose was for. Very quickly, you can see a couple of features that may help identify it. First, there are four bosses that are cast into the base for mounting whatever machine was originally sold with this base. Second, there is a slot in the base next to one of the mounting positions, you can see it lower left corner. If you let your eye follow that leg down to the foot, you can see another boss protruding to the inside of the leg, just above the caster. My guess is that is a pivot mount to let a motor pivot and tighten the belt, or some sort of lever mounted belt tensioning mechanism. Photos of the base and leg part numbers:


Anyway, the base it slightly lighter than the machine itself, I would put it at 120 lbs. The machine with the motor mounted (which isn't that heavy) is probably around 150 lb. I don't like the mounting method and the machine should be properly leveled and put on a base that is stable and doesn't risk wobbling on casters. Yeah, I'm being particularly picky here, but I feel like a working collectible machine like this should be treated better. I will eventually give this a thorough overhaul at somepoint in the distant future and repaint as well. There a couple of small issues to investigate in the meantime. The vertical leadscrew cover has a crack in the mounting hold. It wobbles a bit. I'll have to fix that. The vise on the unit currently is a mechanical mag vise. It did come with the original electromagnetic vise and Ken said the circuitry needs work underneath the base. I'll unravel that another time and see what can be done to restore that as well. But that is a future side project and isn't needed right now.
All cleaned up!!

- small and benchtop size - which is perfect for the size of parts and shop that I have and will continue to occupy.
- easy to move around if I need to.
- easy to learn on, work on and buy things to put on (it),
- relatively inexpensive and easy to pickup when one finally shows up in my locale.
For you big city folk, I'm about to wrap this story in Vermont context...so skip ahead if you can do without the yokel blathering on here...
The Sanford was in possession of Ken Millay at Springfield Tool, in Springfield, Vermont. For those of you who recognize that town, it is the former home of such companies as Fellows Gear Shaper, Cone Bryant, etc. My grandfather used to work for Cone as a mechanical engineer, he gave me some of his old gear tables that he had to make up for himself while doing his engineering. I'll post those someday in the downloads, but they are huge blueprints. I worked in the Gear Shaper building for a telecom mapping company - this was long after Fellows had gone away. If I recall, there was a bingo hall and gymnastics studio in the converted assembly halls, karate studio and an architect firm in the office areas and the little engineering company I worked for on the second floor. I'm sure there was more but the building was mostly empty. When you drive in and around the "Precision Valley" you really can feel that something great went on there many, many decades ago. It is a bit of a ghost town now and it is kind of sad. Up the road (vernaculur for 20 miles north) is the American Precision Museum. Springfield Tool is out on the backroads, up in North Springfield, where the Precision Park is located with a number of old, unkept buildings, with the exception of Springfield Tool. This is truly a holdover of the old days. Ken is in his eighties, is an old Tool & Die maker and a really nice guy - and my goodness does he have some tooling! One of the funny coincidences we discovered is that Ken asked what I did for work. When I told him I managed the Edlund Co. he was floored. Edlund happened to be one of Springfield Tool's first customers and that his father-in-law was best friends with my predecessor (from the 1960s-80s). When you hear the colloquial, "It's a small world!" - that's Vermont. Back to the Candystore - I counted six to eight aisles of tooling cabinets and shelves. Out back is his tool and die shop and high bay warehouse - MORE machines and stuff everywhere. He says that his goal is to sell off everything over the next couple of years on eBay and from what I can tell he is set up well to do so.
He came by the Sanford by way of an estate sale a few years ago and claims it was one owner. I believe him. It is in good, working condition, doesn't appear to have been abused, it was well oiled, has been fitted to a heavy cast iron (non-Sanford) stand and has the original electro-mag vise. I bought this from him for $500. I consider that a good deal. He claimed the only thing potentially wrong with it was that the belt could use some work.
Serial number:
Can anyone confirm that the mfg. year is 1956, and this is the 2016th unit built?
_______________
Belt Condition:
The belt is Sanford OG. They continued to operate through the eighties. The SG310 belt listed in the manual (thank you @DAT510) suggests this is the correct size for units made with serial number up to 161 (again, assuming that means 1961). So the belt is correct, but it is frayed along the sides and I had to trim off the pieces. The belt works for now, but first thing I buy for this is a replacement belt.
_________________
Longitudinal Table Ways:
Not pretty, but oil grooves are intact. If you look closely on the flat way, you can see a dark band along the right side of the flat. That is higher then the rest, so quite a bit of wear. You can see two dark bands either side of the v-way. Same thing there. Wiped down with a little degreaser, and when I placed the table back onto the cross table, filled the oil cups with SAE-10W.
_________________________
Cross table:
The v-ways and flat on the cross table, that support the sliding longitudinal table. Some scraping to facilitate oil entrapment on the ways is evident here, both on the flat and v-way.
Since these ways are slightly narrower than those on the longitudinal slide, you get the dark, unworn bands of uneven wear. This doesn't seem like a problem at all to me - so more de-greaser, a nylon brush to clean up the oil pockets and will re-lubricate later.
____________________
The v-ways supporting the cross table. I'm a little worried about these -but it is mostly appearances along the edges. They are fairly ragged. Is stoning the edges a good idea? Or leave it well enough alone? The action is smooth and no problem from what I can tell.
_______________________
Bottom of Cross table:
All of this looks good. De-grease, reinstall and oil.
________________
Cross Table Installation:
The table is attached to the lead screw nut by those two cap screws between the flat and v-way.
_________________
The motor bracket removed and exposing the back of the column. Here you can see the back of the spindle and belt. Also, the three cap screw column arrangement is one of the giveaways that this is a second generation Sanford. It was early enough though that it retained the bronze lead screw nut which was replaced shortly after this unit was made - judging from the serial numbers.
When we tested the unit in Springfield, Ken was saying the leadscrew might need some work because he didn't feel the unit was precise enough. He said the leadscrew was dropping a thousandth or two after you turn the feed wheel. After removing the motor bracket, I understand why. It was loose - and my guess is that the motor bracket provides some resistance to backlash on the screw and nut when it is properly torqued. Once I had done that, the feed wheel appeared to hold its position. Actual measurements after grinding will be the true test.
_________________
The Not Original Base and Janky Risers:
I'm not a fan. I will either re-purpose this base at some point in the future or sell it. Would be interesting to know what it's original purpose was for. Very quickly, you can see a couple of features that may help identify it. First, there are four bosses that are cast into the base for mounting whatever machine was originally sold with this base. Second, there is a slot in the base next to one of the mounting positions, you can see it lower left corner. If you let your eye follow that leg down to the foot, you can see another boss protruding to the inside of the leg, just above the caster. My guess is that is a pivot mount to let a motor pivot and tighten the belt, or some sort of lever mounted belt tensioning mechanism. Photos of the base and leg part numbers:
Anyway, the base it slightly lighter than the machine itself, I would put it at 120 lbs. The machine with the motor mounted (which isn't that heavy) is probably around 150 lb. I don't like the mounting method and the machine should be properly leveled and put on a base that is stable and doesn't risk wobbling on casters. Yeah, I'm being particularly picky here, but I feel like a working collectible machine like this should be treated better. I will eventually give this a thorough overhaul at somepoint in the distant future and repaint as well. There a couple of small issues to investigate in the meantime. The vertical leadscrew cover has a crack in the mounting hold. It wobbles a bit. I'll have to fix that. The vise on the unit currently is a mechanical mag vise. It did come with the original electromagnetic vise and Ken said the circuitry needs work underneath the base. I'll unravel that another time and see what can be done to restore that as well. But that is a future side project and isn't needed right now.
All cleaned up!!
") )
)