-
Welcome back Guest! Did you know you can mentor other members here at H-M? If not, please check out our Relaunch of Hobby Machinist Mentoring Program!
You are using an out of date browser. It may not display this or other websites correctly.
You should upgrade or use an alternative browser.
You should upgrade or use an alternative browser.
First surfacing tool: advice on indexable endmill
- Thread starter r-mm
- Start date
- Joined
- Jan 20, 2018
- Messages
- 5,886
Try removing one insert at a time. There may be one that is slightly higher (lower?) than the others. You should see the radial pattern of the cut, but it should be smoother than that. Of course, I use this cutter for metal removal, then a fly-cutter to pretty it up.I tried a variety of passes from either side, various speeds (hand feed only) various depths, WD40 and get good results but still some radial patterning. Is it realistic to expect none at all?
Been cutting down some lathe tool shanks today. Rough them down with a 20mm APKT inserted endmill, then finish to size with inserted fly-cutter. Finally found some APKT inserts that hold up.
No marks at all is impossible. No matter how nice it is you'll get lots of folks telling you how to do it better. I think it looks good with a tiny bit of chip welding as was said. Even a perfect tram can lead to a bit of directional cut instead of cross hatch simply due to the bearings or flex.I tried a variety of passes from either side, various speeds (hand feed only) various depths, WD40 and get good results but still some radial patterning. Is it realistic to expect none at all?
Don't over stress.
- Joined
- Jun 12, 2014
- Messages
- 5,053
Try running the head at higher RPM for aluminum, 2500-3000 RPM, you can play with the speeds but probably 10-12 IPM. It also depends on the depth of cut, for higher removal rate,deeper/shouldering cuts I decrease the RPM. As others mentioned some air/light lubrication helps clear the chips and prevent chip welding.
- Joined
- Jun 17, 2016
- Messages
- 108
I have a few face mills but usually end up back with old 4x1/2" square shank brazed carbide tool.
It's very easy to touch up but takes a while to get all cutting edges level, although inverting R8 into a pipe with bearing then use a dial indicator makes things a lot faster
Wanted to try inserts as they 'looked' faster to use and set but was pretty disappointed with them unless taking quite heavy cut.
The 'radius' on inserts cutting edge (to strengthen it) means shallow cuts tend to rub rather than cut.
- Joined
- Jun 12, 2014
- Messages
- 5,053
Inserts can give very fine cuts, and inserts for face cutters are profiled differently. If you use ground edge inserts they can be razor sharp and easily take very fine surfacing cuts and you end up with swarf that looks like fine steel wool. The radial patterning seen can be from minor misalignment as well as variation in insert seating and size.
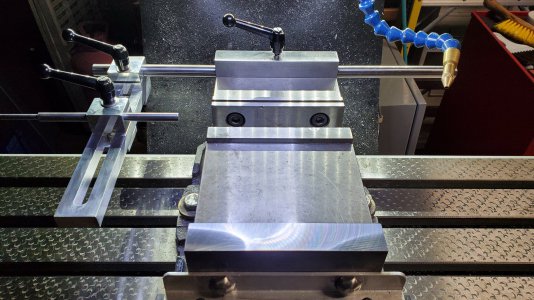
The front and back of the taller outer vise jaws where 1018 steel and I used my Haas face mill to finish both the rear and front to the same height once mounted. I also get the same result with aluminum, and this is not a ground edge insert, but the geometry lends itself to very clean light and cuts to 0.3" depth per pass. The inserts are designed for steel and SS/exotic alloys which tend to have a sharper edge profile, they have 3 positions and can be flipped for another 3 positions.

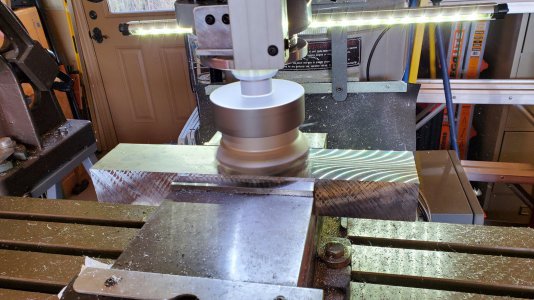
This is a 4" face mill with ground edge inserts taking a light first cleaning pass in 7075 W/O coolant or air. This is running at around 3200 RPM.

The front and back of the taller outer vise jaws where 1018 steel and I used my Haas face mill to finish both the rear and front to the same height once mounted. I also get the same result with aluminum, and this is not a ground edge insert, but the geometry lends itself to very clean light and cuts to 0.3" depth per pass. The inserts are designed for steel and SS/exotic alloys which tend to have a sharper edge profile, they have 3 positions and can be flipped for another 3 positions.

This is a 4" face mill with ground edge inserts taking a light first cleaning pass in 7075 W/O coolant or air. This is running at around 3200 RPM.

- Joined
- Feb 4, 2017
- Messages
- 2
I bought the 2" face mill with SEKT inserts. Impressed with 1st use. Cut alumnium . 125 deep , about 800 rpm, chips were .015 thk. Cut a piece of A36 steel .050 deep, About 500 rpm chips were .012 thk. Hand feeding on 1Hp Bridgeport. Will post pictures when I convert pics to a valid format.
