- Joined
- Dec 18, 2013
- Messages
- 2,012
I finally feel like I have the upper hand on this DRO installation so here's part 1 of 2. This is the kit no complaints on quality I was quite happy with what I received.
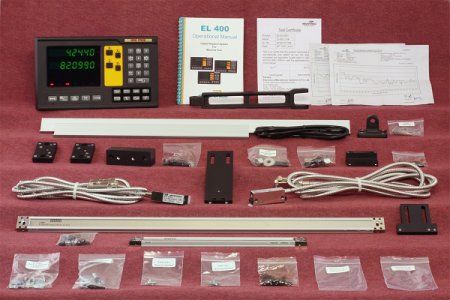
Here I'm looking over the first task fitting the read head bracket for the cross slide. It has to be cut down quite a bit to fit they are clear on this in the installation video. Problem is I don't own a mill.
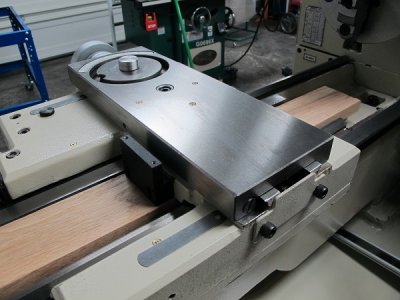
Tip: The video recommends using double sided tape to hold the bracket in place while fitting I found it was a lot easier to use a block of wood.
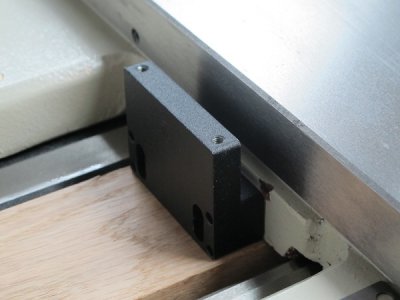
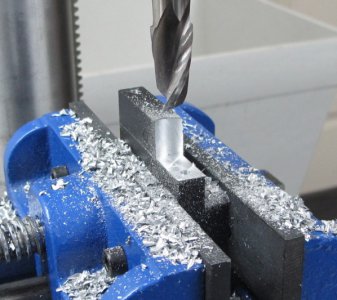
Here I have machined down one surface using my drill press, a cheap Harbor Freight vise and a 9/16 end mill. I removed about .100 of material. This is NOT a safe practice but removed most of the material drilling straight down then took a very light finish pass horizontally. There was lots of shaking and noise.
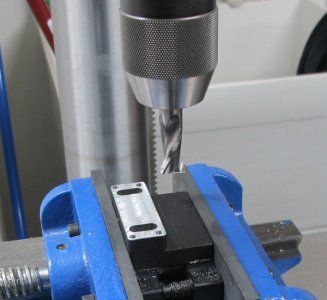
Here I'm chopping off about .560 of material. TIP drill these holes deeper in prep for tapping before machining using the original holes as a guide, the original holes are only tapped about .500 inches deep so they will be completely machined off. That will save you some time and headache.
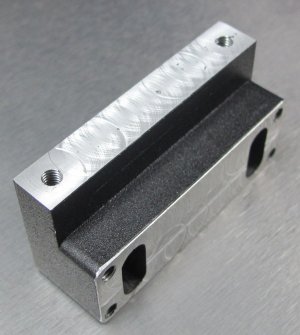
It came out great I was pretty full of myself, this would be short lived.
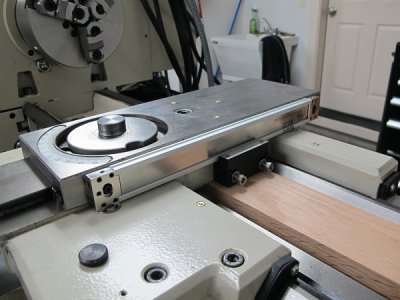
Here I'm fitting the scale, measure carefully because there's not a lot of wiggle room due to the cross slide gib screws. I cut the scale about .750 short of each end of the cross slide to clear those screws. This left just enough travel for the read head plus the wiper that sticks out another .250 when the cross slide is fed all the way out. Note how I have positioned the read head bracket up close (very close) to the back side way on the lathe this is required again to squeeze in enough travel, and makes drilling and tapping those bracket holes a challenge, see the tools I used at the end of this post. Also note I spaced the scale up off the carriage using a couple .045 thick washers.
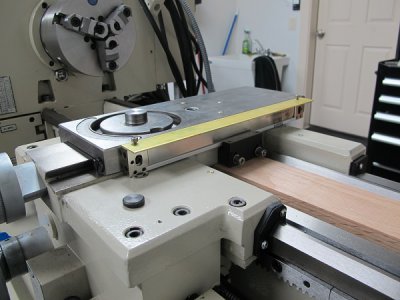
Here's my first gripe with the kit, the aluminum scale cover they provide for the cross slide is useless. Its way too large, the wrong shape, and would require excessive milling to fit they really need to re-think this part of the kit. I opted to fit a nice piece of brass instead and will pick up some rubber sheet to hang down.
ALSO the screws for the scale cover provided in the kit are too long. In the video they show mounting the cover to the scale itself, there's a couple of tapped holes in the top. But the screws in the kit are too long, to be fair those screws are for if you decide to drill and tap holes in your lathe for the cover. So not a gripe just remember to pick up some screws when you go to the hardware store.
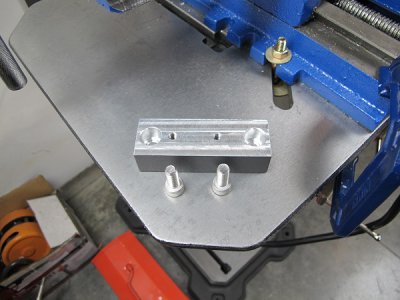
Well now here's the block that bolts up to the end of the cross slide for the Z axis scale. I had to mill off .500 and apparently my end mill was dying due to all the shaking and chatter from the previous job. Machining this on the drill press was horrible and that's after I drilled most of the material away with a 5/16 drill bit. I could only take about .060 side cut at a time e.g. move over .060 drill down, repeat. It took like 2 hours to finish this part. If you don't have a mill plan on finding someone to machine these two blocks for you on a real mill.
ALSO note that this bracket is not machined to fit the G4003G bolts, you will have to enlarge both the bolt hole and the shoulder AND buy new bolts because the stock bolts in the lathe are too short.
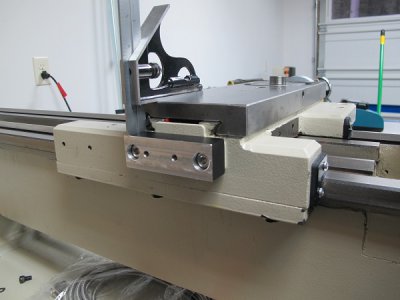
Here I have it bolted up to the cross slide, fits perfect. Note I elected to retain the factory cover behind this block to keep the crud out. Also notice how those two tapped holes are off center? The T bracket that bolts up there will be nearly up against the gib when the cross slide is extended, it clears but barely. Is a better fit with this block flipped around the other way. But then check the Z scale near the motor on the back of the lathe in particular the rear splash guard. Flipping this block can be used to shift the position of the read head which is why I imagine they machined those holes off center. I have the block flipped to the right at the moment but plan to turn this around back the way it is in this picture for better fit of the read head.
NOW's where it gets interesting. Stare at this picture of engineered brilliance while I tell you how horrible this part was. lol In the video they install the scale flat right on the lathe casting. That wasn't going to happen because my lathe casting has a big outward bow horizontally. No problem the kit gives you 2 square aluminum pads in case that happens drilled and tapped with leveling set screws. That approach was an epic FAIL! Trying to get those two pads square and parallel to the lathe and each other was maddening. About the time you think you got it dialed in the thick paint and primer gives a bit and its out of whack again.
The scale is 37" long and the slightest and I mean slightest bit out of parallel and true and the scale bows in or out or twists or both it was crazy how easily the scale would distort. I eventually gave up on the square pads and tried mounting the scale directly to the lathe with thick washers to clear the bow in the casting. FAIL! While this was better again the least bit out and the scale distorts and it distorts a LOT. I had it really close once and the thick paint and primer did me in again. Never mind there's no way this scale is rigid enough to be floating in mid air anyway. That's when I decided I needed a rigid flat surface to mount the scale to just like on the cross slide.
I picked up a piece of 3" bar .75 inch thick x 38 inches at my local metal supplier for $45. I was already into the kit for $1,000 so another $45 well what the hell. This worked out beautifully. I took the scale with me to make sure I was getting a nice flat piece of bar, one end of the long bar was bowed but the other was nice and flat and I had them cut it from there.
I drilled out and tapped the previous square pad holes in the lathe for 5/16-18 bolts and drilled the aluminum bar for the same. I also drilled and tapped the aluminum bar for 4 5/16-18 set screws, the center scale clamps, and the two scale mounting holes at either end.
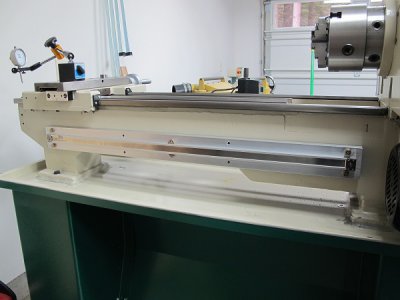
Here you can see I simply shimmed the aluminum bar to clear the bow in the casting, then some more because the tail stock end of my casting stuck out .060 farther from the carriage than the head stock end. I managed to get the bar shimmed to within +-.001 vertically and horizontally. The scale measured the same when I was done. The scale sits perfectly flat against this bar and is quite rigid.
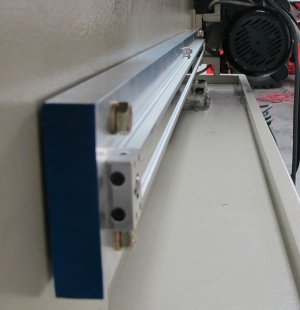
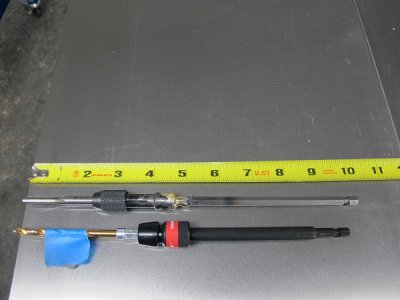
TIP: To drill and tap those two holes in the carriage for the X axis cross slide read head bracket you will need some long reach drill and tap tools. A hex drive bit and extension got the drilling done but I had to make an extended reach hex drive tap tool. Trying to hand tap one of those holes with a tap wrench would have been annoying, it was impossible to hand tap the other its too close to the lathe way. Again measure the X axis carefully because the read head mounting bracket also had to be attached off center to allow the read head to work for the full 6.375 inches of cross slide travel.
That's it for part 1, I'm hoping part 2 will go quicker and easier.


Here I'm looking over the first task fitting the read head bracket for the cross slide. It has to be cut down quite a bit to fit they are clear on this in the installation video. Problem is I don't own a mill.

Tip: The video recommends using double sided tape to hold the bracket in place while fitting I found it was a lot easier to use a block of wood.

Here I have machined down one surface using my drill press, a cheap Harbor Freight vise and a 9/16 end mill. I removed about .100 of material. This is NOT a safe practice but removed most of the material drilling straight down then took a very light finish pass horizontally. There was lots of shaking and noise.

Here I'm chopping off about .560 of material. TIP drill these holes deeper in prep for tapping before machining using the original holes as a guide, the original holes are only tapped about .500 inches deep so they will be completely machined off. That will save you some time and headache.

It came out great I was pretty full of myself, this would be short lived.

Here I'm fitting the scale, measure carefully because there's not a lot of wiggle room due to the cross slide gib screws. I cut the scale about .750 short of each end of the cross slide to clear those screws. This left just enough travel for the read head plus the wiper that sticks out another .250 when the cross slide is fed all the way out. Note how I have positioned the read head bracket up close (very close) to the back side way on the lathe this is required again to squeeze in enough travel, and makes drilling and tapping those bracket holes a challenge, see the tools I used at the end of this post. Also note I spaced the scale up off the carriage using a couple .045 thick washers.

Here's my first gripe with the kit, the aluminum scale cover they provide for the cross slide is useless. Its way too large, the wrong shape, and would require excessive milling to fit they really need to re-think this part of the kit. I opted to fit a nice piece of brass instead and will pick up some rubber sheet to hang down.
ALSO the screws for the scale cover provided in the kit are too long. In the video they show mounting the cover to the scale itself, there's a couple of tapped holes in the top. But the screws in the kit are too long, to be fair those screws are for if you decide to drill and tap holes in your lathe for the cover. So not a gripe just remember to pick up some screws when you go to the hardware store.

Well now here's the block that bolts up to the end of the cross slide for the Z axis scale. I had to mill off .500 and apparently my end mill was dying due to all the shaking and chatter from the previous job. Machining this on the drill press was horrible and that's after I drilled most of the material away with a 5/16 drill bit. I could only take about .060 side cut at a time e.g. move over .060 drill down, repeat. It took like 2 hours to finish this part. If you don't have a mill plan on finding someone to machine these two blocks for you on a real mill.
ALSO note that this bracket is not machined to fit the G4003G bolts, you will have to enlarge both the bolt hole and the shoulder AND buy new bolts because the stock bolts in the lathe are too short.

Here I have it bolted up to the cross slide, fits perfect. Note I elected to retain the factory cover behind this block to keep the crud out. Also notice how those two tapped holes are off center? The T bracket that bolts up there will be nearly up against the gib when the cross slide is extended, it clears but barely. Is a better fit with this block flipped around the other way. But then check the Z scale near the motor on the back of the lathe in particular the rear splash guard. Flipping this block can be used to shift the position of the read head which is why I imagine they machined those holes off center. I have the block flipped to the right at the moment but plan to turn this around back the way it is in this picture for better fit of the read head.

NOW's where it gets interesting. Stare at this picture of engineered brilliance while I tell you how horrible this part was. lol In the video they install the scale flat right on the lathe casting. That wasn't going to happen because my lathe casting has a big outward bow horizontally. No problem the kit gives you 2 square aluminum pads in case that happens drilled and tapped with leveling set screws. That approach was an epic FAIL! Trying to get those two pads square and parallel to the lathe and each other was maddening. About the time you think you got it dialed in the thick paint and primer gives a bit and its out of whack again.
The scale is 37" long and the slightest and I mean slightest bit out of parallel and true and the scale bows in or out or twists or both it was crazy how easily the scale would distort. I eventually gave up on the square pads and tried mounting the scale directly to the lathe with thick washers to clear the bow in the casting. FAIL! While this was better again the least bit out and the scale distorts and it distorts a LOT. I had it really close once and the thick paint and primer did me in again. Never mind there's no way this scale is rigid enough to be floating in mid air anyway. That's when I decided I needed a rigid flat surface to mount the scale to just like on the cross slide.
I picked up a piece of 3" bar .75 inch thick x 38 inches at my local metal supplier for $45. I was already into the kit for $1,000 so another $45 well what the hell. This worked out beautifully. I took the scale with me to make sure I was getting a nice flat piece of bar, one end of the long bar was bowed but the other was nice and flat and I had them cut it from there.
I drilled out and tapped the previous square pad holes in the lathe for 5/16-18 bolts and drilled the aluminum bar for the same. I also drilled and tapped the aluminum bar for 4 5/16-18 set screws, the center scale clamps, and the two scale mounting holes at either end.

Here you can see I simply shimmed the aluminum bar to clear the bow in the casting, then some more because the tail stock end of my casting stuck out .060 farther from the carriage than the head stock end. I managed to get the bar shimmed to within +-.001 vertically and horizontally. The scale measured the same when I was done. The scale sits perfectly flat against this bar and is quite rigid.

TIP: To drill and tap those two holes in the carriage for the X axis cross slide read head bracket you will need some long reach drill and tap tools. A hex drive bit and extension got the drilling done but I had to make an extended reach hex drive tap tool. Trying to hand tap one of those holes with a tap wrench would have been annoying, it was impossible to hand tap the other its too close to the lathe way. Again measure the X axis carefully because the read head mounting bracket also had to be attached off center to allow the read head to work for the full 6.375 inches of cross slide travel.

That's it for part 1, I'm hoping part 2 will go quicker and easier.


Last edited:

