- Joined
- Feb 5, 2015
- Messages
- 662
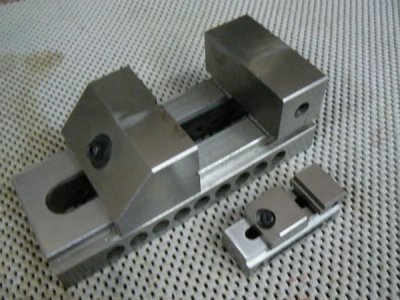
Toolmakers vises are useful for holding small parts, especially in a surface grinder. The following describes a simple improvement that has made this device more useful to me for casual chores. Here's a fuzzy photo of a couple of vises:
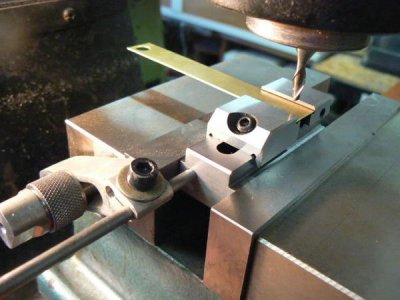
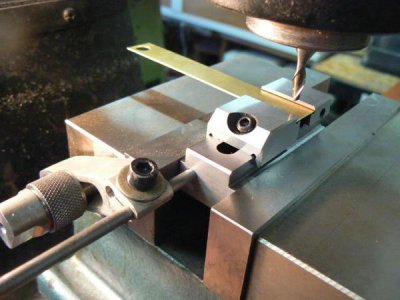
Small parts may not clamp well in a large milling machine vise; sometimes they are of an inconvenient dimension (e.g. for parallels) and frequently it is awkward to manipulate a small part in a mill, under a sharp tool while attempting to align the part with precision. It may be convenient to set up a workpiece in a toolmaker's vise then transfer the toolmaker's vise to a larger workholder, like this:
I use toolmaker's vises for drill press applications particularly in a drill press set up for tapping small holes. Locating a small part perpendicular (and repeatably) to a small diameter tap is critical to avoid tap breakage.
One disadvantage of these devices is the lack of clamping force under certain conditions, such as when the clamping screw is positioned at an angle past 45 degrees and the screw axis starts approaching a vertical orientation. The clamping screw force is exerted mostly downward instead of horizontally. Ideally, the screw angle would be about 30 degrees from horizontal but it hardly ever works out that way, LOL.
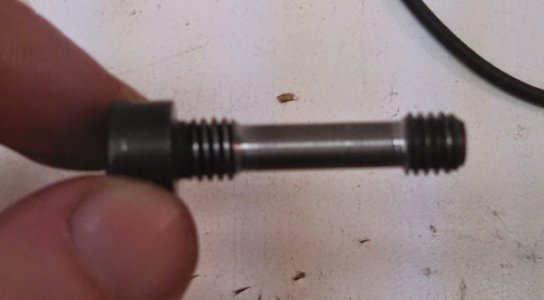
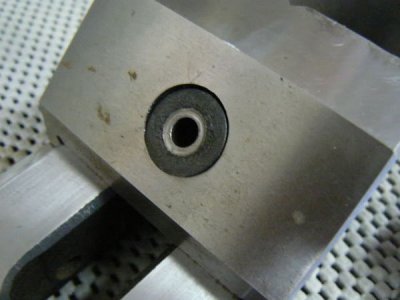
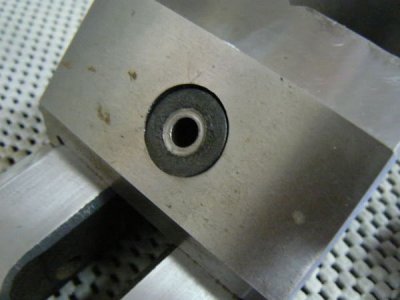
Imported vises are rarely heat-treated at the wear points, as in this example where the socket head cap screw has indented and worn the ball joint excessively, mainly due to over-tightening. (At one time this vise was mounted on a mill-drill, for second operations on small parts, but it never worked very well and I needed the room so I got rid of the machine.)
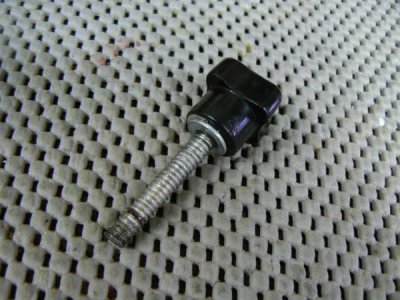
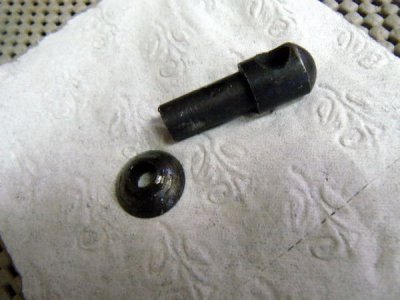
The use of a hex key to tighten the clamp screw can be time consuming (and my 3/16 hex key is usually misplaced). I replaced the socket head cap screw in one of my vises with a readily available tooling part (there needs to be at least 1-1/2 inches of available thread under the knob) but making a similar part is simple. It's wise to install a washer under the clamping knob to prevent further rotational wear on the ball joint.
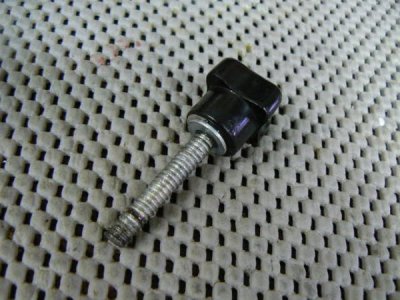
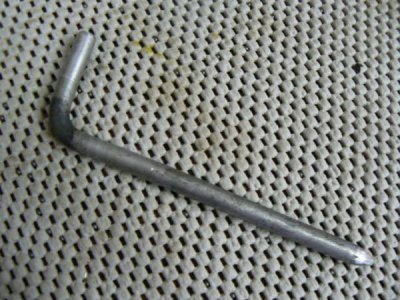
The replacement knob is quickly rotated (compared to using a hex key to torque the original socket head cap screw) BUT the knob has very little mechanical advantage therefore clamping pressure is considerably less than the original arrangement. The mechanical advantage has to be regained so I made this crude part to replace the original pivot pin shipped with the vise.
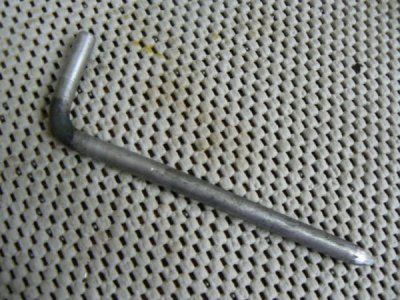
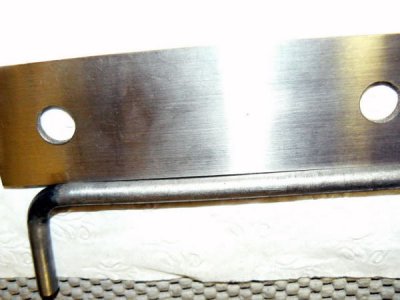
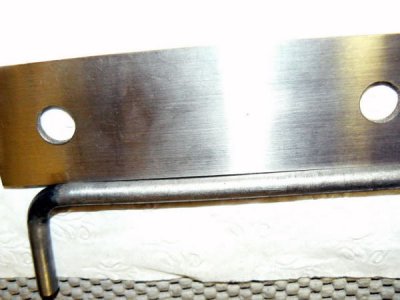
A steel rod was cut to length, heated and bent into an "L" shape. A slight bend was introduced at the center of the rod in the area around which the threaded link pivots (I just put the pin in a bench vise and whacked it with a big plastic-face hammer). The intentional deformation was about .015 in this case (although the exact amount isn't critical). The slight bend is visible by looking carefully at the rod - placed beside a parallel, a slight gap is visible.
Removing the original clamping screw, individual parts of the vise were cleaned and lubricated (high pressure grease is preferred but any lubricant is better than none).
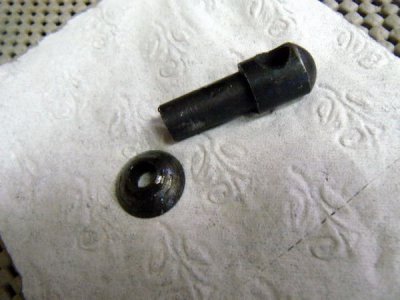
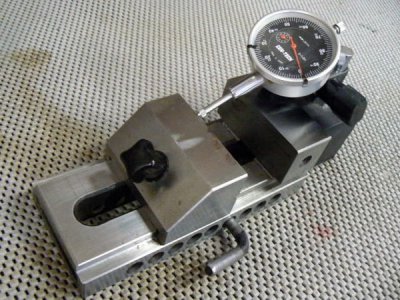
The normal clamping procedure is to insert the pivot rod into the appropriate set of holes in the sides of the vise, through the threaded internal link so that the workpiece can be loosely inserted into the vise. (If possible, the screw should be about 30 degrees off horizontal, as mentioned previously.) The movable vise jaw is adjusted close to the workpiece by finger-rotating the new clamping knob with the pivot rod "lever" positioned toward the REAR of the vise, leaving just enough gap for parts to be loaded/unloaded:
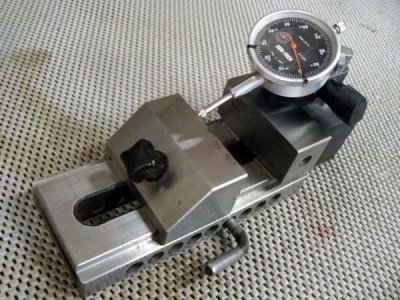
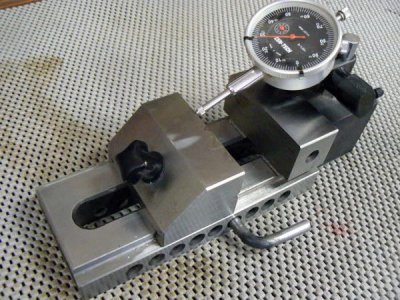
The workpiece can then be fully clamped by rotating the pivot rod lever forward toward the FRONT of the vise as in the following photo:
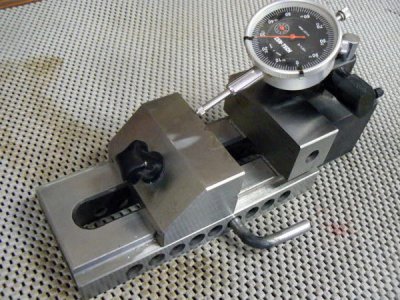
As the indicator shows, rotating the lever through a 180 degree arc closes the vise by about .030. Only modest finger pressure is required to rotate the lever and quite a bit of mechanical advantage is achieved by the movement. The result is a vise that achieves good clamping force while eliminating the use of the hex key and reducing the clamping time by about 90%. Once the vise has been adjusted approximately with the threaded knob, workpieces can be loaded and unloaded quickly and clamped securely with a brief rotation of the "L" handle of the pivot pin.
This mightn't be of major importance in milling operations but for drilling and tapping multiple small parts, the time saving is welcome. I would NOT use this feature for milling, by the way. Time spent in modifying the toolmaker's vise was around 15 minutes. Obviously no modifications have been made to the vise and original configuration can be restored easily if desired.
At the time I bought the 3 inch vise, it cost just a bit over $30, about the same as a crude drill-press vise. It is hardened and ground - flat, parallel and perpendicular within .001 on all faces so it was an incredible bargain not to mention that it opens to a full 4-1/8 inches. I was so impressed with this little vise that I spent several hours making a special set of toe-clamps so that the vise can be mounted on my rotary table. It has proven its utility several times since then -
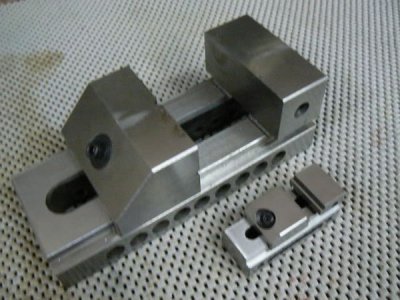
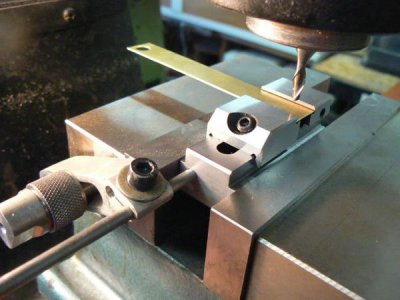

Small parts may not clamp well in a large milling machine vise; sometimes they are of an inconvenient dimension (e.g. for parallels) and frequently it is awkward to manipulate a small part in a mill, under a sharp tool while attempting to align the part with precision. It may be convenient to set up a workpiece in a toolmaker's vise then transfer the toolmaker's vise to a larger workholder, like this:

I use toolmaker's vises for drill press applications particularly in a drill press set up for tapping small holes. Locating a small part perpendicular (and repeatably) to a small diameter tap is critical to avoid tap breakage.
One disadvantage of these devices is the lack of clamping force under certain conditions, such as when the clamping screw is positioned at an angle past 45 degrees and the screw axis starts approaching a vertical orientation. The clamping screw force is exerted mostly downward instead of horizontally. Ideally, the screw angle would be about 30 degrees from horizontal but it hardly ever works out that way, LOL.
Imported vises are rarely heat-treated at the wear points, as in this example where the socket head cap screw has indented and worn the ball joint excessively, mainly due to over-tightening. (At one time this vise was mounted on a mill-drill, for second operations on small parts, but it never worked very well and I needed the room so I got rid of the machine.)

The use of a hex key to tighten the clamp screw can be time consuming (and my 3/16 hex key is usually misplaced). I replaced the socket head cap screw in one of my vises with a readily available tooling part (there needs to be at least 1-1/2 inches of available thread under the knob) but making a similar part is simple. It's wise to install a washer under the clamping knob to prevent further rotational wear on the ball joint.

The replacement knob is quickly rotated (compared to using a hex key to torque the original socket head cap screw) BUT the knob has very little mechanical advantage therefore clamping pressure is considerably less than the original arrangement. The mechanical advantage has to be regained so I made this crude part to replace the original pivot pin shipped with the vise.

A steel rod was cut to length, heated and bent into an "L" shape. A slight bend was introduced at the center of the rod in the area around which the threaded link pivots (I just put the pin in a bench vise and whacked it with a big plastic-face hammer). The intentional deformation was about .015 in this case (although the exact amount isn't critical). The slight bend is visible by looking carefully at the rod - placed beside a parallel, a slight gap is visible.

Removing the original clamping screw, individual parts of the vise were cleaned and lubricated (high pressure grease is preferred but any lubricant is better than none).

The normal clamping procedure is to insert the pivot rod into the appropriate set of holes in the sides of the vise, through the threaded internal link so that the workpiece can be loosely inserted into the vise. (If possible, the screw should be about 30 degrees off horizontal, as mentioned previously.) The movable vise jaw is adjusted close to the workpiece by finger-rotating the new clamping knob with the pivot rod "lever" positioned toward the REAR of the vise, leaving just enough gap for parts to be loaded/unloaded:

The workpiece can then be fully clamped by rotating the pivot rod lever forward toward the FRONT of the vise as in the following photo:

As the indicator shows, rotating the lever through a 180 degree arc closes the vise by about .030. Only modest finger pressure is required to rotate the lever and quite a bit of mechanical advantage is achieved by the movement. The result is a vise that achieves good clamping force while eliminating the use of the hex key and reducing the clamping time by about 90%. Once the vise has been adjusted approximately with the threaded knob, workpieces can be loaded and unloaded quickly and clamped securely with a brief rotation of the "L" handle of the pivot pin.
This mightn't be of major importance in milling operations but for drilling and tapping multiple small parts, the time saving is welcome. I would NOT use this feature for milling, by the way. Time spent in modifying the toolmaker's vise was around 15 minutes. Obviously no modifications have been made to the vise and original configuration can be restored easily if desired.
At the time I bought the 3 inch vise, it cost just a bit over $30, about the same as a crude drill-press vise. It is hardened and ground - flat, parallel and perpendicular within .001 on all faces so it was an incredible bargain not to mention that it opens to a full 4-1/8 inches. I was so impressed with this little vise that I spent several hours making a special set of toe-clamps so that the vise can be mounted on my rotary table. It has proven its utility several times since then -


