- Joined
- May 7, 2023
- Messages
- 1,343
I must be broke in the head.
Found this guy about 3hrs away and it wasn’t too expensive so I cobbled together the cash and went down and had a look.
When I got there I met the couple who owned the business. It was an aerospace company that was liquidating as none of the heirs wanted to run it.
Got to talking to them and in looking the machine over I discovered a big problem. This was a surprise to them and a bit of a disappointment to me as I already have 3 project threads going.

 www.hobby-machinist.com

 www.hobby-machinist.com

 www.hobby-machinist.com
Oops. Baby makes 4!

 www.hobby-machinist.com
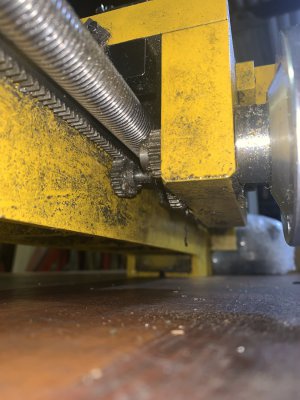
Anyhow, we found that the lathe had suffered a crash at some point and the saddle traverse pinion gear shaft was bent and not allowing the saddle to traverse. It would travel, bind for a bit, free up and then the gear would skip.
Yeah, it was that bad.
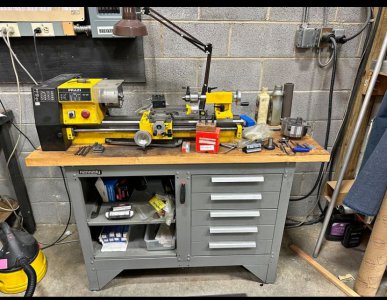
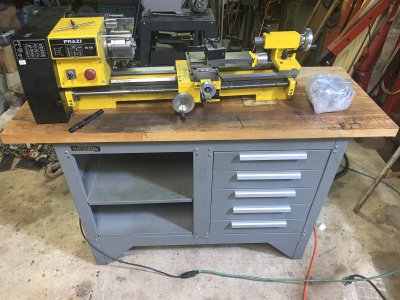
Still, finding this I was in a good position to negotiate and I scored the lathe, tooling and this sweet KENNEDY workstation for $1100. That was about a 2/3 of their asking price which I would have gladly paid if the machine were in good running condition.
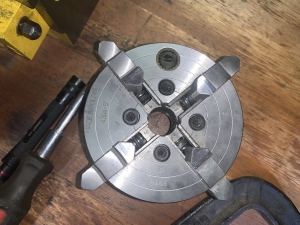
Got the lathe, stand, 3+4 jaw chucks (Prazi 4” 3 jaw and Bison 5” 4 jaw) a collet nose and closer and steady rest plus several indexable tool posts, assorted carbide tool bits and a heavily misused set of boring bars meant for a boring head that they were just screwing down in the tool holders.
I think a set of collets (first pic, bottom shelf to the left) and a couple of the change gears got lost in the shuffle and I’m hoping they find that along with the missing travel rest, but as it stands I’m ok with this.
It was raining like hell that day so I bagged the lathe in huge industrial garbage bags and left the bench nekkid to rely on all the oil soaked into the maple top to protect it from the elements.
Beauty shot of it from when I first got it unloaded.
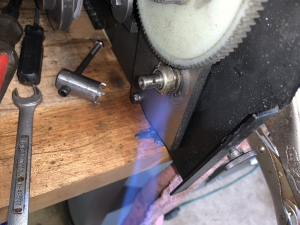
Literally minutes after getting it home I got the shaft bent back enough with a C clamp to actually move the saddle well enough I could work on it.
The gear probably isn’t salvageable, but should be cheap enough to buy new, and the shaft I can make from tool steel and support better for less backlash.
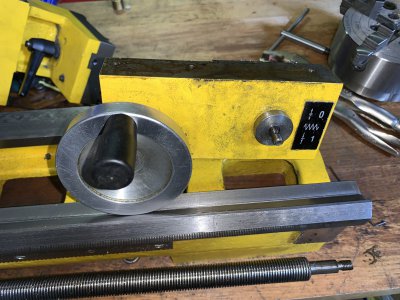
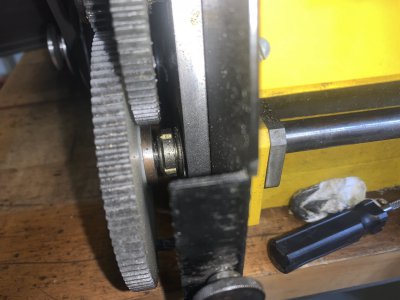
Here’s the offending gear.
Look at that stick out!
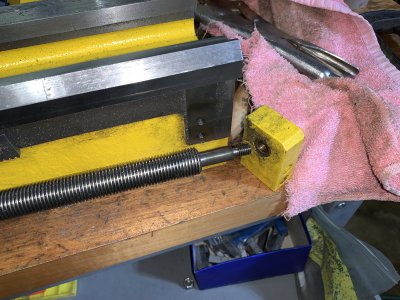
And the C clamp in place attempting to bend the shaft back.
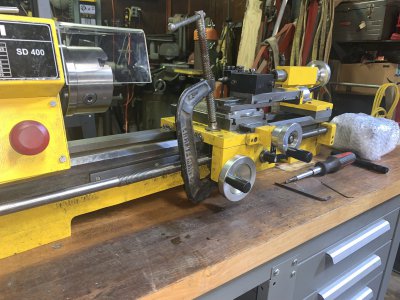
When doing any type of guerilla shaft straightening like this its important to know that you will need to bend the shaft past straight as it will spring back a bit. I used the handle of the C clamp as a crude (Very crude) micrometer dial, taking it to one point in the rotation after contact and checking, then taking it further and further as needed to get my intended result.
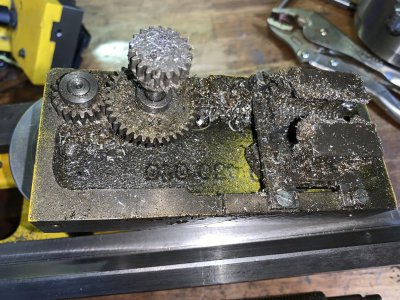
I couldn’t get it perfect by a long shot so it will still have to come apart, but it looks like they were greasing these gears so it needs disassembled for cleaning anyway.
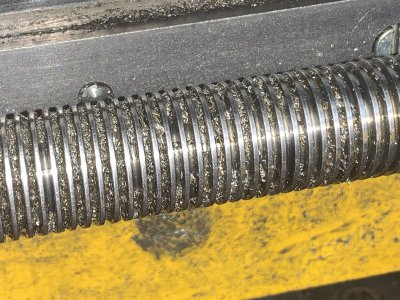
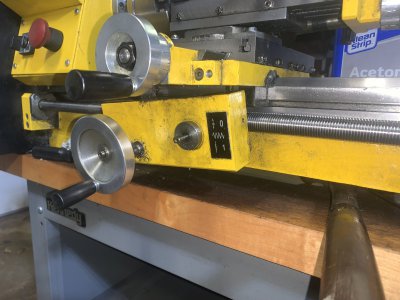
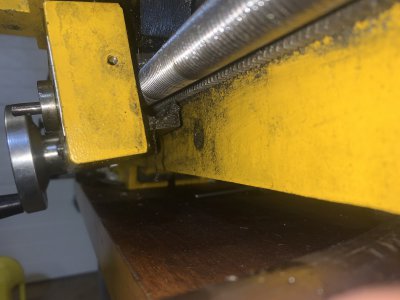
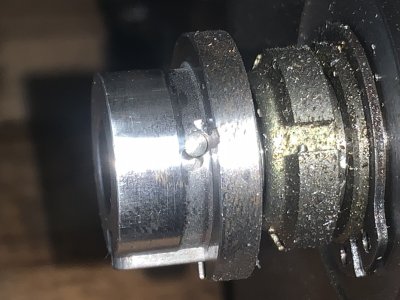
Junky, funky lead screw was nice looking once the schmutz was cleaned off.
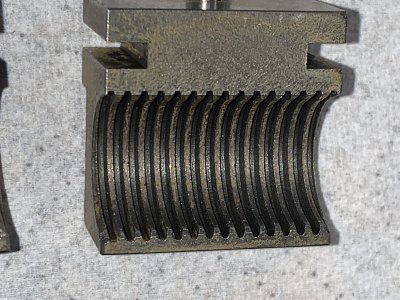
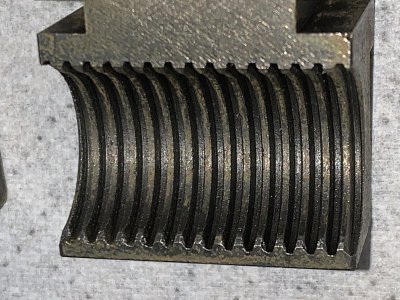
The 4 jaw looks like new and the 3 jaw looks good but it also will be taken down and cleaned.
Found this guy about 3hrs away and it wasn’t too expensive so I cobbled together the cash and went down and had a look.

When I got there I met the couple who owned the business. It was an aerospace company that was liquidating as none of the heirs wanted to run it.
Got to talking to them and in looking the machine over I discovered a big problem. This was a surprise to them and a bit of a disappointment to me as I already have 3 project threads going.

RBW's adventures in tiny Industrial machines. Prazi lathe and milling machine score.
I have lusted after machine tools since 9th grade shop when I made a working cannon, and much to my shop teachers dismay set off all of the car alarms in the neighborhood with it outside of the shop doors in the faculty parking lot. He thought this was impossible for a kid like me, but I had...
 www.hobby-machinist.com

Prazi BFE65-Littlemachineshop Big Mill table Frankenbuild, spin off thread.
This thread is a spin off of the following to keep things from becoming cluttered. Lathe Mill score thread. I got this mill head in a package deal as posted in the above thread but the milling table/base was not included. Having read everything I could find about this combo and working as a...
 www.hobby-machinist.com

Time to fix up my old Steinel SV4 milling machine.
If anyone needs a manual for this machine you can download it here. Takes it a bit to download so be patient. https://onedrive.live.com/view.aspx?resid=FF09154D1189EB47!201 What is a Steinel mill? Mine looks like this. This is where it sits as of now. I had to drag it out of its...
 www.hobby-machinist.com
Oops. Baby makes 4!

Craftsman power hacksaw rebuild.
Trying to cut things to length in a small shop can be tricky. I have a small bandsaw, but cutting round stock can be problematic and the blade speed on these is generally too high to cut steel with anyway. I had a small Dunlop branded unit years back that was in pristine condition, but I sold...
 www.hobby-machinist.com
Anyhow, we found that the lathe had suffered a crash at some point and the saddle traverse pinion gear shaft was bent and not allowing the saddle to traverse. It would travel, bind for a bit, free up and then the gear would skip.
Yeah, it was that bad.
Still, finding this I was in a good position to negotiate and I scored the lathe, tooling and this sweet KENNEDY workstation for $1100. That was about a 2/3 of their asking price which I would have gladly paid if the machine were in good running condition.
Got the lathe, stand, 3+4 jaw chucks (Prazi 4” 3 jaw and Bison 5” 4 jaw) a collet nose and closer and steady rest plus several indexable tool posts, assorted carbide tool bits and a heavily misused set of boring bars meant for a boring head that they were just screwing down in the tool holders.
I think a set of collets (first pic, bottom shelf to the left) and a couple of the change gears got lost in the shuffle and I’m hoping they find that along with the missing travel rest, but as it stands I’m ok with this.
It was raining like hell that day so I bagged the lathe in huge industrial garbage bags and left the bench nekkid to rely on all the oil soaked into the maple top to protect it from the elements.
Beauty shot of it from when I first got it unloaded.

Literally minutes after getting it home I got the shaft bent back enough with a C clamp to actually move the saddle well enough I could work on it.
The gear probably isn’t salvageable, but should be cheap enough to buy new, and the shaft I can make from tool steel and support better for less backlash.
Here’s the offending gear.
Look at that stick out!

And the C clamp in place attempting to bend the shaft back.

When doing any type of guerilla shaft straightening like this its important to know that you will need to bend the shaft past straight as it will spring back a bit. I used the handle of the C clamp as a crude (Very crude) micrometer dial, taking it to one point in the rotation after contact and checking, then taking it further and further as needed to get my intended result.
I couldn’t get it perfect by a long shot so it will still have to come apart, but it looks like they were greasing these gears so it needs disassembled for cleaning anyway.
Junky, funky lead screw was nice looking once the schmutz was cleaned off.

The 4 jaw looks like new and the 3 jaw looks good but it also will be taken down and cleaned.

Last edited:


![IMG_3846[1].JPG IMG_3846[1].JPG](https://www.hobby-machinist.com/data/attachments/426/426932-ecc9f725ab277981178955e6ccc6801b.jpg)
![IMG_3849[1].JPG IMG_3849[1].JPG](https://www.hobby-machinist.com/data/attachments/426/426933-8f113112c6dee5ff9791b499945900b7.jpg)
![IMG_3843[1].JPG IMG_3843[1].JPG](https://www.hobby-machinist.com/data/attachments/426/426931-167a77267e35373c4d2a21dbecee491c.jpg)
