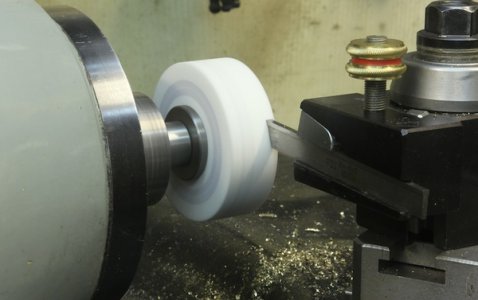
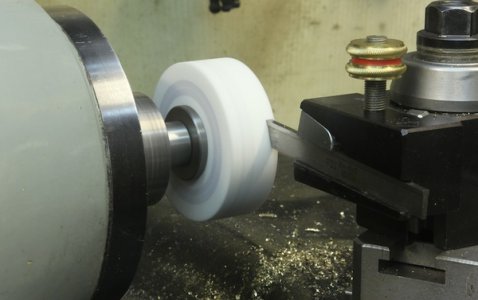
Parting For Idiots

i had this very same problem just last week. examine the parting tool very closely. the cutting tip must be the widest part of the parting blade. look closely at the part of the blade that enters the cut after the cutting tip. i bet there is a portion that is wider than the cutting tip and is ''rubbing'' on material u are cutting. if so i guarantee u this will cause a cut that is exactly like the one u are getting. at least that is what i found to be true in my case. good luck--re steve in montana.

It sounds like everything has been covered. But to recap, a parting tool has by necessity, flex and will yield to unbalanced forces. If the tool is ground at a slight angle, either in error or intentionally to cut the last remaining nub from the part, as David S has suggested, there will a force causing the tool to flex. Similarly, a dull tool, as mentioned can cause these unbalanced forces. You mentioned that you had carefully aligned the tool to be perpendicular to the axis and that your facing cuts a true so you should be able to rule out those as the cause. It is really amazing how little force is required to deflect a parting tool. On occasion, I have used one for facing the right hand side of a narrow groove and even with a few thousandths cut on aluminum, there is deflection.

It is also important to make sure the tool is vertically aligned. Too low and the the tool is scraping rather than cutting; too high and it will catch and be deflected downward and spring back up causing chatter. Mike, above, gives a very good method for vertical alignment.

I have watched You Tube videos of parting with envy as it seems that they part with ease with no chatter, perfectly true cuts, and a mirror finish on the parted piece. It is easy to forget that these are on much larger lathes than I have. Their parting tool is larger and the whole mechanism is more massive and rigid.

One possibility, if nothing else works, would be to offset the tool slightly in the direction opposing the bias you are seeing so when the tool cuts, it will deflect into a perpendicular parting cut. I would not lock down the carriage in that case but allow the tool to follow the cut.
 
I have an SB 9" clone.

What would be the maximum diameter you could part on such a small lathe ?

Biggest diameter I have ever tried was 2"

I tend to finish off with a hacksaw in a bench vice as I dont want the parted bit jumping off onto the ways
 
What would be the maximum diameter you could part on such a small lathe ?

Hi BillWood,

Certainly managing the off-cut is one aspect, but for me the bigger issue is how much of that thin parting blade I want extending from the holder. Yes the parting blades are "tall" and therefore have fairly good rigidity in the up/down direction, however, the more it sticks out the longer the lever is and it takes less force at the cutting edge to flex the entire parting blade, holder, tool-post, etc. Any "compressibility" or just plain slop is really magnified and can easily lead to chatter.

Besides tool rigidity, it also depends on material, speed, feed, and sharpness of your parting tool.

All that is my long-winded way to say that your 2 inch diameter (1" parting blade extension) sounds like a good rule of thumb limit to me.:grin:

-brino
 
Is there any reason he could not cut from the backside with the parting tool inverted to upside down, allowing the normal spindle rotation?

Did it all the time on a turret lathe. They usually have a rear tool post.
 
My parents always tried to teach me "right" way to do things. Grandpa, on the other hand, taught me, "there are two ways to do it - hard or easy."

So, taking Grandpa as a model for my work, I cheat as often as possible.

After setting the tool square to the Z axis, here's how I align the cutting edge of a parting blade, and sharpen it simultaneously:

grindcutofftool02.jpg

You may notice I have a rubber sheet lying on the cross slide and lathe ways - it stays there pretty much all the time because I hardly know from day to day what the hell I'm likely to be turning. It keeps wood dust off things, and catches the small grinding particles for a quick touchup like this one.

Where did you get that grinding wheel? That is very slick.
 
I started with a 7x10 & never did learn how to part on it so I quit trying. It wasn't till I got my 14x40 that I even tried it again. I don't know if I got more skill(probably) or it was the better bigger lathe(I know this helped) but I do know I figured out a few things I didn't know before. The part isn't what needs to be cooled. It is the tool that you have to keep lubed & cool at the cutting edge. A constant stream at least as fast as you can get it there. I sharpen this cutter often. I sharpen it with a 10° edge so it takes the nub off the part dropping first. I cut slow & steady.
 
Where did you get that grinding wheel? That is very slick.

I bought it as a tool post grinder wheel, but didn't notice the size was incompatible with my grinder, so it sat in the drawer until I had time to make a little arbor for it.
 
I am curious how this happens. Insure it is ground right as mentioned. It seems like if you had the cutoff blade turned a bit at an angle the contact with the side maybe causes this as it gets pinched and driven over gradually? I learned parting by asking questions so you will get it figured out here. there are also some videos out there on you tube on parting. I simply adjust the tool as short as needed as you did. I adjust it flat to the the faced off end of the piece and centered on the side of the work. I have also used the face of the chuck to adjust the cutoff tool flat as well and that worked too. There are several ways to get the cutoff tool adjusted to the center of the piece. Ski

A good point but parting tools are design to cut straight in and not on the sides. I have done it with thicker blades since they don't tend to flex. To check the front face use a six inch scale or straight edge. Place the edge of the scale against the front face of the blade. There shouldn't no light showing through.
 
My parents always tried to teach me "right" way to do things. Grandpa, on the other hand, taught me, "there are two ways to do it - hard or easy."

So, taking Grandpa as a model for my work, I cheat as often as possible.

After setting the tool square to the Z axis, here's how I align the cutting edge of a parting blade, and sharpen it simultaneously:

grindcutofftool02.jpg

You may notice I have a rubber sheet lying on the cross slide and lathe ways - it stays there pretty much all the time because I hardly know from day to day what the hell I'm likely to be turning. It keeps wood dust off things, and catches the small grinding particles for a quick touchup like this one.


Great Idea!!!!
 
Back
Top