-
Welcome back Guest! Did you know you can mentor other members here at H-M? If not, please check out our Relaunch of Hobby Machinist Mentoring Program!
You are using an out of date browser. It may not display this or other websites correctly.
You should upgrade or use an alternative browser.
You should upgrade or use an alternative browser.
Replacement Compound slide for Atlas 10
- Thread starter pdentrem
- Start date
Pierre,
A question regarding that new dial you made. The factory dial uses a set screw to hold in place relative to the screw, how did you do the same with your larger one? I ask because I do not see a keyway cut or set screw on yours. TIA.
Terry
A question regarding that new dial you made. The factory dial uses a set screw to hold in place relative to the screw, how did you do the same with your larger one? I ask because I do not see a keyway cut or set screw on yours. TIA.
Terry
- Joined
- Jan 28, 2011
- Messages
- 3,581
No set screw and no keyway to lock the dial on the shaft.
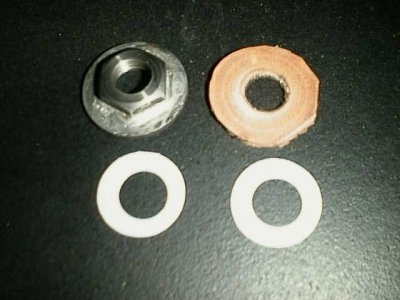
What I did was to use a couple Belleville washers, one on each side of the dial. Using the jam nut, this gave me the tension to hold the dial in position and still allow me to rotate it to any mark that I wanted to use.
Pierre
What I did was to use a couple Belleville washers, one on each side of the dial. Using the jam nut, this gave me the tension to hold the dial in position and still allow me to rotate it to any mark that I wanted to use.
Pierre
Belleville washers, I had to look that up, I'd never heard of them before. Learn something new every day.  I'm guessing from the side I can see the washer in, you've got a bit of a recess cut into the part to accept the washer on the other side as well?
Terry
Terry
- Joined
- Jan 28, 2011
- Messages
- 3,581
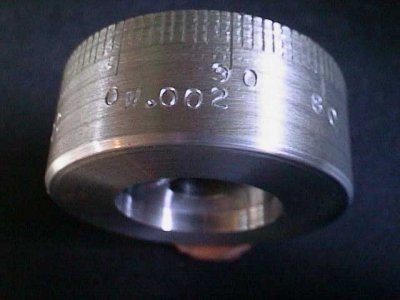
Yes, you can just make out the recess that holds the washer. I did this to have the space required as there is not a lot of space with the nuts and handle etc.
My first attempt I used a couple washers and a leather washer, which does work but needed adjusting a bit too often. I have a picture some where that shows it a bit better. I will try to find it.
Pierre
My first attempt I used a couple washers and a leather washer, which does work but needed adjusting a bit too often. I have a picture some where that shows it a bit better. I will try to find it.
Pierre
I find the idea of the large dials appealing as the tiny ones from the factory become difficult to see after a time. I've got a tendency to be heavy handed when it comes to lubricating the machine, and since I wear nitrile gloves, the oils get all over the dials making them hard to read.
Terry
Terry
- Joined
- Jan 28, 2011
- Messages
- 3,581
Hard to read! You are kidding me! The factory ones are the best thing since slice bread!
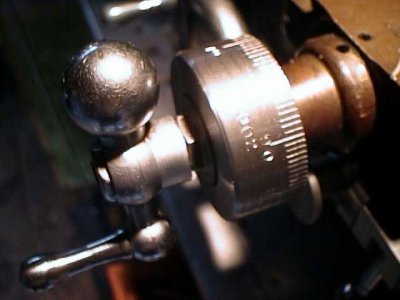
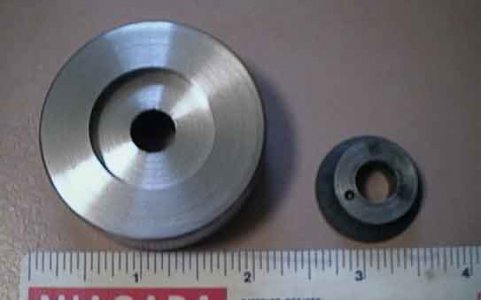
Here is a few more pictures, showing the Crossfeed dial as well. The recess was cut deeper to fit the leather clutch and washer assys. I later subbed with the before mentioned Belleville washers. The installed picture was before I made up an pointer for the larger dial. I do not have a photo of that. If you look closely at the end of the lead screw, you can see that there is not much thread sticking out. That is why you need to recess the clutch assy into the dial. Note the old dial fits in the recess!
Pierre


- Joined
- Jan 28, 2011
- Messages
- 3,581
Earlier I made mention of marking the edge of the backing plate for the chuck with 100 lines. I used those scribed lines and a wire to indicate. I then rotated the chuck one line at a time and scratched a line into the dials with the carriage. Since you are not powering the lathe the chuck stays in place and to be extra sure, you can snub it be holding the belts taut to help resist rotation.
Here is a picture of said chuck with the divisions scribed onto the back plate. There is a bit of variation between marks but at this diameter they represent a very small amount on the actual dials. Naturally this could be done on a rotary table, if one has one.
Pierre

Here is a picture of said chuck with the divisions scribed onto the back plate. There is a bit of variation between marks but at this diameter they represent a very small amount on the actual dials. Naturally this could be done on a rotary table, if one has one.
Pierre

Last edited:
