Restoring an old powered hacksaw

Finally had some time over to work on this again, but it's 32c outside so work isn't fast..

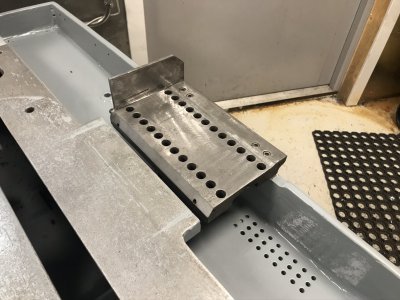
I went over the miserable saw-off support.
The bottom limit has been incorrectly set so this thing has been sawn into over and over again.
If you look close there's a removeable piece, not sure if that's a stock solution or if someone has "fixed" this before.


Chamfered the horrible cut in the mill and also smoothed over the back plate to remove those half-holes.
Gave everything a little sanding to remove burrs and various places where someone had probably used this as an anvil and created a lot of raised edges.
IMG_2285.JPEG

I took the old round bars that were chopped off and chopped them off even more and faced them in the lathe. They were a real hazard before when sticking out with sharp edges ...
They do serve a function in the sense that they plug up some holes where the coolant would leak out.


Looks a lot nicer than before I think.
It doesn't really show up in the photos but there is a slight chamfer on the outside.
 
Last edited:
Wow, what a great find. I much prefer a power hacksaw to band saws. Hope to find one of those myself.

My compliments on your work. Very nice. I am with you on paint. I can fab just about anything in metal or wood, but when it comes to painting, I can screw up a wet dream.

Looking forward to following this thread. Thank you.
 
Thanks, glad to have you along on the journey! :grin:

Since I'm still waiting to hear from Kasto on the spare parts(they were going to send me a price for the stuff I need) I decided to take a look at the motor.
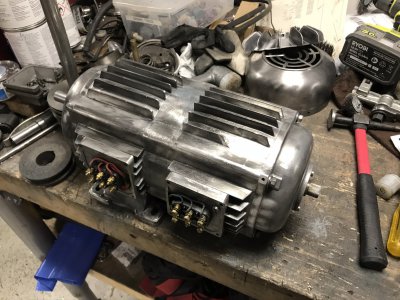
It's a pretty beefy unit ... Tried to carefully wash it with degreaser and high pressure washer to get the worst off.


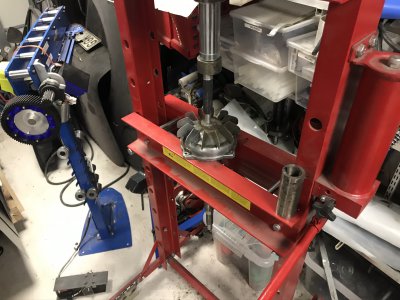
Like most motors it has a fan behind the back cover, pressed onto the shaft.


Just trying to take the thin aluminium fan off.. Having to split the motor up so I can put the shaft in the press.
This is the rear motor that runs the inner shaft. The front motor runs the outer shaft.


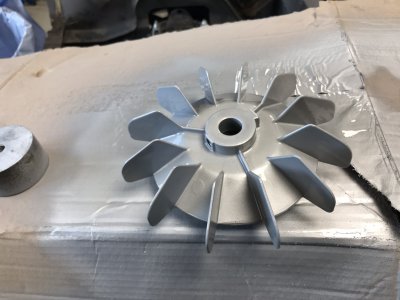
Finally got it off here so now I can start cleaning this thing properly.
Still contemplating wether to paint the motor in the same color as the base or just go with black.
I've already spent a while cleaning the fan and cap at this time.
IMG_2293.JPEG
 
Last edited:
Did you test the motor before disassembly? Interesting design. The windings and stator look in good shape, just a lot of build up from years of use and some very old grease.
 
Yep! I've run the machine before picking it apart. The only defective part is that it doesn't lower, which is most likely that broken seal in the hydraulic unit.
When running it I didn't know it was a dual motor but as far as I can remember, both pulleys spun around as they should.

I'm actually suprised how nice it seems inside. Even the bearings are smooth as butter.
 
Nice, having the motor rebuilt can get expensive.
 
Well that was ... Messy.
Scraped the worst of the mess off and used IPA and wirebrushes to get the rest.
Cleaned up pretty nice, my arms were black up to my elbows though.

Had to lathe out a little adapter to pull the inner pulley off, gotta love working with plastics.
Even on a small lathe like mine you can run some pretty high speeds and feeds!
Just machined a shoulder that was a loose press-fit into the shaft so the "adapter" wouldn't fall out too easy when pulling the pulley off.


There's also one cooling fin that's been busted, I didn't want to risk welding on the motor out of fear of warping so decided to just smooth it out.
IMG_2323.JPEG

It should now almost be ready for paint!
I did clean out all old grease and dirt before applying new and putting the motor back together.
 
Last edited:
Looks almost new. Nice job. A lot of satisfaction after going through all that to see the end product.
 
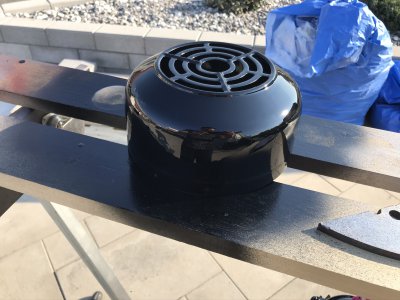
Feels like I'm starting to get a grip on painting!
Incredibly pleased with this, way over expectation.
Unfortunately I splashed some paint on the tiles so if you don't hear from me again, the wife found out. :grin:

IMG_2363.JPEG
IMG_2362.JPEG
 
Last edited:
Back
Top