Stripping And Painting A Vn Base

Paul_NJ

Registered
Registered
Joined
Sep 6, 2013
Messages
60
Thought I should start a new thread on this.

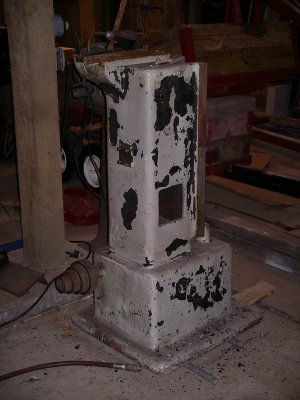
As a good winter project I hope to restore an old VN 1/2 with a mounted Bridgeport M head, and thought I might work cleaning and painting the base into this summer's project lineup. Seemed simple and quick enough. The gray paint is flaking off and after helping it along with a gasket scraper, I searched online and learned what I thought was black base coat was actually factory applied filler. Then I found photos of people sandblasting and needle scaling it down to the base metal. What? Is there a reason to go to all that trouble? I can't imagine removing what appears to be a tightly adhered coating down to bare metal, just to repaint, for aesthetics. Is it an adhesion issue? Is that why the top coat is peeling so readily? Does anyone know why a light sanding of the filler followed by a solvent wipe, wouldn't be adequate prep for something like Rustoleum, or Zero Rust? I was going to brush paint it, but if adhesion is an issue, perhaps a primer is needed? I really have no desire to do the extra effort of removing the filler unless there's a really good reason!


I'd appreciate any experience on this. Thanks
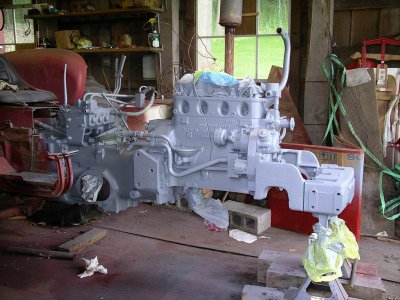
VN55.JPG
 
Paul, I have no advice for you, but wanted to say I am watching closely. I have a machine waiting for me.
-brino
 
I ran across this article, which confirms my thought of using an alkyd enamel. I just don't know how well paint adheres to the filler underlayment. Guess I'll find out!
http://americanmachinist.com/practical-ideas/covering-few-machine-painting-tips

I've had good luck over many years with Zero Rust as a primer in tractor restorations for attachments such as loader frames. Of course the sheet metal and big surfaces get primed with epoxy, but that's a whole different issue.

http://zero-rust.com/index.php
 
Hi Paul,

The filler is a paint-like substance that is lead based. There's no reason to remove it. (I think that it's made from linseed oil and powdered lead.) Go very easy if you use mineral spirits as it will dissolve the filler. Check with you local auto paint store to see what sort of wax and grease removes they have that might not attack the filler quite so much. Use a good dust mask when scraping or sanding the filler.

I would use a pull-type scraper like this to remove the loose paint:
http://www.amazon.com/Bahco-Premium-Ergonomic-Carbide-Scraper/dp/B000288LP6

Prime before using filler. Bondo No. 801 glazing and spot putty, which is like heavy paint, works great for filling small chips and scrapes. Fill large areas with body filler. I like Evercoat Rage and Easy Sand, they spreads and work very nicely. See if you can find a high fill primer to use over the filler. It makes your life so much easier because you don't have to do so much sanding to get a nice finish. Avoid epoxy paints that use an isocyanate hardener (which most do)! They are extremely toxic and need to be applied with special supplied-air respirators; leave that stuff to the pros!

Cal
 
Hello Cal,

Thanks for your advice and suggestions, and thanks particularly for the heads-up on the lead. I'll be much more careful knowing that. Today was such a miserable day here in NJ . . . almost 90 degrees with very high humidity, I spent a couple hours in the below ground level of my bank barn scraping the VN base with a thin blade 3/4 wide spatula to remove most of the paint. But in doing so discovered I had much more rough surfaces, despite the filler, than I initially thought. I lived in SE New Mexico for 3 years, so I have some idea of the heat in Tucson, but the humidity today was the killer! Anyway, I will use the Bondo glazing you mentioned to smooth out the rough areas, and do a quick naphtha wipedown. But after your warning the last thing I want to do is disturb any lead based coating.

I restore old tractors, and have a supplied-air respirator for the hardened urethane finishes, but like many things I never realized that without a full body suit you can absorb isocyanates through exposed skin. Guess that may have something to do with the asthma symptoms I've developed in later life . . .

Thanks again for your help!

Paul

IMGP0305s.JPG
 
Paul:
It looks like you have a lot of painting experience, so you may already be aware of finishing up brush-on paint with a roller.
I can't recall who on the forum mentioned it, but I tried it the other day and it really came out nice. I used a small disposable foam roller to go over brushed on paint after it was a bit tacky. The roller evened out the paint nicely, and completely removed any brush marks. Since the base on that Van Norman has some large flat areas, it may help.
As to the heat and humidity, we had 95+ temps over here in Maryland. I have a lawn tractor deck on saw horses that needs to be scraped and painted, but it just isn't getting done with this heat.
Keep up the good work.
TomKro
 
Yes sir it sure has been hot and miserable here. I had to move a rider mower yesterday dern near burnt my hands just pushin it ten feet. Let us know how the painting goes on this. Wish I could do this too lots of old machines should be brought back to life.
 
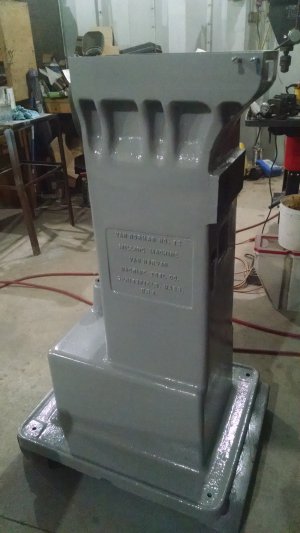
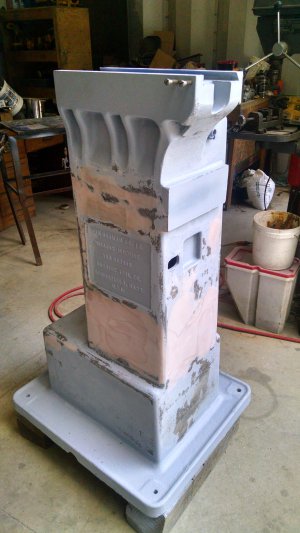
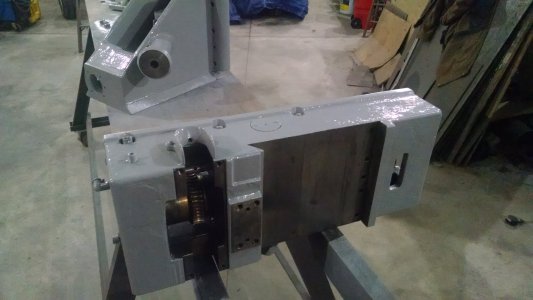
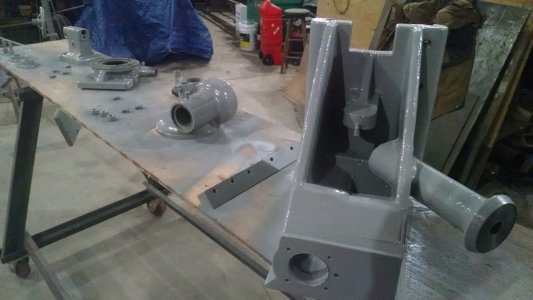
I took it down to bare metal, and glad I did. I applied body filler, to smooth out the rough areas, then primed with a urethane direct to metal primer, 2 coats. I then sprayed 2 coats of urethane single stage paint to finish it off.
IMG_20150831_201028523.jpg

IMG_20150830_180642956_HDR.jpg

This is sn# 5000 I just picked up.

Jason
 
Wow better then new . Your doing a great job on this baby. Hope we get to see it all together.
 
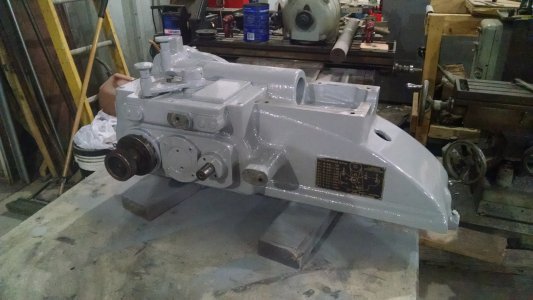
Couldn't stand the green. Plus it smelled bad, and I am pretty sure it was in the paint. Plus, it was peeling too. Within 2 weeks it should be done.
IMG_20150831_201017084.jpg
IMG_20150831_201040959.jpg
IMG_20150831_201049136.jpg

Jason
 
Back
Top