- Joined
- Jan 22, 2014
- Messages
- 578
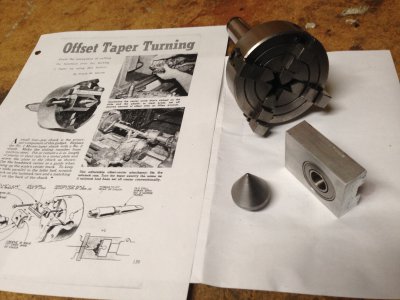
I was browsing different websites some time ago where one link led me to another, until I ran across this idea for an Offset Tailstock/taper turning fixture by a veteran machinist, Frank W. Harth. It wasn’t too long prior to this, and it was still fresh in my mind that I made something that required offsetting the tailstock. What should be a quick operation in reality takes time to set up and zero again. I spent about 20 minutes to set up the taper, 5-10 minutes to machine the part and another 20 minutes to dial it in to .0005 over a 14” round bar. Needless to say this fixture looked like a great idea. It makes turning tapers as easy as switching from a drill chuck to a live center. Also, it’s quickly repeatable to jump back and forth from Taper to Zero if needed.
I searched Craig’s/Ebay for quite a while looking for a cheap, small, used 4-jaw chuck and I found that the Unimat design is preferable because of the very low profile. I got in a few bidding wars for Unimat size chucks but let’s just say that they have some “loyal” collectors that are willing to pay most anything for them (+$170 used). I finally found a Gent on the other side of the pond that was selling them new for about $60, so I went for it.
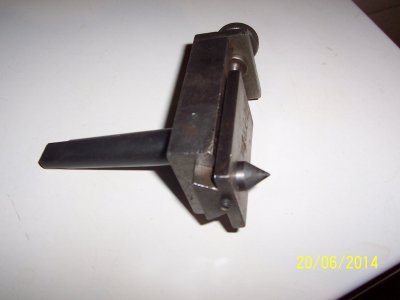
I also have a tooling surplus store nearby that sells used tooling/steel by the pound and found tons of the suggested taper shank drills to re-machine to fit the chuck. Rather than mess with annealing hard tooling to re-purpose, I found that LMS sells MT blanks w/ a “soft” end for just this purpose ($13). After turning it to size, I single-point threaded it for 14 X 1.0 to fit the chuck. I decided to make my fixture with a live center so I changed the fixture dimensions to suit my needs. I used a 1 1/8” OD X .500” ID ball bearing because that’s what I had handy. I made my live center 1” diameter with a 60* angle and hardened it to prevent wear.
Researching the hardening process was interesting. There are many thoughts on this process, some of which border on burning up the steel. My final conclusion is straight from Elmer Verburg’s own musing, “You don’t need to necessarily make it cherry red. Just bring it up to the point where a magnet is no longer attracted and quickly quench it in oil”, so that’s what I did.
Another nuance about this fixture is to be sure it’s level in the tailstock. I found that using my magnetic base digital height indicator that I use for setting tool bits easily solves this problem. I found the perfect height setting for “level” and noted it nearby for future reference (permanent marker on the backsplash). Now, I just set it and stick on the bed rail and rotate the chuck until one side of the jaws slides under it, just like setting up a tool bit.
NOTE: My jig’s range ended up being 0” to .440” of offset. Instead of making a permanent scale, I plan on measuring the offset with a dial indicator and reference a trig table for a specific angle if needed.
On another note, Elmer made his own design of something similar (on the John-Tom website under Appendixes) that doesn't use a chuck for those on a budget. Personally, I like that idea of having a mini 4-jaw chuck around for using on my G0602 (w/ MT-3 to 4 sleeve) and also for my LMS mill to hold small, irregular parts for what others call “the fiddly bits”, if the need arises.
You can find the details on these links if you’re interested in making one.
http://www.vintageprojects.com/machine-shop/offsettaperturning.pdf
http://www.ebay.com/itm/27042883054...AX:IT&_trksid=p3984.m1423.l2649#ht_1249wt_816
http://littlemachineshop.com/products/product_view.php?ProductID=2393&category=
http://www.grizzly.com/products/0-6-Digital-Fractional-Height-Gauge/T21576

Last edited by a moderator:


