The Bronze-Loaded Acme Nut Experiment - Part 1

"Would you pay $75 bucks for a lathe nut you can make?"

The key words here are "you can make". Is the quality of what you intend to make anywhere near the quality of a new nut, and will it last and perform nearly as long. As painful as it might be sometimes spending the money is the better alternative.

I was in a similar situation about 10 years ago with my Seneca Falls Star #20 lathe. In this case there was a sudden clunk and the cross slide refused to move. Upon disassembly I found the acme nut had been "repaired" on more than one occasion and was to the point it was time to be replaced. Unfortunately it was a 7/16-10 left hand thread. The once Acme threaded rod looked more like a 60* thread and it too needed replacement.

With a non functional cross slide and a nut and rod worn to the point repair would have been futile my best option was to replace them. The 7/16-10 left hand threads were "proprietary" to these machines and about the only way to acquire them was to have them made. I checked several local shops and came back with prohibitive prices. In the end I purchased a precision 3/8-10 acme platform nut that had to be modified to fit the machine, and a length of precision 3/8-10 left hand acme rod.

At the time the prices again seemed outrageous, but at least they were less expensive than having the original combination made. At that time the cost for both was around $140.00 including shipping. 10 years later the pain of the cost has long subsided, and the machine still runs fine and makes accurate parts. In retrospect I'm glad I spent the money at that time.. Looking online today I can't find either part at the vendors I searched when the machine needed service.
 
The key words here are "you can make". Is the quality of what you intend to make anywhere near the quality of a new nut, and will it last and perform nearly as long. As painful as it might be sometimes spending the money is the better alternative.
There must be times when something I make for myself ends up less than the bought-in item, but I strain to try and think of them.
Pretty near everything I make well exceeds the specification of the piece it is replacing.
Often, the thing I make is a re-design, or has extra stuff which I take the opportunity to include.
Sometimes what I make is all about function, so I can end up with something that has excellent performance, even if having to live with a less than fashionably beautiful finish.
With a non functional cross slide and a nut and rod worn to the point repair would have been futile my best option was to replace them. The 7/16-10 left hand threads were "proprietary" to these machines and about the only way to acquire them was to have them made. I checked several local shops and came back with prohibitive prices. In the end I purchased a precision 3/8-10 acme platform nut that had to be modified to fit the machine, and a length of precision 3/8-10 left hand acme rod.
I completely get it about your lathe. You pretty much had no options left, especially if you had no "second" machine to contrive a fix. Even I have never threaded a internal ACME thread before, nothing would stop me trying, short of no resource at all, which is (almost) my current situation. I even got the 29° ACME thread gauge, and started making the HSS tool. Now - I resort to "molding" a nut. In performance, it is pretty much guaranteed to work perfectly. I will allow, the final finish is not likely to be "store bought", but then, it's not the final nut I will put there.

The "final nut" should I feel inclined to make it, will have delivered me the skill to turn up ACME nuts anytime, and again, it is very likely to be a class 3B nut with an anti-backlash feature, and nothing like the overpriced stuff I have seen so far.
At the time the prices again seemed outrageous, but at least they were less expensive than having the original combination made. At that time the cost for both was around $140.00 including shipping. 10 years later the pain of the cost has long subsided, and the machine still runs fine and makes accurate parts. In retrospect I'm glad I spent the money at that time.. Looking online today I can't find either part at the vendors I searched when the machine needed service.
I have again to think about what expensive I spent on ever, whether I felt happy now that the money was well spent. I have trouble with that! There is very little that I thought was pretty much perfect, or felt like great value, and it is usually only minutes before I stumble on it's weak points. I still have the best car I ever owned, and I am still critical of things about it
 
Last edited:
OK - Bridges have been burned! The nut is now cut and modified. Until it gets some bronze, it can never be a nut again!

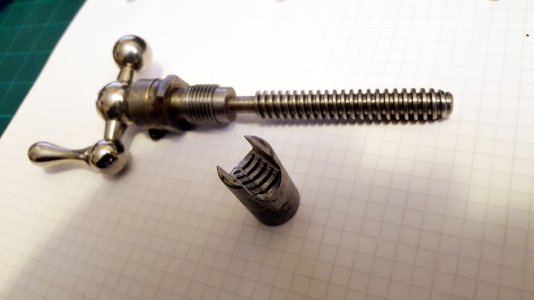
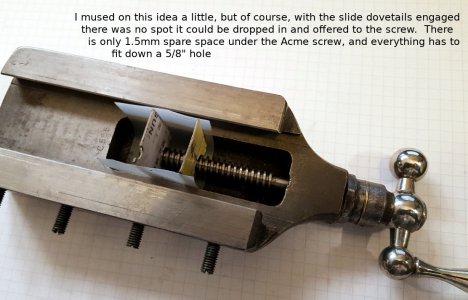
This entire scheme is constrained by the fact that the only way the nut cylinder, with all it's works can ever be put in place is to go down the 5/8" hole The plan here is to cut so wide, the screw is able to just drop in, with some little gap around the sides that will fill with bronze-epoxy, yet the tangs reach far enough to ensure good adhesion and load support to the larger thickness that will mold below.

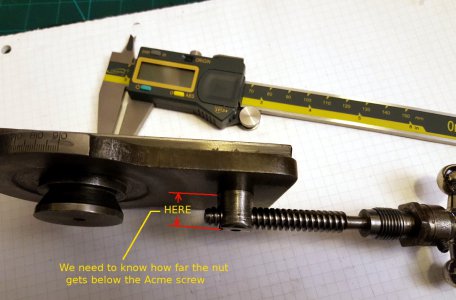
I removed all the thread from the sides, but left a remnant at the main mounting to ensure good axial load bonding. When in place, the top of the cylinder was about 3.8mm below the flush surface of the slide, so there is scope to raise the cylinder about 2 to3mm, to have a substantial amount of epoxy-bronze on that side.

The Acme screw, when in place, leaves only 1.5mm clear from the compound casting. I plan to mold with a 0.3mm plastic sheet spacer under there, to maximize the strength of the other end of the nut, with it only just a tiny bit clear of of rubbing on the casting.


Compound Nut Modified.jpg

The metal cuts leaving a black (carbon?) powdery residue. Metal sawdust! It's cast iron! Perhaps a bit short of the tough impact-resistant stuff that we call semi-steel, that they make lathe beds out of. I would have thought that rubbing on hard steel, with enough oil between, this stuff would last well, if not quite like a spindle, but I could be wrong. I can see why folk make replacement nuts entirely out of bronze. It may be possible that during WW2 and through to 1950's, non ferrous metals were expensive and in short supply.

Various (funny) mold constructions have been attempted, but I will post again when I have something.
There is a definite feeling of "OK - you've done it now! You've got waaaaay to far to turn back"!
This happens when you take a hacksaw and file and start carving on your machine!
 
Last edited:
My attitude is if it is already broken I can't hurt it by trying to fix it. Go for it and tell us how it comes out.
 
My attitude is if it is already broken I can't hurt it by trying to fix it. Go for it and tell us how it comes out.
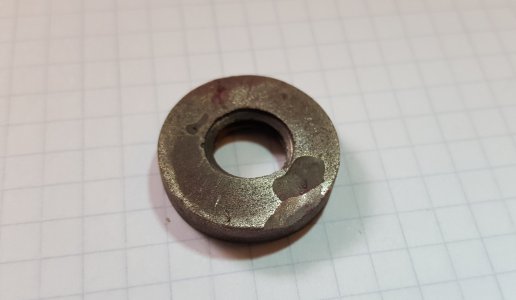
I have been taking pictures at any significant stages on the way. I think I will stay with my first guess of 4:1 bronze/epoxy mix. I filed some on the molded first test sample, and rubbed the sides on some abrasive paper. Then I re-used a small piece of 2000 grit that I fished from the waste bin, and it even seemed to take on a bit of a shine. It has cured as hard as plastics will now. I can still shave bits off it with a scalpel, but only just.
You can kind of see how much metal is in it at the surface. It does not conduct electricity.

Epoxy bronze test sample nut.jpg

I do need to do more stuff on the XRF electronics. It has to share time with this lathe repair, and other works at my place that will end up with a new shop outbuilding.
 
I’m loving this journey of yours and agree that the result you are headed for is top notch.
 
Lubrication Questions
We reach a technical question about lubrication, which might be stuff for another thread, but for now, I put it here.

Normally a Acme screw is not an exact volume fit to the nut. The axial forces are taken on the 14.5° angled sloping sides of the thread, and there is a little space between the crests of the screw, and the diameter of the internal thread in the nut. There is also a little space between the core diameter of the screw, and the tops of the internal thread in the nut.

If the replacement nut were all plastic self-lubricating, like the Delrin® AF suggested by @MrWhoopee, acetal mix with PTFE, or any other of the smooth sliding plastics, then maybe we don't care. This time, the plastic in there is a "hard" epoxy with bronze with zero excess space. It will effectively remove all oil off the screw as it moves. The epoxy is a plastic, not like metal, though it has the bronze in there, which will not easily wear the steel unless acting like a lap, with grime dust for abrasive.

1. Should one "drill out" or file the tops of the internal nut threads to leave about 0.001 gap?
2. Should one tape over the tops of the Acme screw before molding, to make a tape thickness gap for oil?
3. Should one resort to grease, or graphite, or silicones dry lube?
4. The renovation manual mentions assemble with "Type C" oil (what is that)?

The nut is "upside down" in use, and there is no hole above to deliver oil anyway. Once put together, all view of the compound screw disappears. It remains inaccessible for lube. That may not matter. It's closed off to everything, not easy to get dirty, and supposedly, does not move much, which is a logic hard to reconcile with the nut wear folks show us. OK, I accept it is often decades of it.

Not to misunderstand, even if the nut just "works" for the while between times I take it apart , and I may have tried some novel lubrication, that's OK. I would be going after more important stuff, but here I am open to suggestions. My "first shot" is going to be a zero free volume casting.
 
I haven't heard of anyone doing it, but making a "hot nut" using Delrin AF (PTFE filled acetal) might be the hot ticket, so to speak.
There was a blog about that and even a YouTube video ( I think) of where the guy used a torch...or candle to blacken up the screw with carbon. The carbon was the release agent. He then warmed the lead screw to about 300 degrees and pressed screw into a nut spit in half. The original bronze nut had some pieces of delrin which when the halves were clamped together....delrin oozed out.

I am totally simplifying the above. This guy went on with the above experiment and tried many different approaches. Im pretty sure it was on CNZ zone website. Others replicated and refined. It was widely discussed...tweaked...and modified. But...for the most part. It appeared to work pretty damned good in my opinion.
 
The paste wax on the threads will leave a tiny gap. You could try anti seize. It doesn't take much space for lubricant. A thousandth or two would be sufficient.
 
OK - I have made some progress, so now it is time to finish this phase, and start Part 2 as another, but related thread. I have no idea how this is going to work out. So much of it has amounted to "one throw straight", all-in, and the distinct possibility I will have to start over.

@mickri : From what I see of the threads made using the test run 12mm bolt, there is not as much as a thousandth gap. It reproduces even the smallest lines and marks, and the tiny print and production symbols on the inside of the plastic cap.

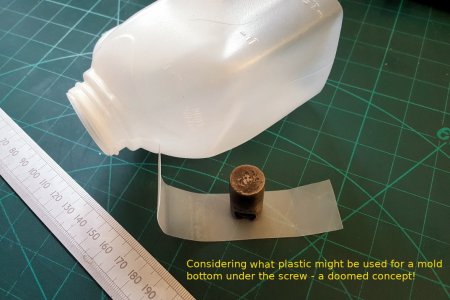
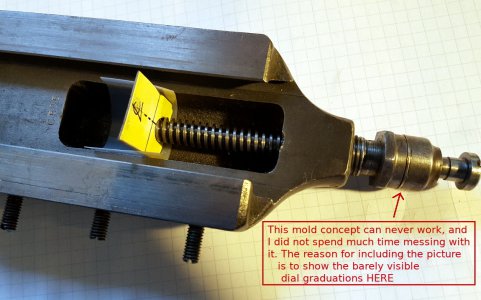
I made a silly mistake, dreaming up various possible molds, until I remembered the fumbles it took to get it all apart. Here is one of the ill-fated ideas..

Compound Nut Mold1.jpg _ Compound Nut Mold2.jpg

There is so very little room under, between the screw and the compound casting. The piece of 0.3mm milk bottle polythene would allow maximum nut strength, but of course, there is no way to put the slide and compound together without everything to do with the nut going down the 5/8" hole first. I needed something circular, the same diameter as the nut cylinder. Also, I had to get length of it just right.

Compound Nut Mold3.jpg _ Compound Nut Mold4.jpg

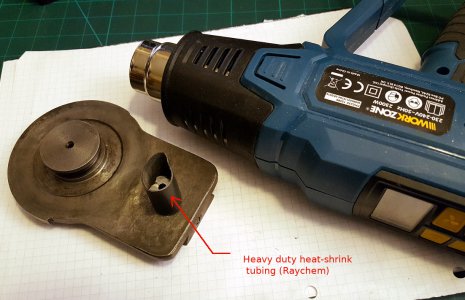
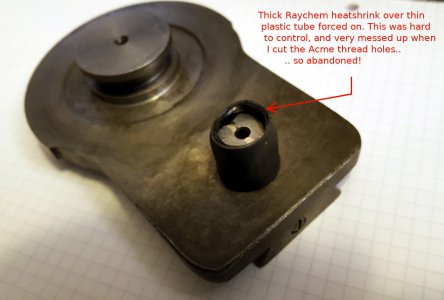
I tried a brief experiment with heat-shrink. It would have been possible this way, but I did not like it. I considered the way it was shaping to be poor, and I wanted far more deliberate control. These pictures were taken just before I did the deed, and cut the nut up in irrevocable fashion.

Compound Nut Mold5.jpg _ Compound Nut Mold6.jpg

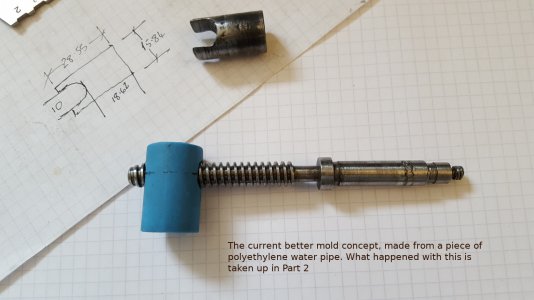
So we come to the "water pipe nut mold". Blue 20mm polythene water piping. The inside diameter was too small to fit straight over the nut cylinder. It could be "forced" if the nut was heated in boiling water, but it was a struggle to work with. What happened next was not without a bit of drama. That will be explained in Part 2, which will be posted as soon as I get some pictures off the phone, and re-sized.

Here is the idea.. Compound Nut Mold7.jpg
The nut cylinder fit to the slide is always somewhat below flush-fitting. The fit itself isn't great, but maybe that is by design - who knows. However this turns out, you will know that I mangled a (somewhat) working compound nut on a totally speculative unproven procedure that only has "it should work - maybe" going for it!
 
Back
Top