A couple of years ago Nelson and I bought some South bend Drill presses.
They were in a sorry state and needed a full overall.
Here is the state they were in.
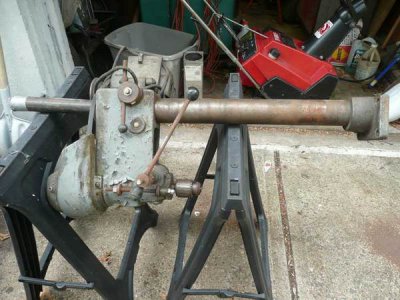
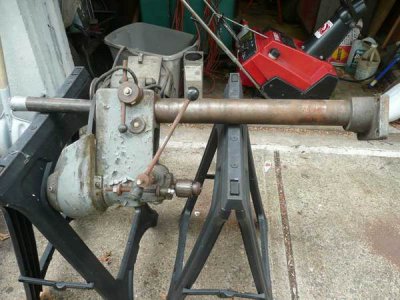
On the road to rebuilding Nelson did some apprentice type things and managed to get the ram stuck into the head and get the chuck beat up a bit.
I offered to help and he sent me a care package in the mail. That was late in april of 2011. One of the first tasks was to get the ram out. The ram had been forced into the journal while the brass thrust bearing was installed and a bit tight.
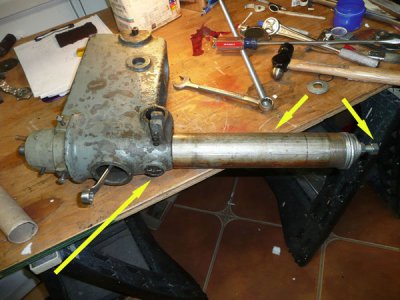
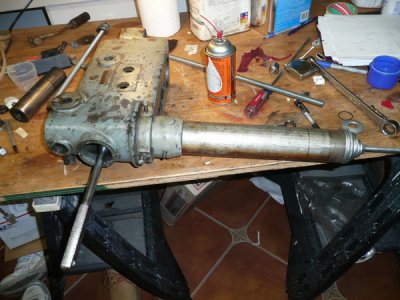
(Large yellow arrow)
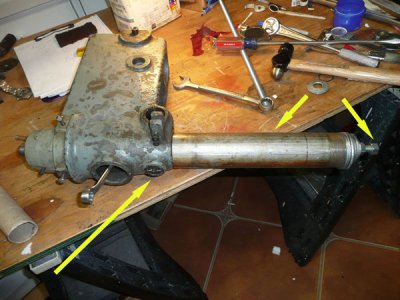
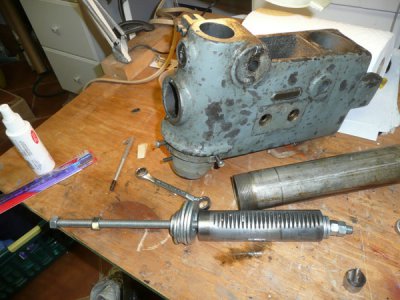
I don’t remember how the chuck and spindle came out. To remove the RAM I cut a length of pipe (Middle short arrow) and used some all thread with a bevy of washers (third rightmost arrow) to pull the ram out of the casting.
Pulling is always better than a hammer.
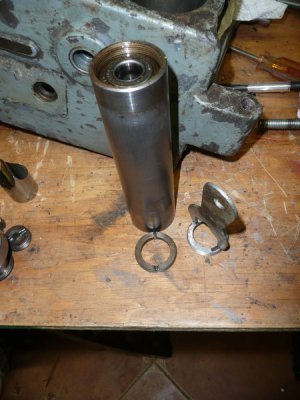
At this point the brass thrust bushing was still jammed in place. It is a multi-piece assembly and the outermost part is slotted. Of course the slot was a bit battered. Normally I would use a drag link socket to loosen such a part. The ones I had no longer would fit the part. I mounted the closest one in my Burke mill and modified the blade to fit.
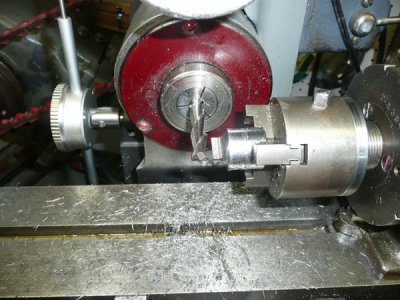
With a good fit and enough leverage and a healthy supply of Kroil the assembly came apart.
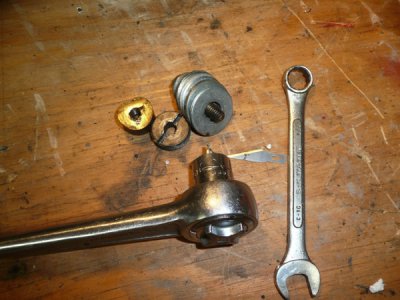
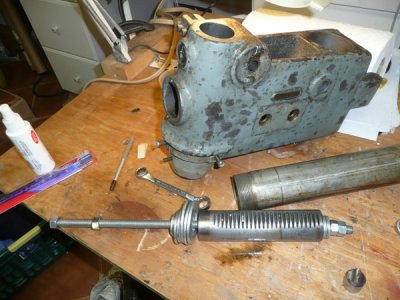
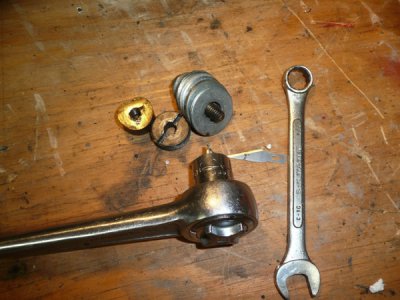
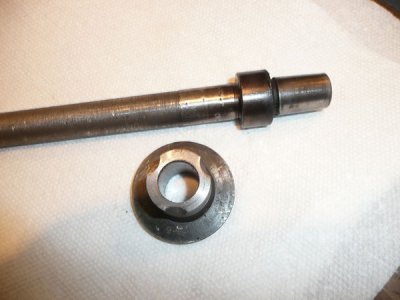
As you can see I did need to make a quick puller with some washers and a bolt to get the inner shoe out.
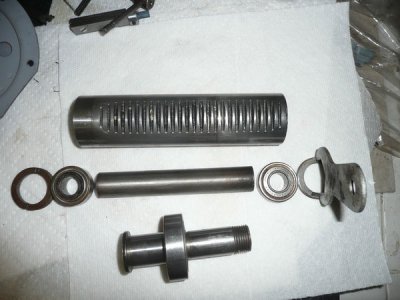
Nelsons attempts to remove the ram had damaged the bearings. He had wanted to replace them anyway. In his care package he provided new ones.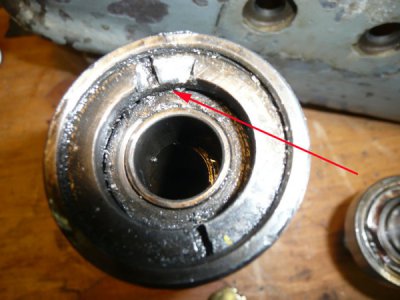
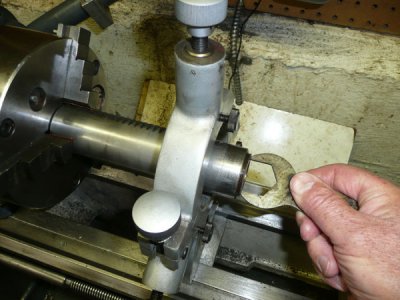
The bearings are held in place by two threaded collars which are slotted I needed to remove these.
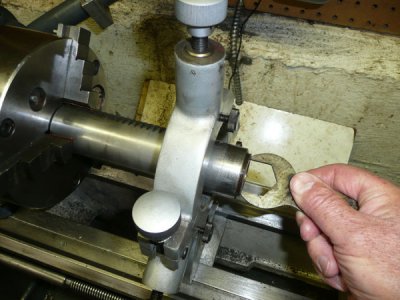
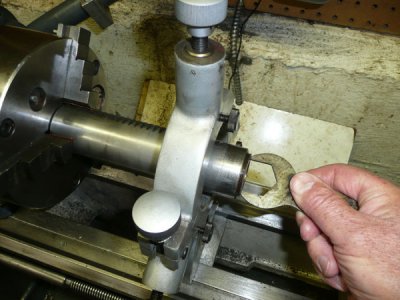
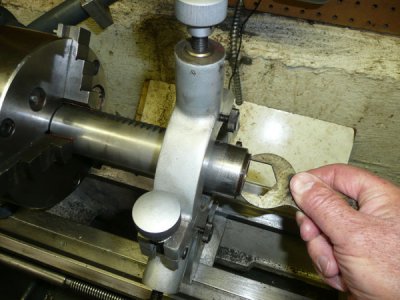
I adapted a stamped spanner that came sit some tool to do this. A little fileing and bending and it worked fine although the threads in the ram had been damaged a bit and I needed to hold the ram in the lathe wit a steady rest to get the rings out.

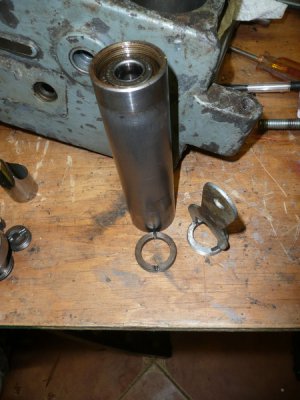
The upper baring set that holds the spindle and pulley were also in need of replacing.
I used the same technique to remove the assembly.
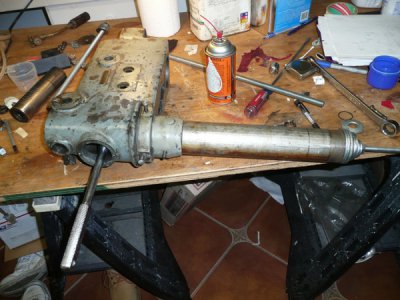
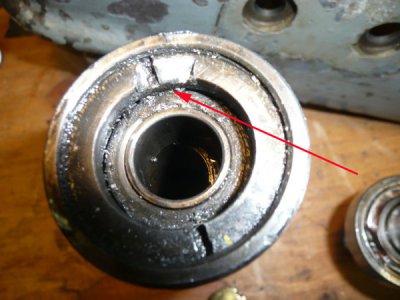
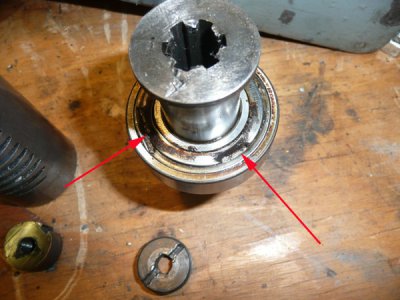
Here you can see some of the damage done to the upper bearings in the attempt to free the ram.
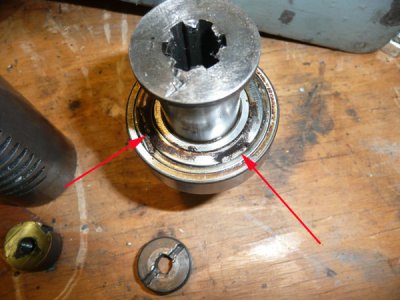
After some more effort I was able to get things apart.
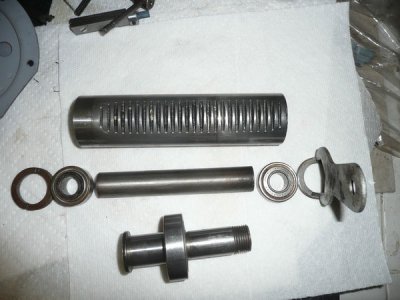
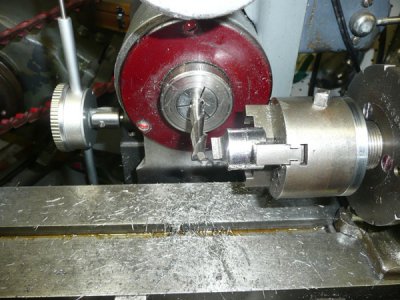
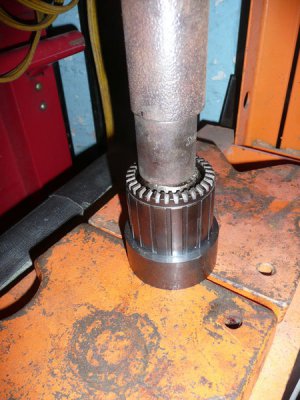
The next issue I addressed was removing the damaged chuck from the spindle. That took a long time. I was never totally successful. The chuck jaws had been peened over and were in a difficult to work with position. I was eventually able to get the outer ring off the chuck using my hydraulic press and a shop made fixture.
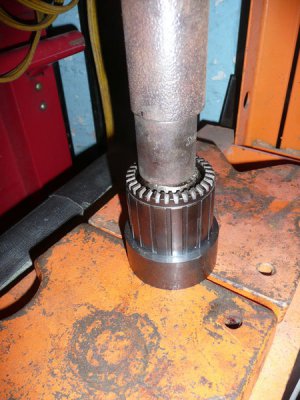
With the jaws finally out I needed to get the balance of the chuck off the spindle. It is pressed into a Jacobs taper and just would not come off. I put the DP aside and went to work on another project. That was late in December 2011. My new task was all consuming and I just was frustrated with Nelsons DP. After some prodding by Nelson I returned to the repair in early April of this year and eventually I machined off most of the chuck, (yes it was a bit hard), and got the rest pressed off.
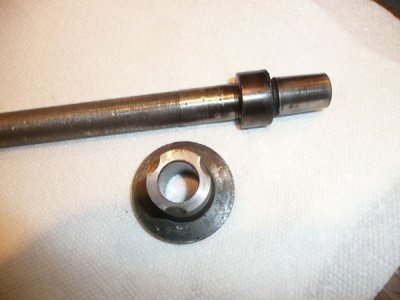
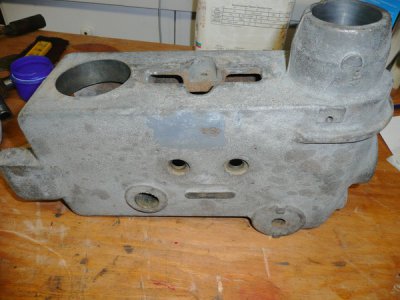
I had, however, in the mean time stripped all the old paint of the casting in my electrolytic tank and wire brushed the casting.
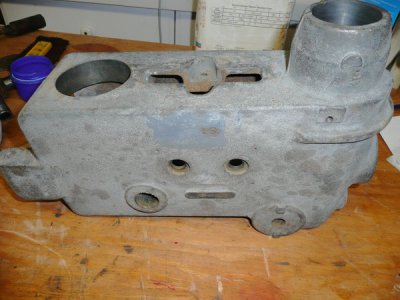
I had promised Nelson I would prime the casting but we later decided that as long as I had it masked I would also paint it.
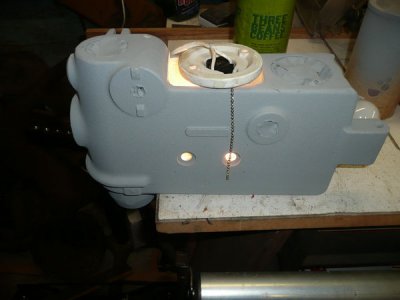
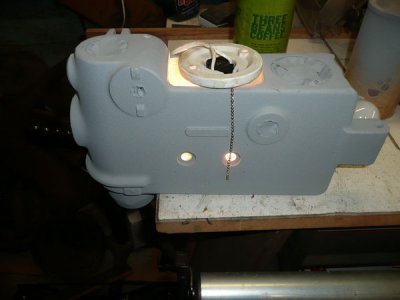
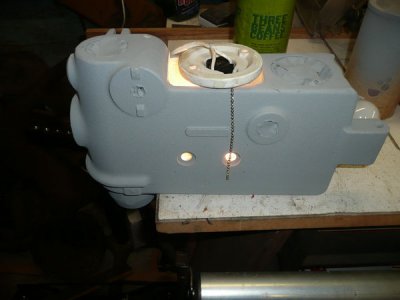
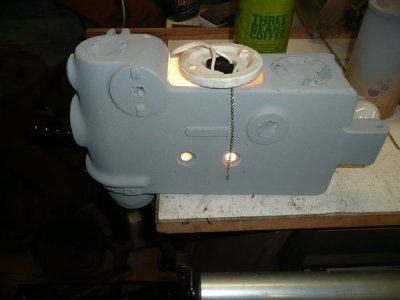
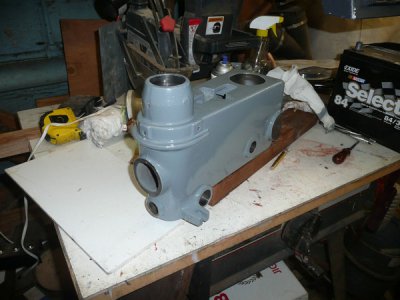
The Benjamin Moor (BM) primer is slow to dry so I stuck a 100 watt light bulb into the casting and let it sit over night. That did the job fine. I first sanded with 180 grit SiC and then primed again. Then sanded wit 200 grit and used an automotive filler (not epoxie) and sanded with 600 Grit and then sprayed BM M22. I again cooked the final point for several days with the 100 watt bult.
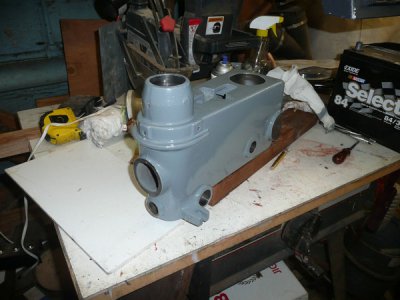
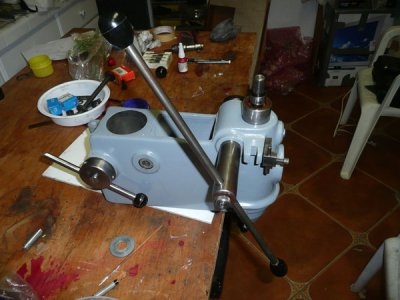
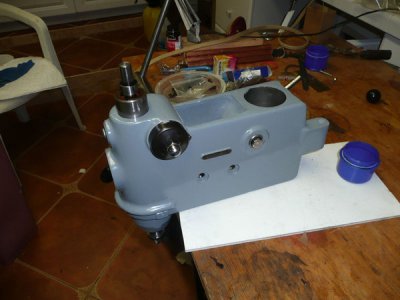
With the painting finished I cleaned up the bores with Naptha. I had assembled the ram, bearings, spacer and spindle. I had lost the retainer ring and split collar that holds the spindle in the ram so I made a new one using my SBDP as a template. I assembled the upper bearing and splined shaft an using the light bulb to heat up the casting and freezing the splined shaft in a plastic baggie to cool that assembly down with out getting moisture in the bearings, I was able to just drop the assembly into the upper bore.
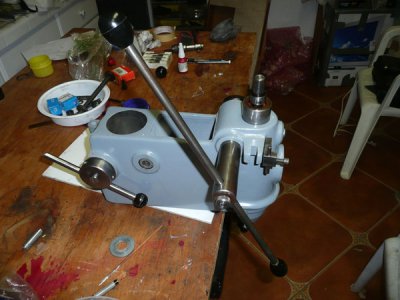
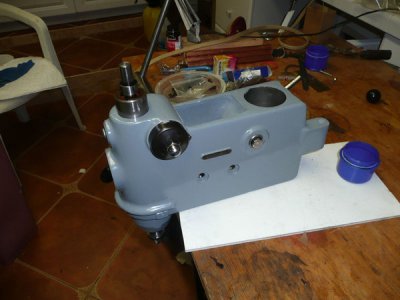
Finally after 1 year and 6 months here it is.
Moral:
Don’t let a retire person repair your drill press, if you need it!
They were in a sorry state and needed a full overall.
Here is the state they were in.

On the road to rebuilding Nelson did some apprentice type things and managed to get the ram stuck into the head and get the chuck beat up a bit.
I offered to help and he sent me a care package in the mail. That was late in april of 2011. One of the first tasks was to get the ram out. The ram had been forced into the journal while the brass thrust bearing was installed and a bit tight.
(Large yellow arrow)

I don’t remember how the chuck and spindle came out. To remove the RAM I cut a length of pipe (Middle short arrow) and used some all thread with a bevy of washers (third rightmost arrow) to pull the ram out of the casting.
Pulling is always better than a hammer.

At this point the brass thrust bushing was still jammed in place. It is a multi-piece assembly and the outermost part is slotted. Of course the slot was a bit battered. Normally I would use a drag link socket to loosen such a part. The ones I had no longer would fit the part. I mounted the closest one in my Burke mill and modified the blade to fit.

With a good fit and enough leverage and a healthy supply of Kroil the assembly came apart.

As you can see I did need to make a quick puller with some washers and a bolt to get the inner shoe out.
Nelsons attempts to remove the ram had damaged the bearings. He had wanted to replace them anyway. In his care package he provided new ones.

The bearings are held in place by two threaded collars which are slotted I needed to remove these.

I adapted a stamped spanner that came sit some tool to do this. A little fileing and bending and it worked fine although the threads in the ram had been damaged a bit and I needed to hold the ram in the lathe wit a steady rest to get the rings out.


The upper baring set that holds the spindle and pulley were also in need of replacing.
I used the same technique to remove the assembly.

Here you can see some of the damage done to the upper bearings in the attempt to free the ram.

After some more effort I was able to get things apart.

The next issue I addressed was removing the damaged chuck from the spindle. That took a long time. I was never totally successful. The chuck jaws had been peened over and were in a difficult to work with position. I was eventually able to get the outer ring off the chuck using my hydraulic press and a shop made fixture.

With the jaws finally out I needed to get the balance of the chuck off the spindle. It is pressed into a Jacobs taper and just would not come off. I put the DP aside and went to work on another project. That was late in December 2011. My new task was all consuming and I just was frustrated with Nelsons DP. After some prodding by Nelson I returned to the repair in early April of this year and eventually I machined off most of the chuck, (yes it was a bit hard), and got the rest pressed off.

I had, however, in the mean time stripped all the old paint of the casting in my electrolytic tank and wire brushed the casting.

I had promised Nelson I would prime the casting but we later decided that as long as I had it masked I would also paint it.

The Benjamin Moor (BM) primer is slow to dry so I stuck a 100 watt light bulb into the casting and let it sit over night. That did the job fine. I first sanded with 180 grit SiC and then primed again. Then sanded wit 200 grit and used an automotive filler (not epoxie) and sanded with 600 Grit and then sprayed BM M22. I again cooked the final point for several days with the 100 watt bult.

With the painting finished I cleaned up the bores with Naptha. I had assembled the ram, bearings, spacer and spindle. I had lost the retainer ring and split collar that holds the spindle in the ram so I made a new one using my SBDP as a template. I assembled the upper bearing and splined shaft an using the light bulb to heat up the casting and freezing the splined shaft in a plastic baggie to cool that assembly down with out getting moisture in the bearings, I was able to just drop the assembly into the upper bore.
Finally after 1 year and 6 months here it is.


Moral:
Don’t let a retire person repair your drill press, if you need it!


