The Stars Have Been In Alignment For Me This Week. Just Got My First Lathe, A D/r 11x36, 25-100

Well, I'm not done yet.

I found a RPC this week that I intend to buy, offered by a member of the Yahoo group.

However, I just figured out that the pulley of the Reeve's drive on my lathe has been altered, so that the center sheave of the pulley is fixed in position and does not slide side-to-side to change speeds.

So, decision time: Do I disassemble the pulley and rebuild it to spec and go with the RPC for power, as originally planned, or do I leave the pulley as-is and buy a VFD for power, so I can have the variable speeds, but risk harm to the motor down the road?

Boy, seems nothing is easy anymore.

Here are some attachments of what it is supposed to look like (photos reposted from Bill-TALUTIS):

IMG_0234[1].JPGIMG_0235[1].JPGIMG_0238[1].JPG

The center sheave has a plastic or phenolic bushing which allows it to slide side-to-side on the steel shaft. My center sheave is apparently a shop-built item that is made solid, so that it does not slide, but stays right in the middle.

Stay tuned!

IMG_0234[1].JPG IMG_0235[1].JPG IMG_0238[1].JPG
 
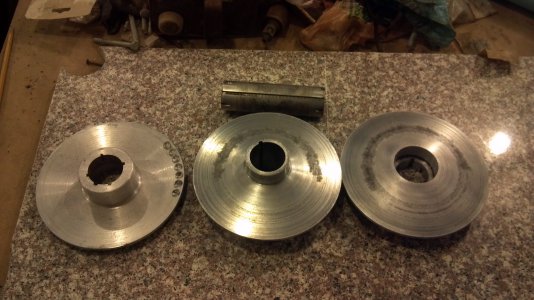
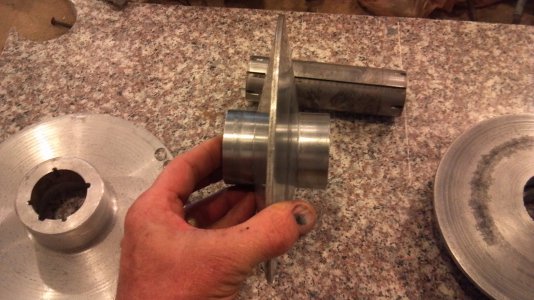
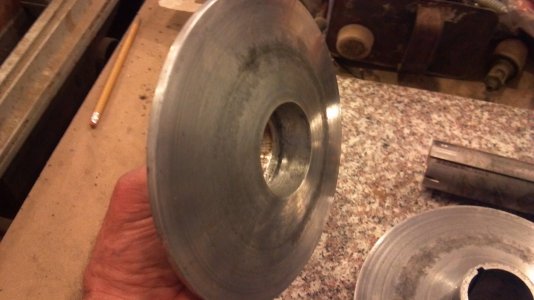
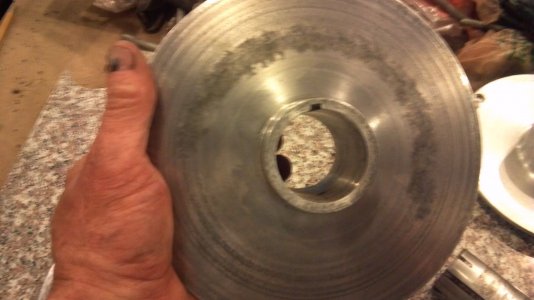
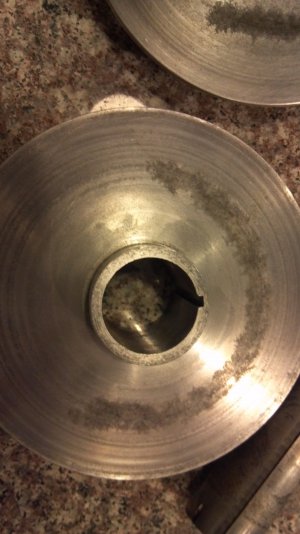
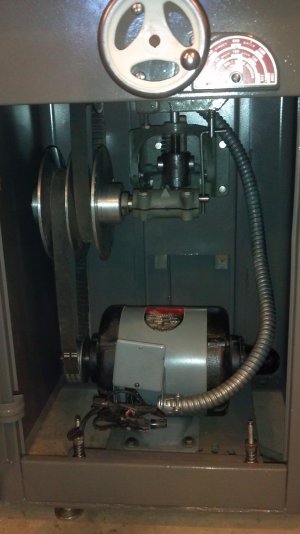
Ok! Today I got my Reeve's Drive pulley pressed apart. Happy Day! Figured out pretty quick that it is actually in good shape and it turned out to be an easy fix. My drive is made a little differently than Bill's, but functions the same. My center sheave does not have a plastic bushing, like his does and the sheaves are machined to fit together differently. Mine just slides on the steel shaft with no bushing. It is also keyed, so as to not rotate on the shaft. The center sheave was stuck in place by surface rust on the steel shaft. After having the pulley pressed apart, I cleaned everything up, de-rusted the shaft and cleaned it up, greased it, and reassembled it. Works like it is supposed to. My Reeve's drive has been re-installed in the lathe cabinet and I'm ready to go buy a RPC and get it running.

I have been offered a 3hp RPC by a member of the Yahoo Group (Thanks Dan) at a great price, and I'll pick it up on Thursday. I should have everything running by next week! Hallelujah!

Pics of my pulley parts:

2014-04-22 11.39.56.jpg2014-04-22 11.40.04.jpg2014-04-22 11.40.12.jpg2014-04-22 11.41.27.jpg2014-04-22 11.41.39.jpg

I just realized I forgot to get a pic of the part after reassembly! Oh well, here's a shot of it in the cabinet!

2014-04-10_16-23-20_994.jpg

- - - Updated - - -

I also borrowed a Starret machinist's level and leveled my lathe precisely today. Just about there!

2014-04-22 11.39.56.jpg 2014-04-22 11.40.04.jpg 2014-04-22 11.40.12.jpg 2014-04-22 11.41.27.jpg 2014-04-22 11.41.39.jpg 2014-04-10_16-23-20_994.jpg
 
IT IS ALIVE!!!!!!!!

[video]https://www.dropbox.com/s/ybjs6c5vdm12ioz/2014-04-26%2017.50.07.mp4[/video]

We'll see if this link works. If not, I'll post a youtube link. Picked up a 3hp rotary phase converter on Thursday. Got it plugged in today, but the power switch is bad. I'll pick up a new one this evening. However, I was able to bypass the switch to give the lathe a test run. I was very pleased with the way it sounds and runs. No bad gear sounds and everything is functioning as it should. I need to figure out a way to check the speeds and set the pointer on my speed contol to show the correct spindle speeds. I think that for now I'll just wind it up to the max and set the pointer at the max speed, then see where it lands on the minimum and just adjust it to the best compromise between the two that I can get.

Now to start making some chips!

You'll notice I have a South Bend carriage stop on the bed. The stop came with the lathe and it fits and functions on the DR, so I'll use it until I come up with a DR stop. It is for a South Bend 9, 10K or 10L machine.

This has been quite a project. Next up will be my cost sheet. I think I'm closing in on about $3,000. I'll get the exact numbers up next week.
 
Tony,
your machine retro looks great. Making me anxious to get mine.
ill be following this post.

- - - Updated - - -

Almost there!

I still need to install the lead screw, finish setting up the end gears, and install the gear cover. I need to head to HD to get a few allen bolts to finish assembling things. I still haven't finished re-installing the drive unit and motor either. I'll get it done this week for sure! Later on I plan to finish polishing the handwheels and a few other parts. I'm pleased with the way the cabinet turned out, for a rattle-can job.

View attachment 74070View attachment 74071View attachment 74072View attachment 74073View attachment 74074View attachment 74075

Here's a before and after of the backside of the apron. I still haven't figured out how the worm gets lubrication.

View attachment 74078View attachment 74076Tony,
this is from John on the yahoo group "There is an open oil bath which the worm runs through; its filler is accessible from the front by rotating a knurled aluminum nut - it's awkward to fill but oil is needed to minimize wear to the brass gear."
Maybe this helps on the lubrication of the worm.
 
Yeah, on that worm lubrication, I never did figure it out. The reservoir that was mentioned does not lubricate it. The worm is above the level of the reservoir. The only thing I can come up with is that the original worm bushing must be oilite and not need constant oiling. I didn't replace mine with oilite, so I expect I'll have to replace it again in a few years.
 
Hey Tony. What a fantastic job you did restoring that lathe. Your persistent enthusiasm carried you thru this project with flying colors.

I remember when you first took delivery of the lathe, and how disappointed you were with the condition of the lathe. Awesome job brother!

Marcel
 
Made a few chips this afternoon on the DR11. Just a few little test cuts to sort of get the feel of this machine and make sure everything works and sounds good. As it turned out, I couldn't get it to give me a clean cut. Lots of chatter and vibration. Thought maybe it was my HSS cutter, so I reground it, but no joy. Tried a 1/2" carbide with the same results. Tried different speeds and feed rates, no luck. I finally zeroed in on the headstock bearings. I readjusted them, tightening them a bit, and Voila! It's making nice, clean cuts for me now. I'll have to watch for heat and make sure I haven't over-tightened the bearings, but they didn't get more than a little warm with the little bit of work I gave them today. It was very gratifying to get a few nice cuts out of her, after this long restoration.

I found out I really love the vari-drive! After learning on a South Bend 9A, changing belts and taking whatever speed that gave, I absolutely love being able to change speeds on the fly, setting it exactly where I want it by feel and sound. It was really nice! I ran the speed all the way to the stops in both directions and set the indicator needle. I was quite pleased with the way it worked. Not as loud as I had thought it would be either.

I also found I may have missed something when I reassembled the apron. After making a cut using the carriage power feed, I heard a clicking sound coming from the apron. Turned out the half-nut lever had fallen a little and the half-nuts threads were clicking on the threads of the lead screw. That's not supposed to happen. It would be a sad thing if the half-nuts were to engage while the carriage feed or cross feed was engaged. I found that I can engage the half-nuts with the carriage/cross slide power feed lever in any position. That's not supposed to happen either. There is supposed to be a lock-out that will not allow the half-nuts to engage unless the power feed lever is in the center position. I'm going to have to go back in and see what I missed.

One other thing I found today. I don't like the leveling feet I installed on the cabinet. It isn't the quality of them, they are very good ones from McMaster-Carr, and not cheap. It's just that they allow too much vibration. Too much movement of the cabinet, even though I carefully leveled the cabinet and then leveled the lathe with a machinist level. When I get settled in my new location in Utah, I plan to remove the feet and bolt the cabinet to the floor, then re-level the lathe bed.

We're having fun now!:terrific:
 
Very nice job on the lathe! Looks like a new one. Thanks for sharing.

David
 
I have a bunch of 3/8" ID shim washers that are .006 thick, along with some fender washers, you can get it real level...Tim
 
Back
Top