Tooth thickness

Wino1442

Registered
Registered
Joined
Jun 21, 2019
Messages
66
Hi all....I cut a gear last night and when I finished it I could see that the top land of the teeth became thinner and thinner in width as I went around the gear. Hopefully you can see that on the photos I've posted. My question is...what would cause this? I thought it may have been because I wasn't exactly on center, but when I got to the original staring point after the 1st cut everything seemed fine...with the machine off the cutter passed easily through where I had already cut.
Any thoughts, opinions, or suggestions would be greatly appreciated. Thank
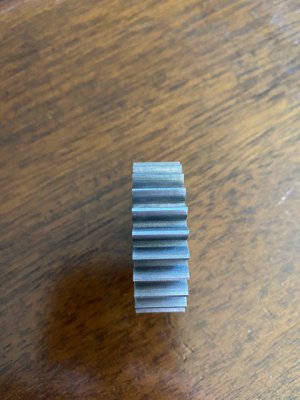
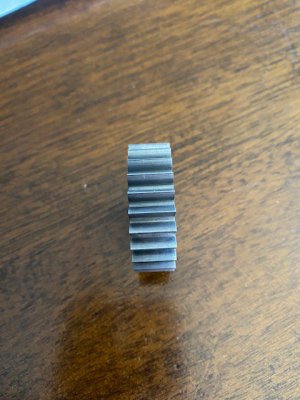

IMG_3889.jpg
IMG_3890.jpg
 
The only thing I could think of that would cause this is an increased depth-of-cut (since the flats are the same on both sides). Could your cutter arbor been slipping as you went, or perhaps an axis been unlocked?

Horizontal or vertical mill? In a vertical mill, it would likely be the 'Y' axis (toward/away from the operator) that moved, in a Horizontal mill (also 'Y' I'm told), it would have to be table up/down.

EDIT: Strike through, the arbor slipping wouldn't have caused this...

ALSO, I thought a bit more after reading that the cut still looks 'right' when you re-attempt it, my guess would be that this could be runout in either the gear-blank or the spinning-indexer tool that you used.
 
Arbor run out does not cause that sort of defect, it just causes all the teeth of the cutter to not cut in sucession, that is, a few teeth are doing most of the work, and are liable to cause more distinct revolution marks in the cut.
 
Arbor run out does not cause that sort of defect, it just causes all the teeth of the cutter to not cut in sucession, that is, a few teeth are doing most of the work, and are liable to cause more distinct revolution marks in the cut.
I think he means the arbor to which the gear blank was mounted.
 
I second the runout in the blank. Since returning to the first cut and you're not having any problem, that eliminates slippage. A simple test is to tun a dial indicator on the teeth while rotating the blank. Any runout will be obvious.
 
With the gear off the arbor it is hard to tell if it was due to run out or concentrically of the gear blank as cut.

What you can do is to measure the distance from the center bore to the root and to the tip of each tooth to see if they are concentric to the center bore.
I am guessing that either the root or the tips are not concentric to the center bore.
 
I wonder if the blank is concentric, if it is, that measurement would not help discover the defect, more likely, the arbor was not running true .
 
After taking the measurements recommended by Flyinfool I get a .010 difference in readings when measuring from the bore to the root on roots that are 180° apart.
I am using a vertical mill and when I was feeding in along the X-axis I did notice that as the blank rotated that the cutter started making contact with the blank at different distances....I had zeroed the X-axis on the DRO on the 1st tooth when I could hear the cutter make contact with the blank, so as I moved around the blank I would have to advance the X-axis a little further each time until the cutter made contact ( hope I explained that well enough). I didn't think much of it while it was happening, but as I think about it more now it makes sense that that would happen if the bore is not concentric to the diameter. I have a feeling I know how that happened too. The bore is 3/4" and my 3/4" reamer has a 5/8" shaft, which does not fit into the tailstock drill chuck. So, I moved the blank over to the mill and used a co-axial centering indicator to center it and then reamed the hole. Must not have been centered ...

I'd like to thank everyone for their responses...I appreciate hearing and learning from those that are way more experienced than me.
 
Back
Top