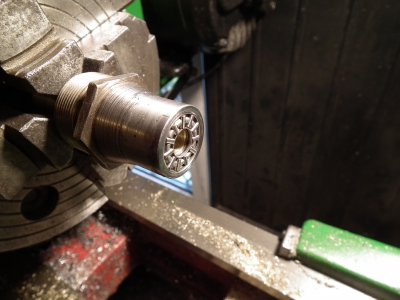
Yet another large direct reading cross slide dial...

Hi Bernard,
You have done a very nice job. I like the split level effect with the numbers :)

It looks like there are 4 main pieces to your dial. Is that correct?
would it be possible for you to do a rough sketch with dimminesions? ( free hand would do fine)

This would save me going though the same trial and error process.
My lathe is a 10" hoping yours is the same.

I understand you stuck the PDF printout to a piece of plywood. How did you attach it to the back of the spindle?

Thanks in advance for any assistance.
David
 
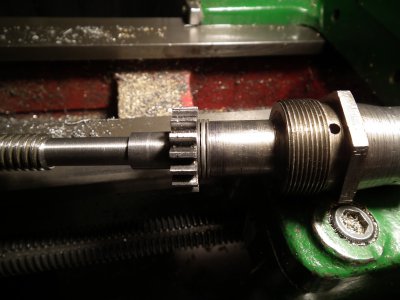
Now fitted two roller thrust bearings and made a new bush, which make it silky smooth, it feels like a Rolls Royce lathe now...grin.gif

Had to build up the bearing holder part with weld to get enough depth to machine the housing at the dial end, the bush was worn so made a longer brass one. At the other end just pressed the Oilite bearing in a bit and took off the width of the thrust bearing.

DSCF2609.JPG

DSCF2611.JPG

bernard

DSCF2609.JPG DSCF2611.JPG grin.gif
 
Hi Bernard,
You have done a very nice job. I like the split level effect with the numbers :)

It looks like there are 4 main pieces to your dial. Is that correct?
would it be possible for you to do a rough sketch with dimminesions? ( free hand would do fine)

This would save me going though the same trial and error process.
My lathe is a 10" hoping yours is the same.

I understand you stuck the PDF printout to a piece of plywood. How did you attach it to the back of the spindle?

Thanks in advance for any assistance.
David

Hi David, The problem with dimensions and drawings it that I have a couple of the Atlas part 10F-46 that are different sized and angles, they can't be relied on to be concentric either!

What I did was to bore a piece of ally to fit the end, then bore a short taper at 10 degrees, take the part out of the chuck and trial fit, mark the length and part it off a little too long, then face it to suit.

To hold the index disc I made an ally plug with a threaded hole in it to fit the spindle, musta got lucky because it was such a good fit it just tapped in place and stayed there.

I'll get some rough dimensions of the rest and have a go at a Sketchup drawing as I'm sort of getting the hang of that now...:bitingnails:

Bernard
 
Really nice job on the dial and that's a very good idea of making a template and mounting it on the back of the spindle.

And on a humorous note: -Now be careful not to turn the lathe on with the template in there, you might hypnotize yourself and never snap out of it :)...

Ray
 
Really nice job on the dial and that's a very good idea of making a template and mounting it on the back of the spindle.

And on a humorous note: -Now be careful not to turn the lathe on with the template in there, you might hypnotize yourself and never snap out of it :)...

Ray

I'm working on a dial with 365 divisions so I can time travel to find out what happened, because sometimes I get a premonition that I'm about to get deja vous

Bernard
 
Bernard,
Hey I just noticed that there are 200 graduations on the PDF template instead of just 100.
Fantastic soon I won't have to remember to half everything with turning diameters :)

What size number stamps did you use?
I'm going to have to buy some as I don't have any.
I should be able to make a stamp guide in my tool post.

I think I skip any Rolls Royce Options and make it as simple as I can.
I'll opt for a grub screw as a locking mechanism to cut down on the number of parts I need to make.

Thanks
David
 
The 200 divs was my main reason for making the new dial, it makes things a whole lot easier for me, specially as I haven't been at this lathe driving lark long enough to always remember the halving thing, and not yet got set in my ways!

Number stamps where 2mm size,

I'm hoping you have no real need for dimensions now if you're using a grub screw, as I'd rather not have to pull it apart again.

Bernard
 
Last edited:
Bernard
I do not see a pic of the dial by itself.
I would like to do this for my Logan but I am unable to follow how it works exactly

more advise would be helpful


Bill
 
Last edited by a moderator:
Nice job I did something similar to mine it works great!! Thanks for the PDF I will make good use of it how did you lock it in at the end of the spindle??? Thanks .. Ray
 
Back
Top