Cast iron brazing questions (with photos)

A carbon rod of the correct size would be an excellent plug, bronze/brazing alloys won’t stick.
Bevel the crack zones all the way around
Preheat between 300 and 400 degrees F
Braze it up ( Silicon Bronze is excellent)
Allow to slowly cool in sand, vermiculite, ash, under a thermal blanket, or in a preheated bbq
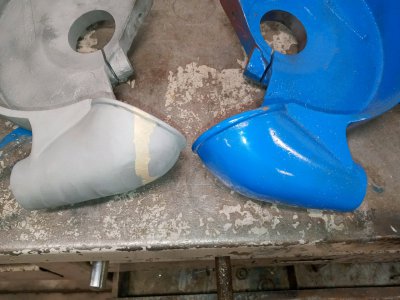
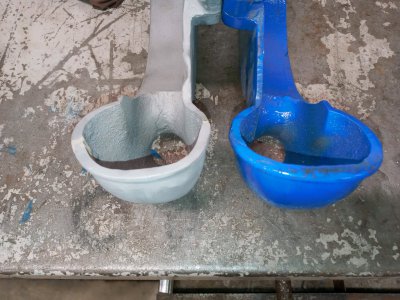
Finish with whatever you choose-sanding, grinding, bead blasting, etc.
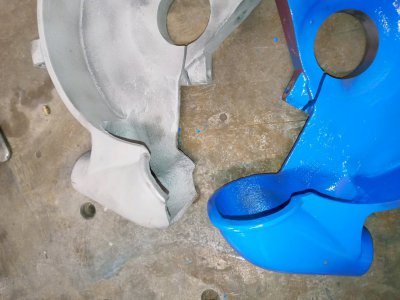
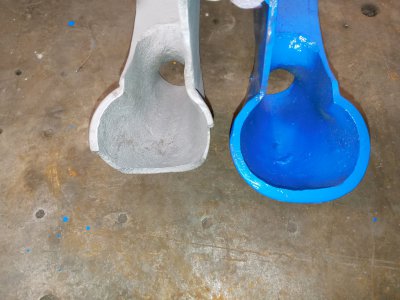
Paint
Install
 
I have brazed my share of cast iron in my lifetime because I was a professional welder for my early years. Brazing is my preferred method. Refractory clay would be the best to fill the eye. That way when it cools it could just be crumbled out of the hole. As has already been mentioned pre heat and cool slowly. The last job i did about a month ago I used Ni-Rod 55% nickel and arc welded a sheave for my 5913 Clausing Lathe. The process I used was to put the sheave on an electric Hot plate from my kitchen. (Out in my shop of course) Measuring with a thermal gun I got it pre heated as close to 400 degrees F as I could with the hot plate. I had a bucket of cool ashes from my neighbor's wood stove ready for the cooling bed. Removed the Sheave from the Hot plate Grounded it, and Arc welded it with short beads, (Short beads keep from overheating it. As was already mentioned bevel the 2 parts to be welded ahead of pre-heat. Don't be concerned that the short, interrupted beads don't look pristine because NI-Rod never does. Some of the weld is going to be machined/ground off before ASSY anyway. Immediately after you finish welding it completely cover it with ashes top and bottom in a steel bucket or pan and leave it to cool till next day. Upon inspection the next day look for cracks and do not confuse the undercut made by the welding process with a crack. If you are satisfied with the weld, then finish grind /file it to fit. I only chose Ni-rod over Oxy-Acte welding because I turned in my tanks last year. After leasing them for 45 years the anual lease was just too expensive to use them once or twice a year. Hope this helps.
 
Behold the broken gear lever for the QCGB on my late model Atlas/Craftsman 12. Like to take a shot at fixing it before try finding a replacement. I’ve got a gas welding outfit and a couple different kinds of fluxed brazing rod. I did enough brazing in HS to give me courage. Also I’m cheap. So why not, right…

My question(s) – can I save myself some work and keep filler metal out of the bore by leaving a stainless dowel in the void while brazing? Am I correct to assume the brass won’t stick to the stainless and should press out after everything’s cooled? Is there a better procedure with the resources I have? Or is there a better filler metal (on Amazon) for what I’m trying to do?

WWTFD? (What would the forum do…)

View attachment 432719View attachment 432720View attachment 432721

That would be a simple brazing job.
Take the pin out and clamp the mating parts together.
Vee out along the crack lines but Not all the way to the bore. Then braze it up. You will likely need to ream the bore back to spec afterwards.
 
As mentioned by others, the stainless steel slug/dowel will act as a heatsink and draw too much heat away from the other areas. Also, the filler metal will stick to the stainless steel slug. A graphite slug/dowel will prevent filler material from sticking but a quality braze job would most likely require you to braze a prepared crack from inside the bore as well. I don't see any way to avoid having to machine the hole once the repair is made.

Good luck!
 
When I first got an Atlas 15 yrs ago, it fell over on it's face and broke those two control arms in half. Only halfway knowing what I was doing. I heated them to red hot with the O/A torch, slathered on the brass brazing rod, It left a thick layer of maybe 50 thou on the outside of the crack. I haven't a clue if any got into the crack itself. I guess you could think of it a a shrink fit sleeve. I just left it to air cool.

Wasn't pretty, and I now know is wasn't "the right way", but I never had to even think about it again. It was working just fine when I traded up for a Sebastian last year. This is an extremely over-engineered, low stress part.
 
i've welded a fair amount of cast iron over the years. primarily exhaust manifolds.
1. never V the crack. U it
2. i always pre and post heated with the o/a
3. the only time i had a problem was with multiple breaks i bolted another manifold to the broken one to align everything. it kept re cracking when cooling until it dawned on me to loosen the bolts so don't clamp tightly. i used cast iron filler. brass should be easier to work with
 
I think of braze as a high temperature glue. Unlike welding, there is no fusion with the parent material. Somewhere back in the distant past, I recall seeing that braze works best with about a .030" gap. To that end, veeing a brazed joint is not necessary. What is necessary is to get wetting of the braze to the faces to be joined. Proper cleaning of the surfaces and use if a good flux will facilitate.

Keeping the part hot is essential. A forge works best as it has a lower temperature than an oxyacetylene flame but still can provide the required heat. For larger parts, I use our wood burning furnace. I get a good bed of burning charcoal and lay the part in to soak.

If using a torch, propane is usually not adequate for this task. MAPP gas would do the job but is no longer available. Forced air propane, oxypropane, or oxyacetylene will work. I build a temporary oven by stacking firebrick to retain the heat. Lay two bricks out flat for the base and stack three bricks on top to make the walls. Then lay two more bricks on top for the roof. Leave an opening just large enough to work. Preheat the oven with your torch, preferably so the interior is a red heat. This will minimize heat loss from your part. Then heat the part to brazing temperature and apply the rod. The braze should flow into the joint and give a solid repair. Leave the part on the makeshift oven to cool slowly. Remove the part and clean off any excess flux and braze and you're done..
 
Another advantage to brazing is it works very well to join dissimilar metals.
Here is a fix I did on an old grinder cover a couple of years ago.
The wheel cup was broken when I got it. I used a trailer ball as a makeshift curved anvil and used the rosebud for heat to fashion a cup out of 12ga steel.
Lots of heating, pounding, cutting, grinding and fitting.
I used mig to creat the lip.
Then I brazed it on to the cast iron cover, sanded it smooth and sandblasted it for paint.
It is not exact but it serves as intended.
 

Attachments

  • 2021-06-09_03_46_23.jpg
    2021-06-09_03_46_23.jpg
    401.4 KB · Views: 14
  • 2021-06-09_03_46_37.jpg
    2021-06-09_03_46_37.jpg
    480.9 KB · Views: 14
  • 2021-06-17_04_06_23.jpg
    2021-06-17_04_06_23.jpg
    504.8 KB · Views: 14
  • 2021-06-17_04_06_38.jpg
    2021-06-17_04_06_38.jpg
    591 KB · Views: 14
I think of braze as a high temperature glue. Unlike welding, there is no fusion with the parent material. Somewhere back in the distant past, I recall seeing that braze works best with about a .030" gap. To that end, veeing a brazed joint is not necessary. What is necessary is to get wetting of the braze to the faces to be joined. Proper cleaning of the surfaces and use if a good flux will facilitate.

Keeping the part hot is essential. A forge works best as it has a lower temperature than an oxyacetylene flame but still can provide the required heat. For larger parts, I use our wood burning furnace. I get a good bed of burning charcoal and lay the part in to soak.

If using a torch, propane is usually not adequate for this task. MAPP gas would do the job but is no longer available. Forced air propane, oxypropane, or oxyacetylene will work. I build a temporary oven by stacking firebrick to retain the heat. Lay two bricks out flat for the base and stack three bricks on top to make the walls. Then lay two more bricks on top for the roof. Leave an opening just large enough to work. Preheat the oven with your torch, preferably so the interior is a red heat. This will minimize heat loss from your part. Then heat the part to brazing temperature and apply the rod. The braze should flow into the joint and give a solid repair. Leave the part on the makeshift oven to cool slowly. Remove the part and clean off any excess flux and braze and you're done..
I was told years ago to drill a 1/8" hole ( and do ) at the both ends of the split to avoid the split from continuing. What are your thoughts on that practice ?.
 
Back
Top