Recently I got interested in growing mushrooms and so I needed a pressure cooker to sterilize the growing media and one large enough to sterilize a log should I choose to grow them on it.
Before I begin I should do the usual disclaimer, that I did this for my own use and my own skills as a welder and if anyone does do this or copies what I did then they accept all respossibility and liability should something go wrong, I am explaining this as to what I did and I make no guarantees that this may work for others or be safe. Now that's out of the way:
My previous one I had when growing orchids I threw out when I closed down my business, I made that one out of a 60lt propane gas bottle and heated it by putting a 3 burner gas barbeque under it which took a while to heat up as the steel bottle was exposed and had a tremendous amount of heat loss because of this fact. This one is based on a 250L electric hot water heater and I used this size so should I want to, I can put in a 110cm log and sterilize it and it has the benefit of being well insulated so the heat loss will be significantly less. The advantagous of using a gas bottle from a safety point of view as against the hot water heater is that the gas bottles use much thicker steel and have a much higher working pressure than the hot water service, there by having a greater safety margin but no insulation. Having said that if you go for a hotwater heater cylinder, you have to make sure that the steel hasn't been compromised and corroded and is structurally sound.
Most hot water heaters are rated to about 850-1000Kpa working pressure which is approx 125-145PSI, and about 8-10 times more than the pressure that a Pressure Cooker uses, allowing for the fact that you are modifying the cylinder by putting in a door and using air/steam instead of water, (water is safer as it tends to leak rather than explode in the event of a major cylinder rupture). Bear in mind that 15PSI is a relatively low pressure, what makes it dangerous is the tank diameter, so the bigger the tank the more force is on the walls trying to expand and turn it into a balloon and burst open.
Back to the story, I have been welding for over 40 years so don't have any concerns with my welds not being x'rayed to prove that it won't go bang, at least not for my working pressure. If I was working on something commercial or higher pressure than I absolutely would have them tested as I could not afford the liabilty should something go wrong. Also if that was the case I wouldn't be using a used hot water service and would use new steel and insulate it after it was built and tested. Provided that you put in the pressure safety valves they should keep the pressure down to the safe working level. Can't count the number of times the foam caught on fire when I welded near it though.
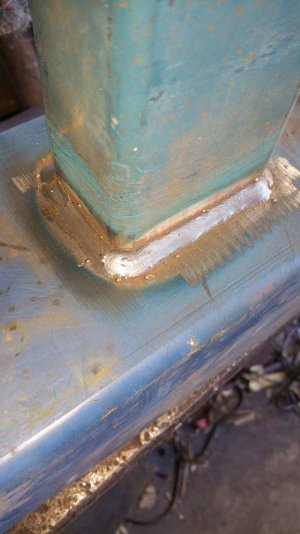
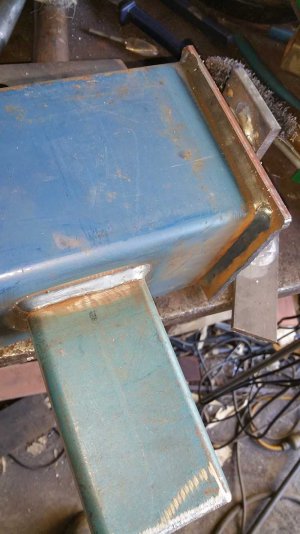
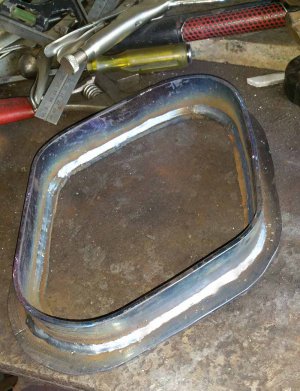
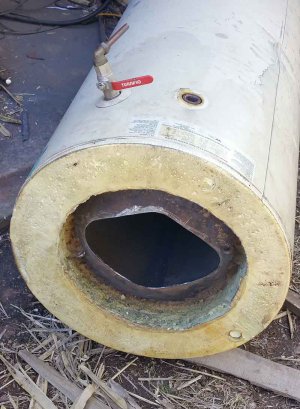
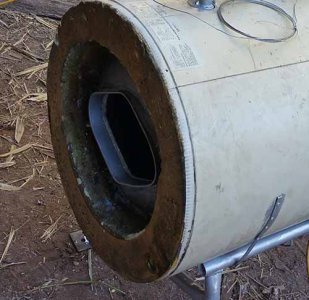
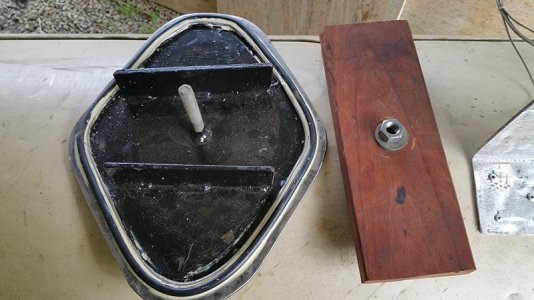
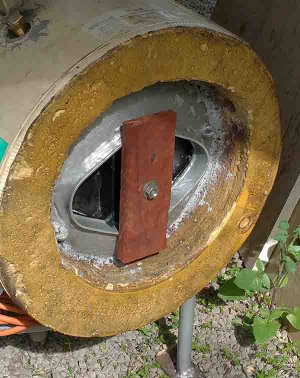
Now I made this one to operate with the tank on the side so built a stand out of some scrap pipe I had, then cut a diamond shaped door opening with rounded corners into one end of the heater tank with a plasma cutter. Inspected the tank for corrosion and proceeded to make the actual door out of 6mm plate about 25mm bigger than the opening, the reason for using an oblong shape is that the plate can go in through the wider part, then a 90 degree rotation and the plate can't come out. The door is designed so that as the pressure builds inside the tank, it tries to push the door out through the now smaller and reinforced hole. Where I cut the hole out, I reinforced the entrance with a piece of 40mm x 4mm flat bar bent to the inside hole shape and welded the two ends together. Then plasma cut another piece of plate that was 25mm larger than the welded flat bar which will be the mating surface for the seal of the door, welded that to the formed and welded flat bar. So basically it is a piece of angle steel section formed to the shape of the door with the smaller angle on the inside of the tank. (I don't have a angle iron bender) Cleaned it up and welded it to the tank opening. The actual door has two pieces of flat bar also welded to the outside to help position the door so it lines up in the door mouth. Saves time making sure it is all lined up properly every time I close it, do it once and it saves time forever.
For the door, I welded a 10mm x 60mm bolt to the outside, I use a piece of hardwood with a hole drilled through the centre which I place over the bolt and over the door lip which when tightened squashes the nitrile seal flat against the door seal angle. I tack welded a strip of stainless 6mm round rod just larger than the door hole, but smaller than the ouside flange of the door reinforcement/seal, and then Sikaflex'd a piece of 8mm round nitrile rubber on the outside of the stainless rod. The rubber you can get from most bearing supply stores and you cut it to length and super glue the ends. (about $6/mt), glueing that round nitrile seal to the flat door plate stops the seal from moving around and also prevents the seal from being forced out through the 2mm difference of the s/s round rod and the thickness of the rubber seal. This sound complicated but the pics will make it clear.
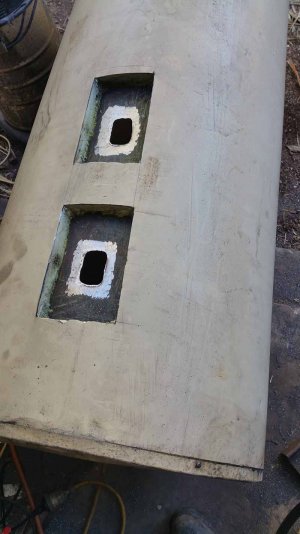
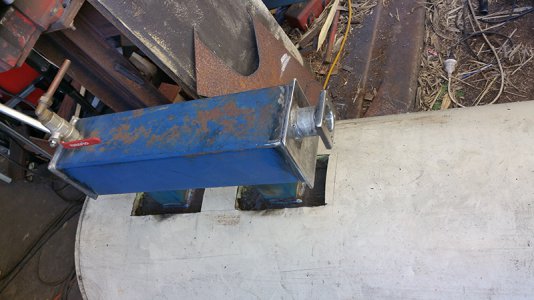
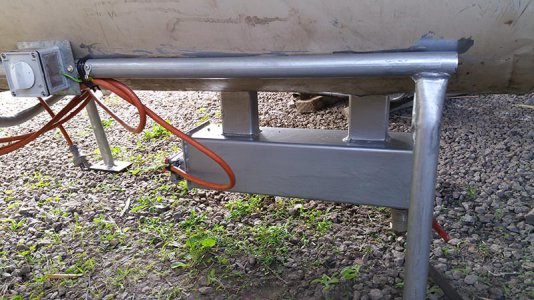
Next I welded up a piece of 125mm x 3mm thick by 500mm long SHS for the main heating tank that houses the heating element, added a piece of pipe to one end plate and welded a piece of 10mm flat bar with 4 holes drilled and tapped to it to fit the 3600 watt heating element through it. Added 2 bits of 50mm x 75mm x 2.5mm RHS to one long side and cut out the corresponding holes at each end of the main tank. These bits will allow the water and steam to flow back and forth from that heating chamber into the main tank, also added a drain hole and tap to the bottom of the heating chamber, for easy drainage and pressure relief.
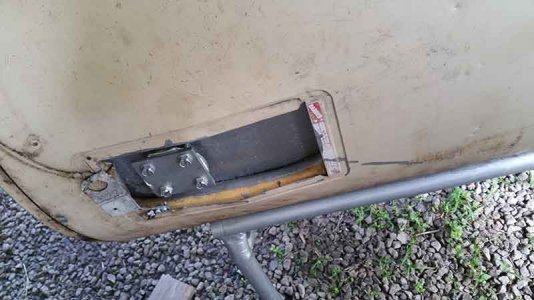
Used an angle grinder to cut out 2 oversized bits out of the heater tank sheet metal skin and removed the insulation underneath to provide access so that I could weld the 50mm x 75mm RHS to the wall of the heater cylinder. Plasma cut out two holes through the tank heater wall itself so the water and pressure can flow through the system.
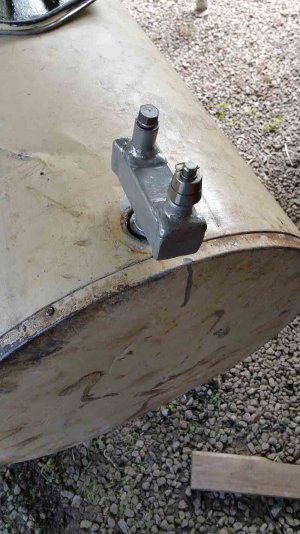
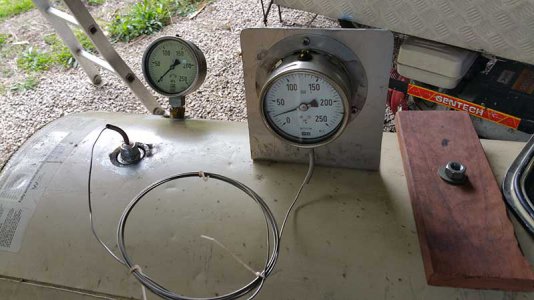
Water heaters come with handy pipe plug socket holes which suited my purpose for fitting in guages so I positioned the heating chamber at the bottom of the tank and the plugs ended up on top. The temp guage has a 200mm sender so made up a bit of pipe welded up on one end and welded the other to a drilled pipe plug and fitted it to the socket nearest to the door. Made up another short bit of 40mm SHS with a bit of threaded 1/2" pipe to go to the other end of the tank and screwed that in. That one holds the pressure valve and safety weight. I will have two, one is a weight and the other a spring loaded one which still has yet to arrive. The first one I ordered was delivered in the wrong size.
For controlling the heating element I used a simmerstat (MP101 it's a 15A) from an old stove, fitted it to a plastic enclosed box and used 2.5mm core wire lead for 15A draw.
Continued.


