Some interesting engraving on a penny.

I believe machining is the controlled removal of material. This person does micro machining.
 
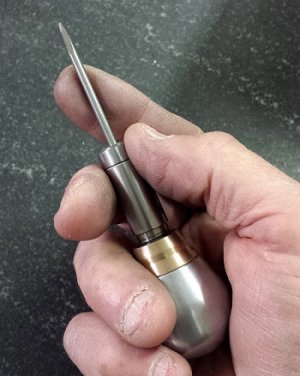
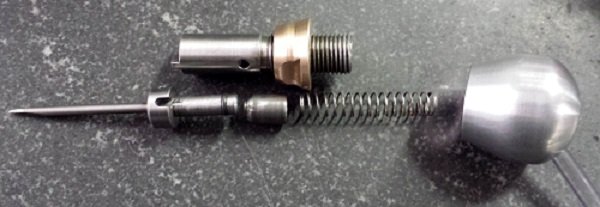
I've been watching Shaun Hughes videos for a couple weeks now, it's hard to keep up with him since he puts out so many of videos. He has really dedicated himself to teaching others how to engrave and even better, shows how to make your own equipment from scratch. I made my air graver in a single day in the shop after watching a Rick Alexander videos on his graver design, he even emailed a detailed drawing upon request.
 
Holescreek, how did the air graver work? I've been engraving for a couple years. I've seen Shawn and Rick making their spring recoil tools with the inexpensive compressors. They look like they work OK but compared to some of the other tools they seem to lack some control.

Since I have tooling that I am very happy with I have not made one of the tools but I have wondered how they work.

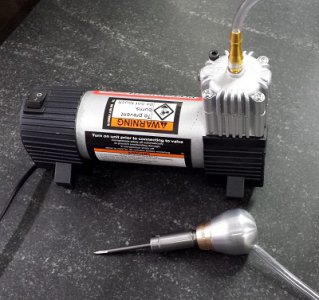
Since I'm just beginning I really don't have anything to compare it to and frankly am having more trouble getting the graver sharpening figured out. I'm using sections of 1/8" tig rod for the graver bits. I've made a template and sharpened some, just need to get some seat time. I had my doubts about the modified HF mini compressor but it works quite well, even with a very long hose. The next thing is to get some artwork to transfer to some metal for practice.
 
I would strongly suggest you invest in the Lindsay sharpening jig. I tried to start engraving with some hand push tools but had poor results and a difficult time making any kind of decent cut. Once I found out having the ability to sharpen a tool with consistent angles and then resharpen the tool exactly as it was took out this huge variable. Virtually everyone I have met in the engraving world will tell you the same thing. There are several types of sharpening jigs but I find the Lindsay easiest to use. I purchased diamond plates off ebay for about $3 each and then epoxied them to some plywood that just happened to leave them at a thickness of .505". The jig is designed for stones 1/2" thick so this worked out perfect. Really you just need 320, 600 and 2000 grit diamond stones and the jig to cut gravers that will cut well.

The jig is made for 3/32" square graver blanks and they are available in HSS, M42 and Carbide. I use the HSS and have no issues. The HSS are $30 for a 5 pack which will get you started. If you would like some more information, including how to build a power hone for sharpening send me your email in a PM and Id be glad to help you out. There are some very easy ways to transfer art to material as well and we can talk about that too.
 
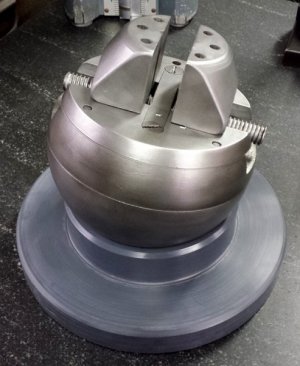
I made my graver tool from aluminum, stainless steel , and brass. I ordered the 5 piece set of diamond discs you mentioned last week and have been thinking about building a power hone. I have a Deckel SO grinder with a diamond cup wheel I've used for roughing the angles on, eventually I'll figure the right order of operations to prep a bit in just a few minutes. I posted another thread here (I think) on the ball vise I found cheap at a local antique mall. I shouldn't have any trouble making a Lindsay jig. The geometry calculations are spelled out in yet another Youtube video by Nejc Mazej. I've been looking for sources of 1/8" carbide that won't break the bank, and I have a couple pieces left over from my jig grinding days.

Since I'm just "testing the waters" I don't want to put a lot of money into engraving till I find out if I have any abilities.

Speaking of control, I added the PWM DC speed control and the 12V power supply that Shaun Hughes linked in another of his videos to my setup, it really helps being able to dial in the BPM on the hand piece. It's amazing what I've found on Youtube about this. Lots of people freely sharing their ideas and information.

20171226_151912.jpg20171226_152120.jpg20171226_152016.jpg20171220_130209.jpg
 
I would caution you on copying Steve's jig. The design is patented and despite what many people believe building one for personal use is not a legal side step to the protection offered by a patent. What you do is your business. I think even Shawn would admit at this point that for all the time he has invested in builds, failures and design, he could have purchased a tool from one of the manufacturers and spent more time engraving.

I've commented on this same thing in the past, and taken heat for it, when people want to buy an old machine that needs scraping, alignment, bearings lead screws, nuts etc. I weighed all those things when I wanted to purchase my machines and despite being trained as a machine tool rebuilder I chose to buy new tools. The factors were time to repair, tools needed to effect the repair and the desire to make parts and projects not fix machines. Everyone's experience and opinion may vary and I am totally OK with that. I just know what made sense and worked out for me.

When I needed to retire for medical reasons and wanted to really try engraving I wanted tools that were proven to work, would cut down on my learning curve, and let me learn to engrave, not make engraving tools. Again, your situation may vary. Let me know if I can help in any way.
 
The video is really cool, I wonder if a micro bit in a small cnc mill could produce similar? No artistic skills envolved, but it definately would be a lot less work!
 
Back
Top