Looking for help with the lube lines on a B&S, 618 Micromaster surface grinder

Janderso

Jeff Anderson
H-M Platinum Supporter
Joined
Mar 26, 2018
Messages
8,407
The machine is in overall incredible condition. It’s tight and the ways show zero wear.
I just changed the oil, went with the factory recommended Mobil Vacuoline 1405.
I fired it up and ran for thirty minutes or so, the table left to right is getting good lubrication, some of the Bijur emitters must be plugged.
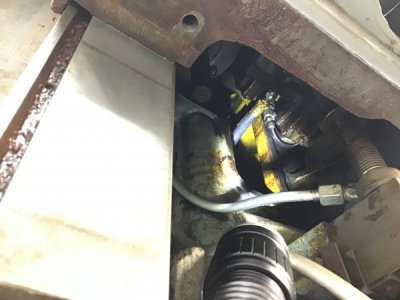
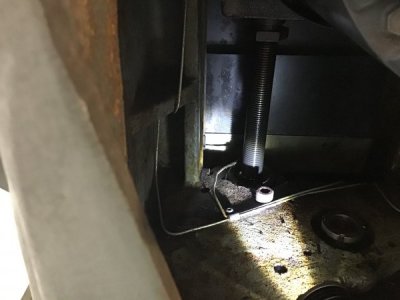
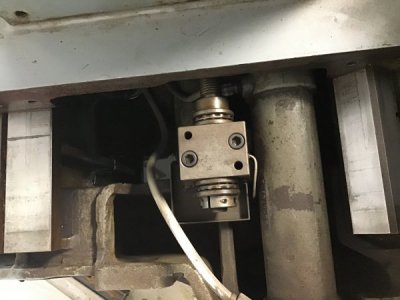
Access is troublesome, I can see the distribution block but I won’t be able to access it without making some room.
Have you done this job before?
If so, what did you remove to gain access?EDE4F708-E78F-469B-B598-212090ECCD6F.jpeg90C33A70-E061-43AC-81E3-4023447F3739.jpeg6FAC4013-EA84-4D3C-AC0E-0E0D4091932F.jpeg323DEFFE-B538-4096-A010-CAFA63401999.jpeg
 
Jeff , if I could get to mine in the garage I could help you out . Unfortunately , it is boxed in at the moment . :rolleyes:
 
if i'm not mistaken, the table can be removed for easier access to the lubrication system
 
Here are a couple manuals from the Vintage Machinery website that might help. The first is a 1977 parts manual for the 618 and the Micromaster 618 surface grinders.
http://www.vintagemachinery.org/pubs/2185/16566.pdf

This one is the 1975 operation and maintenance manual:

There are several other B&S surface grinder parts and operators/maintenance manuals available that may or may not apply to your particular model:
 
Usually the table just lifts right off, tough since this grinder has a leadscrew instead of a rack for the table travel you would have to disconnect that first. Can you get at the nut if you crank the table to the end of travel? If so I'm guessing you can just unscrew the leadscrew nut from the table and then lift it off.

Sent from my LYA-L29 using Tapatalk
 
I cut and pasted this to Jeff in my forum.
Richard,
I just posted this on the Questions thread.
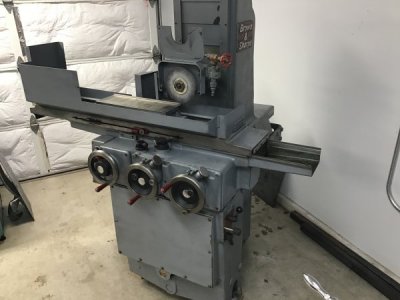
Picked up this 1966 B&S fully auto 618 Micromaster.
It's in very good shape.
Just not sure how to get to the bijur fittings to replace them.
I have good lubrication in some spots but not in others.
Do No Harm!
I want to do this right from the get go.
Any help?
Please.
Thanks,
Jeff Anderson, Vacaville Class


Like Quote Reply

Report


R


Richard King 2
Master Machine Tool Rebuilder & Instructor
H-M Supporter - Commercial Member


Joined Jan 31, 2018 Messages 558
City Cottage Grove State Minnesota Country United States


8 minutes ago


Check the manual and look for the lubrication manifolds on the machine. You need to replace all the fittings and just not 1 or 5 . It's like replacing 1 spark plug if you get my drift. Also clean out the felt filter on the bottom of the pump. It looks ass backwards with the screens, but that's right. Look for loose connections and smashed copper tubes and leaky rubber hose. When removing the fittings I made up a hydraulic box wrench by taking a box wrench and slicing a slot with air grinder cut off wheel to slide over the tube. The metering units (jets) will loosen in manifold and not on the top sleeve nut and if your not careful you can twist the copper tubing. The special wrench comes in hand. hold the metering unit the use a end wrench or another special wrench to unscrew it. Might be smart to blow out the lines too...The metering units have an ----> arrow for flow direction and a number...I am guessing FJB 0 for low use areas' up to FJB 2 for more oil...make a sketch or print out the page in the manual and mark the page as you remove them. The tubing is 5/32 special size from BiJur. I would probably buy from Bijur and not some knock off made in china. LubeUSA in SC sells them, but be careful from Devcon...they are super expensive. When you install the new ones I sometime use some loc-tite Teflon white paste on the threads. a little dab will do you on threads. Be sure to turn them backwards to get the thread started. feel it fall into the thread and then carefully tighten them as the get cross threaded super easy. Rich http://vintagemachinery.org/pubs/2185/16566.pdf please share this in the regular forum as it should benefit them too. Thanks
 
Usually the table just lifts right off, tough since this grinder has a leadscrew instead of a rack for the table travel you would have to disconnect that first. Can you get at the nut if you crank the table to the end of travel? If so I'm guessing you can just unscrew the leadscrew nut from the table and then lift it off.

Sent from my LYA-L29 using Tapatalk
The Micromaster does not have a table screw, it uses a cog belt instead of a rack gear, it is fastened to the table with clamps and bolts, they are removed and the table slid or lifted off. I think nearly all of the metering units on manifolds and are located in the hydraulic sump area, and tubes are led to the units being lubed, an exception being the metering unit that lubes the cross feed nut.
 
yes John is right... I wrote this to Jeff a bit ago...
"be a detective....the table uses a timing belt it looks like not a lead screw like the one dude says
the up and down uses a screw and the in and out plus a hyd. cylinder...I would guess the manifiolds are hidden but accessible... Yes B&S are super machines... I rebuilt several...the spindle head uses nylon pads instead of cast on cast. You might find the manifolds under covers when you crank the column back all the way. would be smart to clean under their too...as that's where all the grit goes. I see on the lube drawing it shows the metering unit flow number. larger the number the more you get."
 
Great,
One more thing, I have read this can be caused by air in the system but it looks to be pretty consistent. The reversing lever should not go back to center according to John, he owns one of these.
I am going to run it some more this evening to see if it clears up. I do have good lubrication to the lateral table movement.
 
Probably a dirty or sticky valve. That nylon roller looks worn too. The other one looks whiter? How about making a new roller a little bigger. I have also seen where they weld a bead on the taper reversing flange. I'll look at book too....probably by the time you screw with it taking it apart you might mess it up more. Page 14 of the manual shows the valve and valve body and adjusters 31 & 35 that might be the nuts you adjust the shifter rod.. There might be some worn parts there or the valve body has some crud inside. Look under there and see if the bolts look like someone has had them apart. Or get some epoxy stick and smash it on the angle flipper about .020 and see if that helps. can always scrape it off.
 
Last edited:
Back
Top