
If I was doing it I would probably shorten it also just keep in mind to bottom against the face of the spindle not bottom out the threads. What's the worst that can happen, buy another backing plate. Every engineering challenge can be resolved with enough time and money

-
Welcome back Guest! Did you know you can mentor other members here at H-M? If not, please check out our Relaunch of Hobby Machinist Mentoring Program!
You are using an out of date browser. It may not display this or other websites correctly.
You should upgrade or use an alternative browser.
You should upgrade or use an alternative browser.
Fitting to a backing plate
- Thread starter DavidR8
- Start date
- Joined
- Jan 28, 2011
- Messages
- 3,486
Usually the threads on the spindle stop short of the mounting face, leaving an area that is at major diameter. Make sure you don't take too much off otherwise you will have to cut away some of the first thread on your backing plate.
Pierre
Pierre
- Joined
- Oct 16, 2019
- Messages
- 6,587
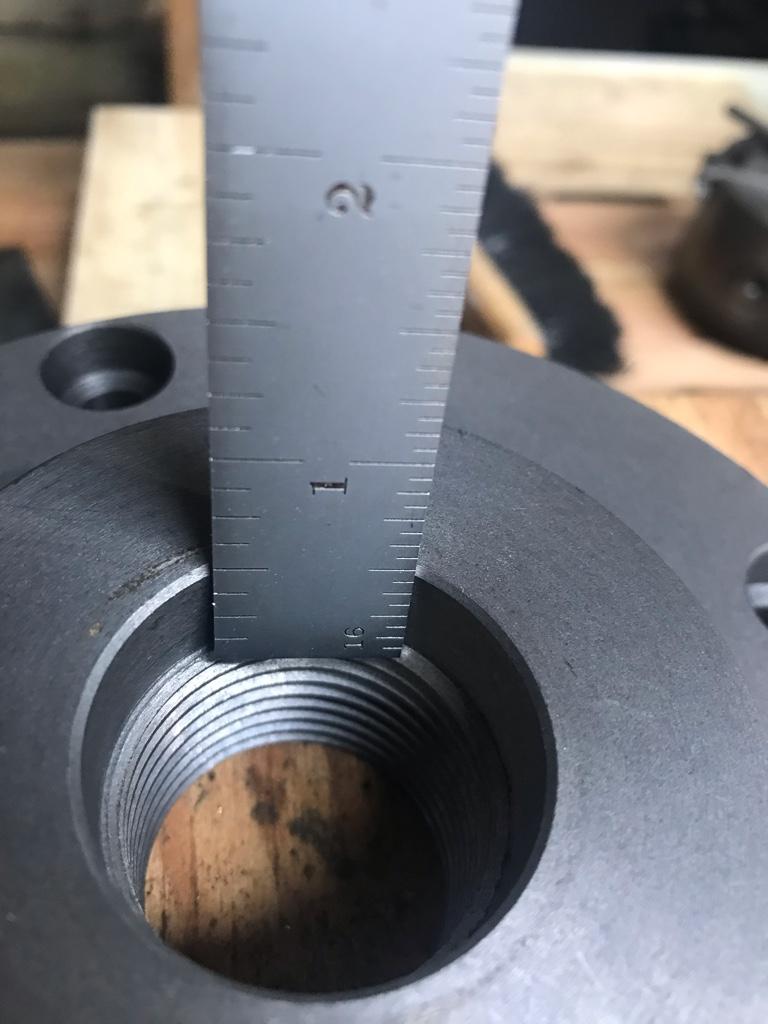
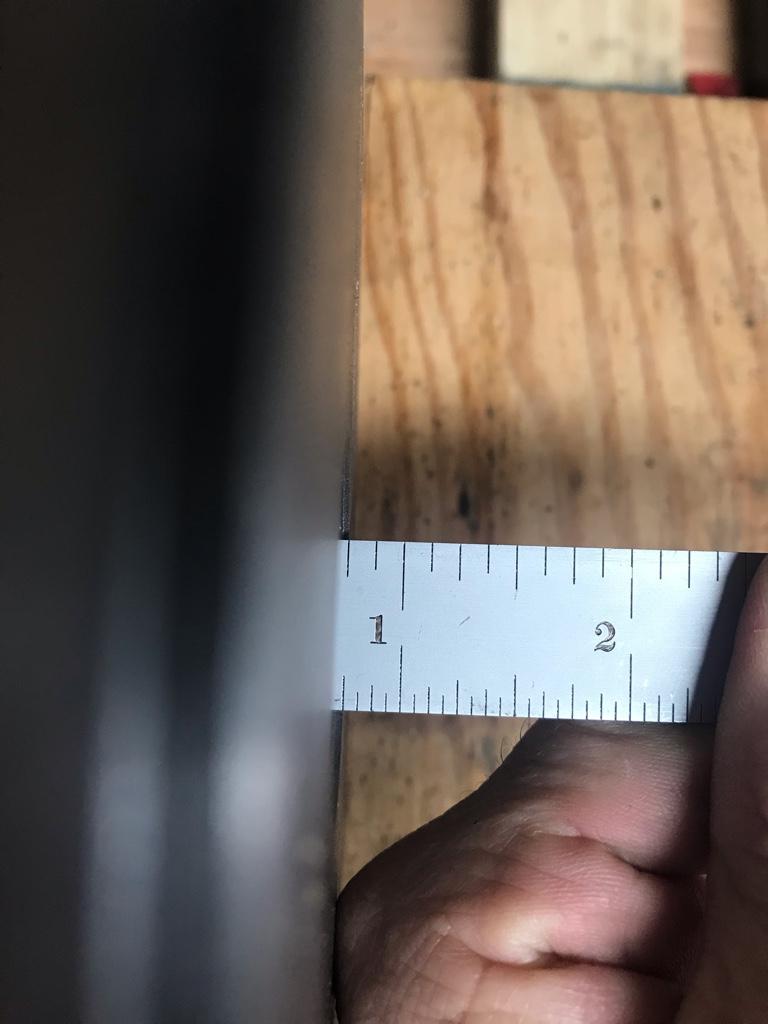
I snapped some pics of the new backplate mounted on the spindle.
Depth of recess
Length of spindle to register
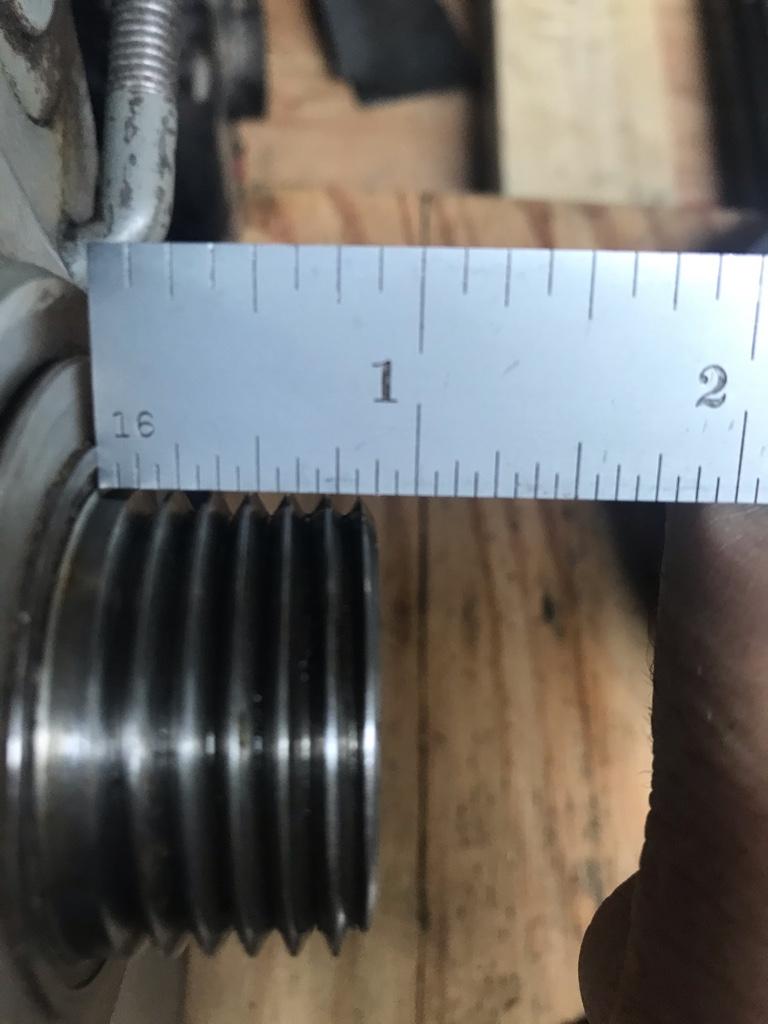
Amount of insertion before threads engage
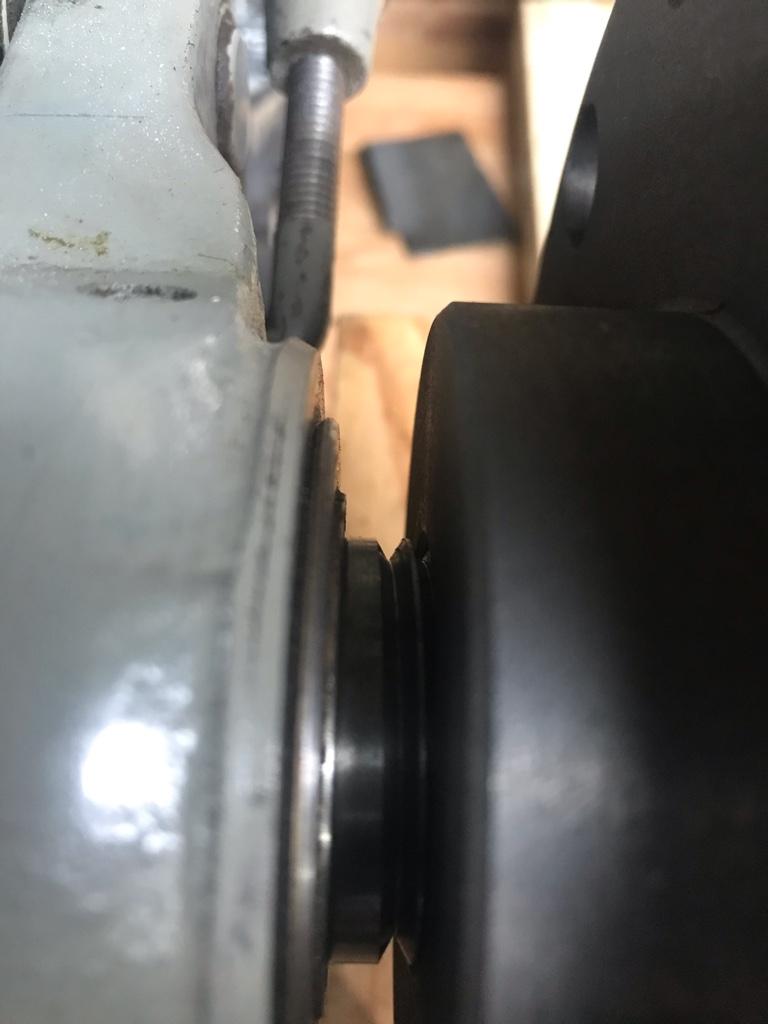
Threads remaining after snugged up to spindle register.

Depth of recess on SB faceplate and 3-jaw
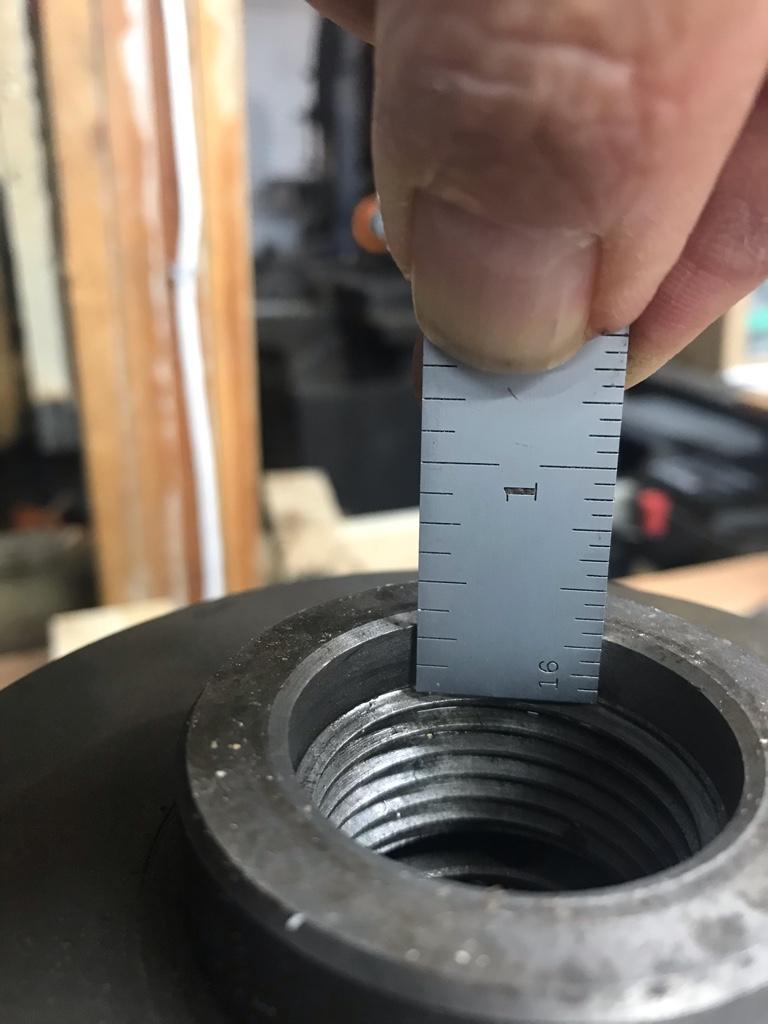
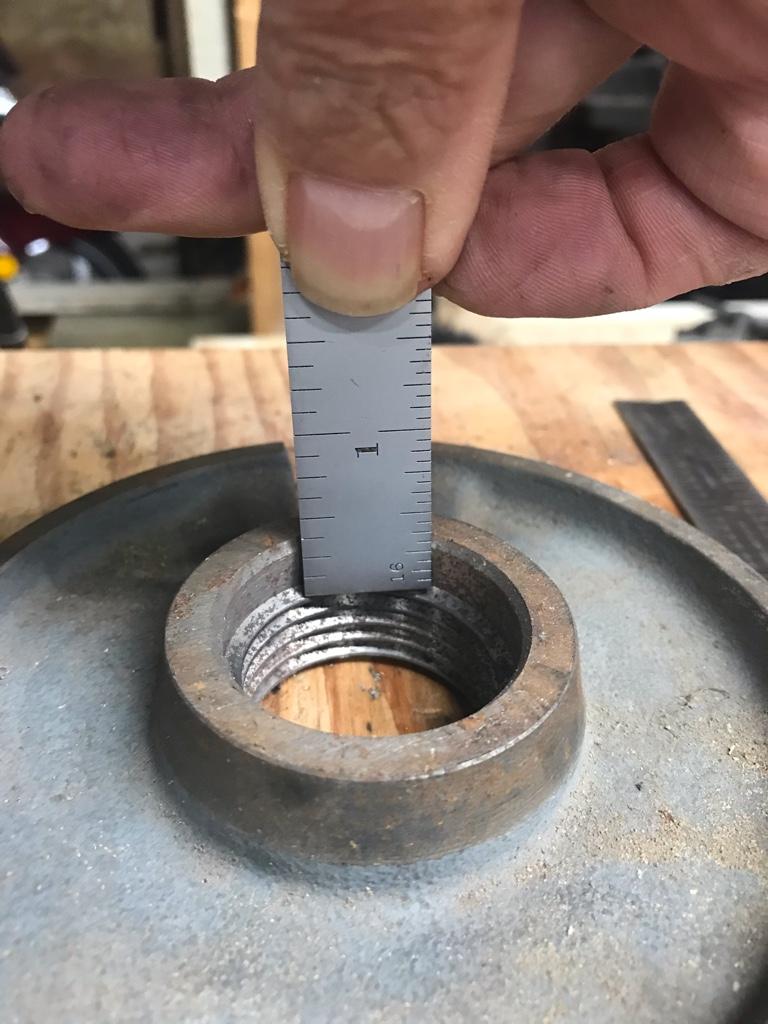
Sent from my iPhone using Tapatalk
Depth of recess
Length of spindle to register
Amount of insertion before threads engage
Threads remaining after snugged up to spindle register.
Depth of recess on SB faceplate and 3-jaw
Sent from my iPhone using Tapatalk
Hey Dave,
Looks like you should take off about 3/16" to get it to spec with the original arrangement. I have found that a lot of the newer back plates (threaded or in my case D1-3) have a lot of extra material to allow the end user to modify to what they require. You will note how much wider the face is on the bump out compared to your originals as well.
Once you machine it down, thread it on and check to be sure it fits flat to that landing in your second picture (where your ruler is touching). Then you can skim the face of the plate. Does the landing on your new plate fit snug inside the recess of your chuck? Do the bolt holes all line up?
you will need to skim the outside bolt face of the plate and also then machine the landing for a snug fit into the recess of your chuck. Make sure the landing is not deep enough to bottom out in the chuck so that the bolt face of the plate sits flush with the bolt face of the chuck.
Once you have a snug fit - bolt the two together, check the run out, then you can machine the outer edge of the new plate flush to your chuck.
I then stamp a 1 on the plate and chuck to locate its fit if I ever take the two apart.
You have material to work with so get the landing diameter to be a great fit with the chuck - take your time and use light cuts and multiple fits.
- Joined
- Oct 16, 2019
- Messages
- 6,587
- Joined
- Nov 14, 2016
- Messages
- 3,007
Keep in mind you are removing material from the front. The back plates are fairly thick which gives you some cushion for error. It looks like you have about 1/2" of material to play with, but you will lose some when facing the plate. You could lose a little more if you make a mistake and need to take a bit more off to correct, and then you have to consider the depth of the register on the chuck which is probably 3/16 - 1/4" deep.
I wouldn't get too aggressive trimming down the back of the plate until you have the front finished, the chuck has been checked for fit and you are happy with it.
I've been working on the backplates for 3 and 4 jaw chucks on my lathe. When beginning to cut the register I only ran it down about 1/16" and then fit the chuck to ensure it was tight before continuing the cut. You want a close fit without movement. Since I only went in about 1/16" I had a second chance, if I had overshot and made my register too small. I would still have enough material left to adjust my cut to leave a little larger diameter and then trim off my error if I got it wrong on my first try.
With a 4 jaw I don't think the fit is quite as critical since you will be fine tuning the chuck every time you set it up anyway. Anyway the was my reasoning for starting with the 4 jaw chuck since this was the first time I had done a back plate.
- Joined
- Nov 12, 2017
- Messages
- 391
All the recommendations work together. Establish material available to determine excess. First, I'd literally sketch the entire assembled combination as is, unaltered. With that, dimension absolute each face and diameter [section drawing] from spindle face and register as zero. Finding full [nearly] engagement of spindle threads and plate will pop right off that drawing.
Add or subtract size of backing plate. I'd shoot plate register to spindle fit as size for size or very small interference. Make certain the fillet and corner radii do not contact. Easiest remedy uses a very narrow 'parting' bit, plunge directly into the fillet corner at 45° to one depth. A little Dykem or felt pen will show as the corner comes out, go ~.005 deeper. A square bit is easier, but radiused is better.
As recommended, allow .004-.006 chuck register to plate face for perfect zero final adjustment. It deserves same remedy as above.
If my 16" 10 horse 2000 RPM Pacemaker doesn't jog chuck on face plate, you won't either. I would use 12.9 grade metric bolts [not fine threads] no matter what chuck had new.
This chart will aid tap selection and prescribed hole sizes.
Last edited: