310 Martini Cadet project

BruceW

Registered
Registered
Joined
Jul 16, 2020
Messages
27
O.k being a skin flint and knowing that I would have fun loading for a 310 cadet I set about making some loading gear to fit it.
‘First there was a de-recapper.
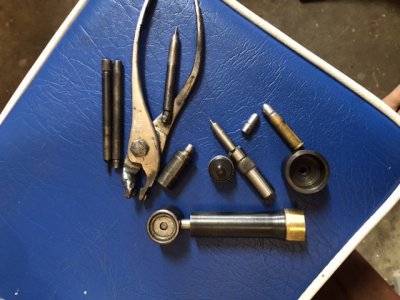
E9637D52-504E-4876-BC74-11BCE32EB3BC.jpeg
made out of a set of pliers.
‘Then I slugged the bore and chamber.
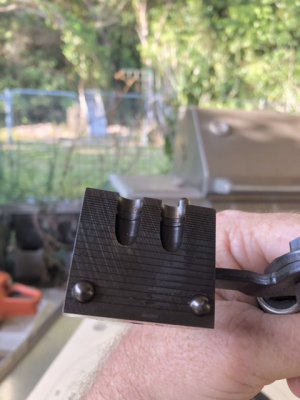
Bought a mold that should be large enough for my gun.
bought some 32-20 brass to make into 310 cadet.
bought a Lee 32-20 holder and trim tool and modified it in a drill chuck To get the right Len for my chamber
Thinned case rims by using a hacksaw blade with the cases in the drill.

For my sizing and forming die I use a chopped off chamber from another old barrel.

When I bought my lathe and fettled it up the first project was to machine up a collar for this die and base plate.
This means I can seat and use fixed ammunition.
‘But I have had to bore out the mould heel section to fit my brass being used.
 
Last edited:
CCB33D0A-1FEB-4653-9982-A50975319B9A.jpeg
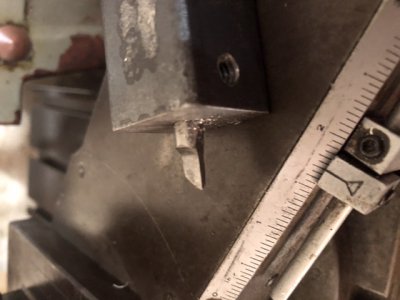
To do that I made a boring bar holder out of square held in the tool post and drill in a chuck.
E82F89EE-E342-4E81-A5A6-CE01ADE895FF.jpeg
Now we are Cooking with gas.
After setting the mold in the 4 jaw I machined the heel a few thou larger.
The second hole I moved the bar in a wee bit long as I couldn’t see but it turned out o.k. Anyway.

So Cast a few bullets and separated them and loaded a few up.

This has been a year or two project all up and it shoots very well for a 100yr old gun.

I have used and have shot very well breachseating but now I can use fixed ammo either hand seated or using the pound die if needed.
Took it out today to try my new bullets from the mold and as expected it needs a little tweak with the load.
This is shooting about as good as I can get with open sights and a swirly wind at 50 yards With no flags.
01B1CDCD-4F56-4C30-8111-88E4B66D13C5.jpeg
One side of the mold and the other
15F02217-8A9B-45AA-A4E3-C4556C2BEB08.jpeg
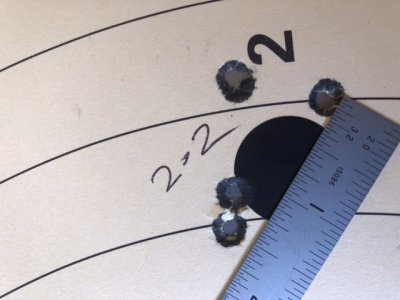
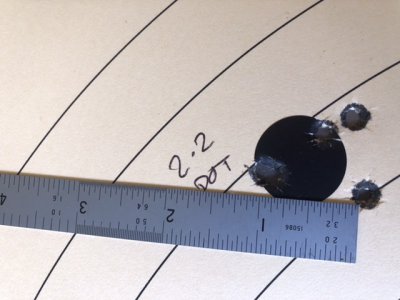
Took 15 rounds of two different loads to try and sides of the mold.
2 Ten shot groups and 2 fives.
These looked the best.
I am happy with the results and seems to be about as good as I have had it shoot with this mold before.
Some-one said I should post a project up To see what I have achieved.
Thanks for the help in getting my lathe back together.

Bruce
 
Last edited:
Just wondering if you size the bullets after casting. After casting and filling the grooves with beeswax, pushing the bullet through a sizing die might help even out any differences in bullet diameter between the two mold cavities (and also from uneven shrinkage of the lead).
 
Well I would have to work out a way to size a heeled bullet.

I will have to go over my cases as I found I a couple with different primers and a couple were harder to chamber.
I think they might have cast a thou bigger with the alloy I used.
:chunky:
Hey that dot is just a blurry speck.
Allowing for 1/2" is a bit hard in a 10 knot swirly wind without flags.
O.K. I will see if I end up with 2 seperate groups..
‘But I will have to have a bigger sample pool.
Maybe alternate shot for shot to even out wind changes.
 
Last edited:
In all fairness, considering your range conditions (no scope, unknown wind, etc) it would be hard to evaluate the round much further. I will throw in that most weird ballistics stuff normally begins to be seen at about the 100 meter point. I have seen rounds which shoot hole in hole at 50 meters, but at a hundred meters print a 2 inch pattern.

Based upon the range conditions, that was actually solid shooting, as my ancient eyes do not have the love for iron sights they once had. My joke is, no matter how far the target is, if you can't read the fine print at the bottom right corner, you don't have enough magnification ;)
 
Back
Top