

- Joined
- Jul 26, 2020
- Messages
- 159
I wanted to share this adjustable spotting scope swivel I made over the summer for my dad as a let's-all-stay-indoors-and-not-go-crazy COVID-19 project:

This was my first self-designed project that was more than 1 or 2 parts, and I'm pretty proud of how it turned out.
First off, some background. My dad does Palma rifle shooting competitively. Palma is shot from 300 to 1000 yards, and at the further reaches a spotting scope is an absolute must for reading wind mirages. There are plenty of dedicated spotting scope stands out there that are perfectly suited to the task, but they're often bulky and heavy. My dad began competing internationally a few years ago, and he just didn't have the space or weight allowance for a larger stand. Enter the tripod mount scope swivel, MK1:


This first version was made up of a commercially available swivel mounted to a tripod with a custom bushing. The scope was then attached to the swivel with an angle bracket. This setup mimicked the purpose built scope stands out there, but it was much lighter and could be broken down into pieces that were easy to cram into something airplane friendly.
The swivel itself has an interesting design. There's an aluminum bushing(?) that rides inside of a plastic cap that allows the bushing to spin freely. There's also a plastic washer that sits between the bushing and the aluminum body of the swivel. Set screws inside of the body of the swivel can be tightened to push the washer into the bushing, introducing some friction. You can tune the amount friction so the scope can be pushed to the correct position without needing to be locked in any way.
This setup had some distinct disadvantages, however:

Some key things to note about this design:
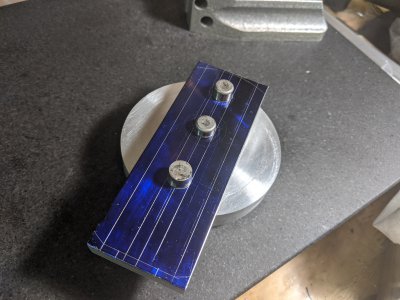
My first step was to rough cut all of my raw stock.

(Ignore the plastic here. I wasn't happy with the stock I had, so I went and purchased a nice delrin round bar from McMaster.)
I had some nice 7075 offcut blocks that I used for all of the square things. The round stock is some 6061-T6 I picked up at the same time.
I then went about squaring up my stock. My mill is very, very tiny and these pieces are somewhat sizeable, so I squared things up on my lathe using a superglue arbor:

If I'm being honest, this was terrifying:
(Apologies for my terrible camera work. The most charitable description of it would be that I'm trying my hand at cinéma vérité.)
I got some beautiful surface finishes, however:

(At least, they were beautiful until I scratched them to death with my general incompetence.)
I also got some excellently dimensioned stock. When I was careful, I was getting .0005" variation in thickness, which is pretty good for my sloppy shop!
Next came the layout:

(Yes, my drawings are terrible. My high school drafting teacher would be ashamed.)


(I was pretty inconsistent about getting pictures, so several pieces are missing. You can also see where I missed dimensions on my drawings and had to write them in after the fact...)
I then set about working on the dovetail pieces. I had never machined dovetails before, and it shows. I made basically every rookie mistake it's possible to make here. My cutter also wasn't big enough, so I had to relieve the top of the female dovetail to make it fit. I don't have a DRO on this mill and I'm terrible at compensating for backlash, so this operation was done by working up to the scribe lines.


(My mill has no power feed, so I wasn't able to grab any worthwhile videos of me cutting the dovetails.)
(Also, when I said "I had to relieve the top of the dovetail," what I meant was "I'm an idiot and I'm going to let the cutter RUB A RELIEF." I feel I had to make that confession. I hope you will all forgive me, especially because I made a very similar mistake on my next project...)
Next up were the vertical and horizontal swivels. I don't have pictures of cutting the bolt hole pattern, but I can assure you it was an exercise in tedium thanks to the lack of a DRO, forcing me to be reliant on handwheels that count .0625" a turn.

(I love spiral fluted taps. I'll never buy another straight fluted hand tap again.)

Next, I made this jig for my rotary table that was WAY too tall. It let me round off these parts fairly consistently, however:

(I know it's messy in this picture. Don't worry, I'm still just as terrible at keeping things clean and the squareness of my parts suffers for it.)
The parts were totally beat to death at this point. I spent quite a while lapping things on my beater surface plate and eventually got a presentable finish:

(Presentable, he says. I suppose it is if you ignore all of the deep scratches...)
With those done, the male dovetail was up next. This part is freaking cool, so it's a shame I don't have more pictures of making it.
First up, I drilled and reamed some holes to match this fixture I made:

Oops! I've hit my picture limit. To be continued in the comments, maybe. I'm pretty new to this forum, so I'm not sure if the 20 attachment limit is per post or per thread. I'm also not sure if I'm committing a faux pas here by attaching so many photos.
This was my first self-designed project that was more than 1 or 2 parts, and I'm pretty proud of how it turned out.
First off, some background. My dad does Palma rifle shooting competitively. Palma is shot from 300 to 1000 yards, and at the further reaches a spotting scope is an absolute must for reading wind mirages. There are plenty of dedicated spotting scope stands out there that are perfectly suited to the task, but they're often bulky and heavy. My dad began competing internationally a few years ago, and he just didn't have the space or weight allowance for a larger stand. Enter the tripod mount scope swivel, MK1:
This first version was made up of a commercially available swivel mounted to a tripod with a custom bushing. The scope was then attached to the swivel with an angle bracket. This setup mimicked the purpose built scope stands out there, but it was much lighter and could be broken down into pieces that were easy to cram into something airplane friendly.
The swivel itself has an interesting design. There's an aluminum bushing(?) that rides inside of a plastic cap that allows the bushing to spin freely. There's also a plastic washer that sits between the bushing and the aluminum body of the swivel. Set screws inside of the body of the swivel can be tightened to push the washer into the bushing, introducing some friction. You can tune the amount friction so the scope can be pushed to the correct position without needing to be locked in any way.
This setup had some distinct disadvantages, however:
- The adjustment screws could be impossible to access on the swivel depending on how things were put together, meaning the friction bushings (making that term up) might be too loose and require a bunch of work to tear down and tighten up
- The point of rotation for the scope was the top of the tripod, meaning the eyepiece of the scope would move away from or towards your face when you tried to pan the scope around
- The angle bracket lacked rigidity and could vibrate annoyingly
- It wasn't easy to adjust how far the scope sat from the tripod. The setup as pictured meant the tripod was a bit unstable when being used by someone sitting upright to spot wind conditions for another shooter. You definitely don't want your expensive spotting scope taking a tumble!
- Angle brackets aren't as cool looking as custom machined components. This is clearly the most important consideration
Some key things to note about this design:
- The set screws are always accessible. There's enough clearance between the scope and the "vertical swivel" to fit an Allen key
- The point the scope pans around is directly underneath the scope itself, meaning the eyepiece stays roughly the same distance away from the eye
- The solid 6061 and 7075 aluminum construction is rigid and doesn't vibrate, while still being lightweight enough to travel with internationally
- There's a ridiculously cool dovetail that can be used to adjust how far the scope sits from the tripod to help with balancing. Like, I seriously love dovetails so this feature is like catnip for me
- The scope swivel is shiny and has a much better chance of attracting ravens, crows, and other competitors who are drawn to shiny things
- (Do not shoot the ravens and crows, they will remember your face)
My first step was to rough cut all of my raw stock.
(Ignore the plastic here. I wasn't happy with the stock I had, so I went and purchased a nice delrin round bar from McMaster.)
I had some nice 7075 offcut blocks that I used for all of the square things. The round stock is some 6061-T6 I picked up at the same time.
I then went about squaring up my stock. My mill is very, very tiny and these pieces are somewhat sizeable, so I squared things up on my lathe using a superglue arbor:
If I'm being honest, this was terrifying:
I got some beautiful surface finishes, however:
(At least, they were beautiful until I scratched them to death with my general incompetence.)
I also got some excellently dimensioned stock. When I was careful, I was getting .0005" variation in thickness, which is pretty good for my sloppy shop!
Next came the layout:
(Yes, my drawings are terrible. My high school drafting teacher would be ashamed.)
(I was pretty inconsistent about getting pictures, so several pieces are missing. You can also see where I missed dimensions on my drawings and had to write them in after the fact...)
I then set about working on the dovetail pieces. I had never machined dovetails before, and it shows. I made basically every rookie mistake it's possible to make here. My cutter also wasn't big enough, so I had to relieve the top of the female dovetail to make it fit. I don't have a DRO on this mill and I'm terrible at compensating for backlash, so this operation was done by working up to the scribe lines.
(My mill has no power feed, so I wasn't able to grab any worthwhile videos of me cutting the dovetails.)
(Also, when I said "I had to relieve the top of the dovetail," what I meant was "I'm an idiot and I'm going to let the cutter RUB A RELIEF." I feel I had to make that confession. I hope you will all forgive me, especially because I made a very similar mistake on my next project...)
Next up were the vertical and horizontal swivels. I don't have pictures of cutting the bolt hole pattern, but I can assure you it was an exercise in tedium thanks to the lack of a DRO, forcing me to be reliant on handwheels that count .0625" a turn.
(I love spiral fluted taps. I'll never buy another straight fluted hand tap again.)
Next, I made this jig for my rotary table that was WAY too tall. It let me round off these parts fairly consistently, however:
(I know it's messy in this picture. Don't worry, I'm still just as terrible at keeping things clean and the squareness of my parts suffers for it.)
The parts were totally beat to death at this point. I spent quite a while lapping things on my beater surface plate and eventually got a presentable finish:
(Presentable, he says. I suppose it is if you ignore all of the deep scratches...)
With those done, the male dovetail was up next. This part is freaking cool, so it's a shame I don't have more pictures of making it.
First up, I drilled and reamed some holes to match this fixture I made:
Oops! I've hit my picture limit. To be continued in the comments, maybe. I'm pretty new to this forum, so I'm not sure if the 20 attachment limit is per post or per thread. I'm also not sure if I'm committing a faux pas here by attaching so many photos.
Attachments
Last edited:


