Atlas V36 rebuild

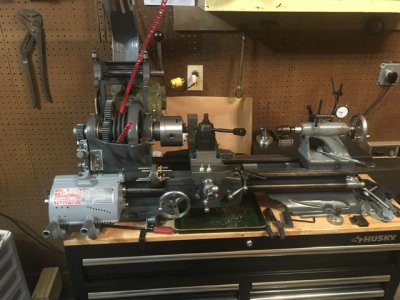
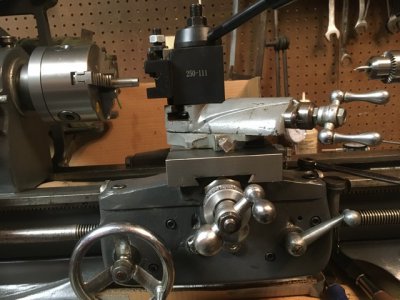
I hemmed and hawed around about paint. I figure if this goes the way the rest of it went I'll have it off and on half a dozen times before I get it right. So here's my first test fit. I had to take a lot more off than I saw in the bulletin. But maybe I just missed some details. I think I'm more fond of the looks of the change gear lathe than the qc version. But we will see at the end. The point is to not have to change gears after all..." looks" come second I suppose.
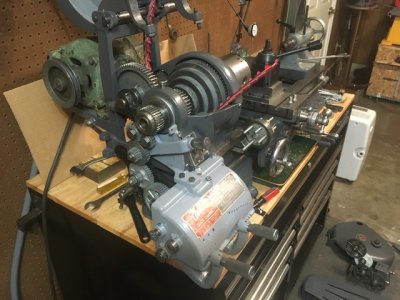
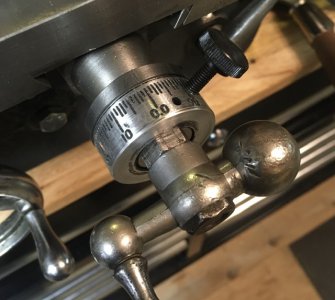
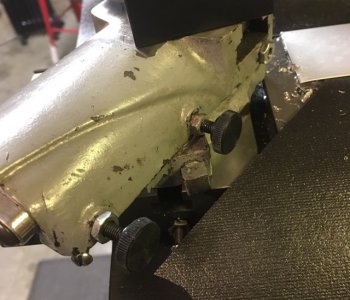
I can't seem to get a good mesh with the reverse selector. Either it's good in fwd but reverse is barely engaged, or vice versa. I'm thinking altering the curve of the index plate may help? It's like the holes need to be further apart. I flipped the spindle gear because the other side had better teeth, and that helped a little. But I'm not happy with it yet. I'll pick it up tomorrow and try again.
 

Attachments

  • B0D4DCBE-E75D-41FE-A53C-D742F36DA570.jpeg
    B0D4DCBE-E75D-41FE-A53C-D742F36DA570.jpeg
    109.9 KB · Views: 20
  • 57A898D4-693C-4637-AA4B-43FE07EE2F99.jpeg
    57A898D4-693C-4637-AA4B-43FE07EE2F99.jpeg
    116.3 KB · Views: 12
All done for now. Ended up replacing both reverse selector gears. I had a brand new steel 20 tooth and a printed 24 tooth gear. I was very concerned with noise when I did this. Mr Pete says his Atlas lathes sounds like combines. I didn't want that. I'm happy to say this is no louder than the Grizzly gear head lathe I used to have. And in neutral, it's almost silent. I really love that about it. I'm hoping to try to cut some threads later on today. Lunch time!
 

Attachments

  • 704605C2-215B-497F-AF57-84C63A7345F9.jpeg
    704605C2-215B-497F-AF57-84C63A7345F9.jpeg
    588.6 KB · Views: 12
  • BEFFBA5E-F968-44B1-AF76-507B22C157E8.jpeg
    BEFFBA5E-F968-44B1-AF76-507B22C157E8.jpeg
    1.4 MB · Views: 16
Here we are again with another little improvement I hope. I have really been missing the compound on my lathe. Andy Loftquist provided a drawing for a boss by which I could mount the original compound. I borrowed some time on a lathe with a compound, so that I could make that part. Once again, my skills were the limiting factor. But eventually I succeeded. So now I've got a compound again!
 

Attachments

  • 8C78F754-BAA7-4FF1-BEAE-D214FED5D725.jpeg
    8C78F754-BAA7-4FF1-BEAE-D214FED5D725.jpeg
    100.5 KB · Views: 10
And now some chip control.
 

Attachments

  • 84944630-BDD0-482B-9E6B-1A6F3C52CD60.jpeg
    84944630-BDD0-482B-9E6B-1A6F3C52CD60.jpeg
    88.6 KB · Views: 6
  • 775BC9C5-1118-4333-ABE5-B0C38F6F673E.jpeg
    775BC9C5-1118-4333-ABE5-B0C38F6F673E.jpeg
    92.7 KB · Views: 7
Little stuff I changed.
I bought the dial from an Ebay seller years ago. I couldn't read the numbers. So I painted the whole thing black, then removed all the paint except what got in the lines and numbers. It's way better.
I don't know where I came up with the thumb screws. But I hated using a tiny flat blade screwdriver to adjust the gibs. I had intended on making fancy brass ones, but I already had these.
 

Attachments

  • 91CCA04C-3F33-440D-8B22-7320E6D5E776.jpeg
    91CCA04C-3F33-440D-8B22-7320E6D5E776.jpeg
    101.9 KB · Views: 5
  • 7BB02760-416C-4C66-B8DE-51D19B9F952F.jpeg
    7BB02760-416C-4C66-B8DE-51D19B9F952F.jpeg
    116.3 KB · Views: 5
  • DC858EE0-CD1B-4A9D-A03A-59A30F0D81F6.jpeg
    DC858EE0-CD1B-4A9D-A03A-59A30F0D81F6.jpeg
    120.2 KB · Views: 6
Back
Top