- Joined
- Mar 26, 2018
- Messages
- 2,724
Most of my mill tooling is set up to use the Tormach Tooling System, where a special 3/4" collect remains in your spindle at all times and all your tooling is 3/4" shank as well. Makes it very quick to change tools (within a second for me with an air powered drawbar release) and the length is repeatable to tenths.
Tormach made a really nice electronic edge finder that had this tooling system shank on it. It came with a spring loaded ball and I found it to be very accurate for everything I needed (and I would use a DTI when I needed better). Unfortunately I crashed mine while not paying the best attention to what I was doing and knocked the tip out of true. I tried to straighten it out (and did a decent job), but I don't trust it anymore. Tormach no longer sells replacements.
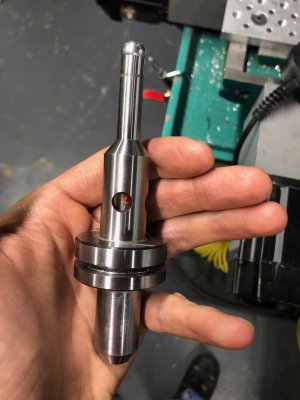
I found a similar one from Shars, but without the collar which is so important for setting Z measurements. It was cheap enough so I bought it as a backup.
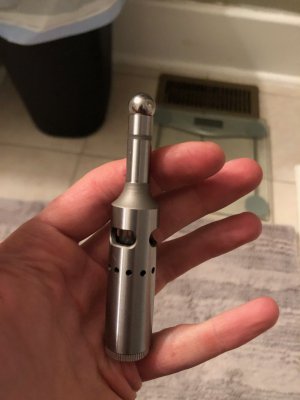
I then started working on a press fit collar to convert this tool into a TTS one. I started with a 1.5" piece of 440C stainless generously given to me by @bakrch during a tool trade. That material machines beautifully and gives great finishes. I will have to buy more in the future.
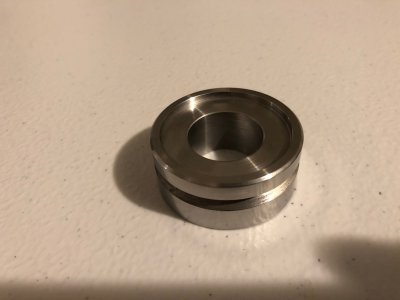
The bore was drilled and bored to 0.7497" to be a 0.0004" interference over the 0.7501" tool shank. The collet recess was bored at the same time as well.
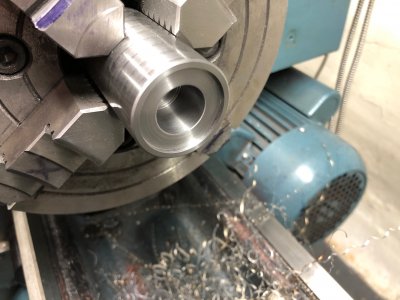
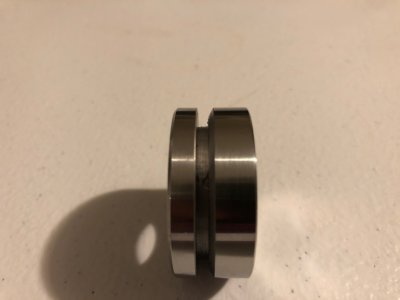
I failed to get a picture, but I used a parting blade to generate the slot used in Auto Tool Changer (ATC) operation if I had one. Tailstock support was a must even with this small amount of stickout. There are 45 degree chamfers on most edges and one side of the ATC slot has a 60 degree chamfer. I pulled the dimensions from the existing tools I have. The collar was parted off and flipped in the 4 jaw so I could face it to thickness and put in the final chamfers.
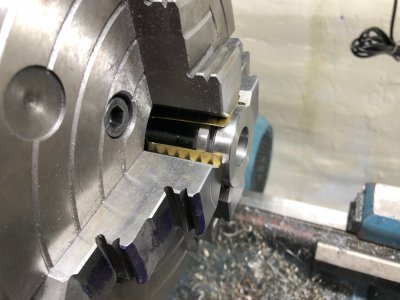
Here is the finished collar.
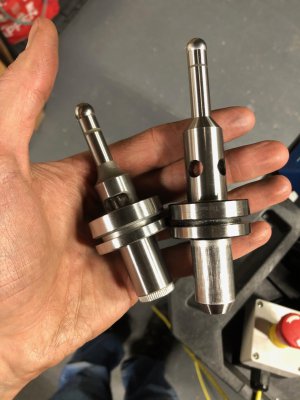
Using my lathe as a press, I held the edge finder in a large keyless chuck and cranked the tailstock to press it into the collar, using the chuck jaws as a backing plate. Here is the new edge finder next to the old one.
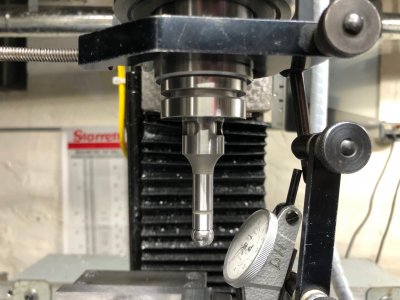
And installed in the mill spindle. I'm not sure if I like or dislike the reduced length but it is nice to have an accurate edge finder again. My one gripe is the ball is 10mm 0.3937" rather than the 0.4000" of the original. Makes mental math a bit harder when offsetting the radius of the tip.
If you haven't used a ball edge finder, you should try it. They are extra handy when you need to center on curved surfaces like the side of a cylinder held deep in a vise. You don't need access to the edge of the part and can find center by approaching the cylinder from both sides without changing your Z height.
Tormach made a really nice electronic edge finder that had this tooling system shank on it. It came with a spring loaded ball and I found it to be very accurate for everything I needed (and I would use a DTI when I needed better). Unfortunately I crashed mine while not paying the best attention to what I was doing and knocked the tip out of true. I tried to straighten it out (and did a decent job), but I don't trust it anymore. Tormach no longer sells replacements.

I found a similar one from Shars, but without the collar which is so important for setting Z measurements. It was cheap enough so I bought it as a backup.

I then started working on a press fit collar to convert this tool into a TTS one. I started with a 1.5" piece of 440C stainless generously given to me by @bakrch during a tool trade. That material machines beautifully and gives great finishes. I will have to buy more in the future.
The bore was drilled and bored to 0.7497" to be a 0.0004" interference over the 0.7501" tool shank. The collet recess was bored at the same time as well.

I failed to get a picture, but I used a parting blade to generate the slot used in Auto Tool Changer (ATC) operation if I had one. Tailstock support was a must even with this small amount of stickout. There are 45 degree chamfers on most edges and one side of the ATC slot has a 60 degree chamfer. I pulled the dimensions from the existing tools I have. The collar was parted off and flipped in the 4 jaw so I could face it to thickness and put in the final chamfers.

Here is the finished collar.


Using my lathe as a press, I held the edge finder in a large keyless chuck and cranked the tailstock to press it into the collar, using the chuck jaws as a backing plate. Here is the new edge finder next to the old one.

And installed in the mill spindle. I'm not sure if I like or dislike the reduced length but it is nice to have an accurate edge finder again. My one gripe is the ball is 10mm 0.3937" rather than the 0.4000" of the original. Makes mental math a bit harder when offsetting the radius of the tip.

If you haven't used a ball edge finder, you should try it. They are extra handy when you need to center on curved surfaces like the side of a cylinder held deep in a vise. You don't need access to the edge of the part and can find center by approaching the cylinder from both sides without changing your Z height.

