- Joined
- Nov 23, 2014
- Messages
- 2,606
Here’s another Erector set reproduction part string. This one is for part number ‘BW’ small chain bucket which was included in the largest sets from 1924 – 1926. Being used in just the largest sets means not a lot of sales volume, they usually go for around $50 for a set of 8 on eBay.
Bucket is made from 0.018" steel and sets about 3/4" wide about 1" long.
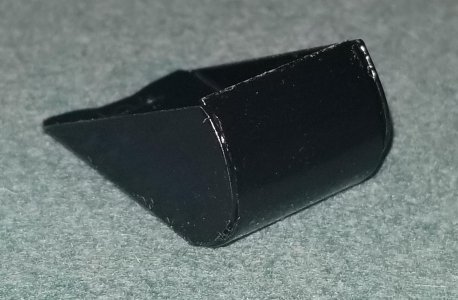
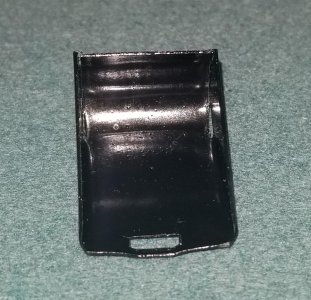
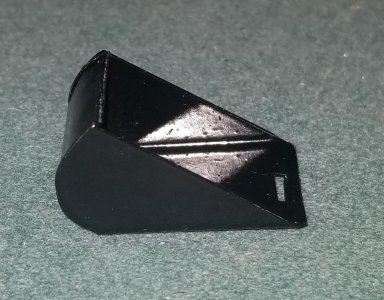
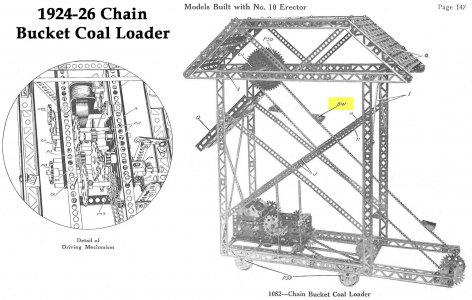
The A.C. Gilbert company numbered their Erector sets by size with the No. 10 being the largest sets in 1924 – 1926. Curiously (at least to Erector set collectors who can be an odd bunch. . . ) only one model was illustrated using this part. On top of that, the sets included 8 parts, but the one illustrated model only shows 4. The small bucket was held to ladder chain by bending one of the chain loops open, slip in the bucket, and bend the loop back closed.
Only model page using the BW small chain bucket
I’d made up 10 sets of these 6 or 8 years ago and sold them all at a couple of shows. Well, Corona has given me time to build up some inventory again as all of the Erector set collecting club shows have been cancelled for the year.
I made the part pattern by flattening a crappy original part. That was scanned on our computer, then nested using Photoshop for a strip of them. I’d then print the paper pattern, glue stick it to 0.018” steel and trim to size.
Nothing too spectacular about the work. I use a Roper Whitney No. 218 punch press to knock in a 1/16” x ~0.25” rectangular notch for the ladder chain loop. Then use a 4-ton notcher to cut the blanks.
Punch a 1/16" x 1/4" rectangular slot with the RW 218
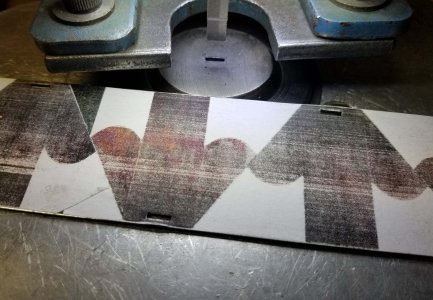
Separate the blanks using a 4-ton notcher.
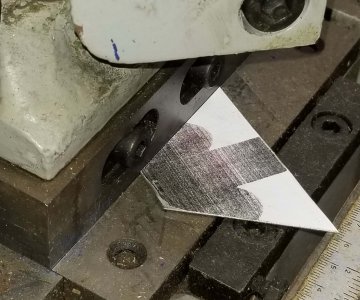
Bunch of blanks. More boring detail, but I nest them this way so the top and bottom are on a line. Means I waste a little more material than if I nested them closer together and slid the tops/bottoms apart, but that makes the trimming operation a little tougher. The sheet metal is cheap, so I use the less efficient pattern nesting to save time on the trimming.
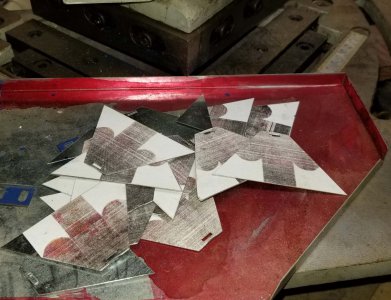
More trimming with the 4-ton notcher
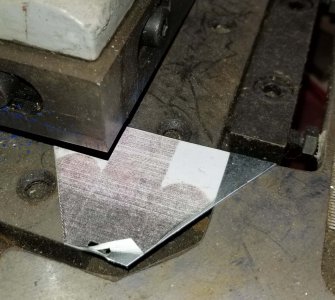
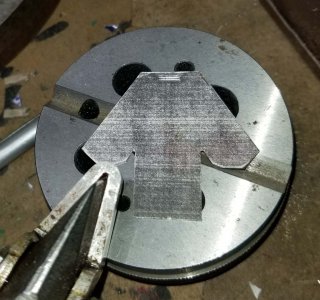
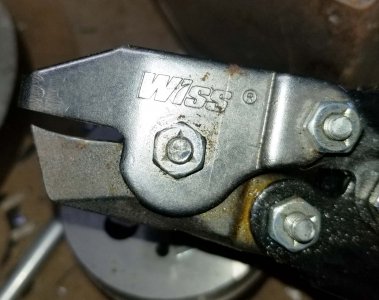
There’s a ~30 deg. angle that I cut with a Wiss hand notcher, then sand to the edge of the pattern on a Dremel 1” x 30” sander.
This Wiss hand notcher cuts a 30 deg. angle, use that to trim away the "armpit"
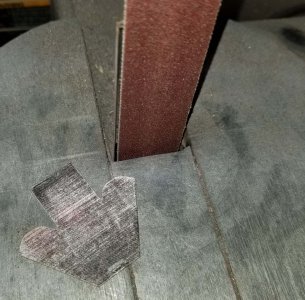
Sand in the radius on a 1" x 30" sander, takes about 15 seconds per part
After that, go to my Diacro brake to fold up the sides. I fold one side, then set a round of steel cut to the diameter and width of the inside of the bucket. The chunk of steel is a gauge of sorts to set the width for the 2nd fold.
Finished blank and a second one about to get the 2nd wall folded up. I use the steel round as a gauge to set the width of the part
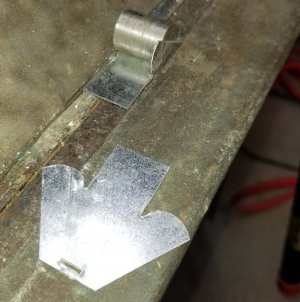
Use the same round as a die and hand bend the back of the blank to form the back of the bucket. There was no soldering or welding done on the original parts to “seal” the joint as in the grand scheme of things, it’s a part in a kid's toy.
Set the width gauge block in place and fold up the back wall by hand. Couple of taps with a hammer and the forming is complete
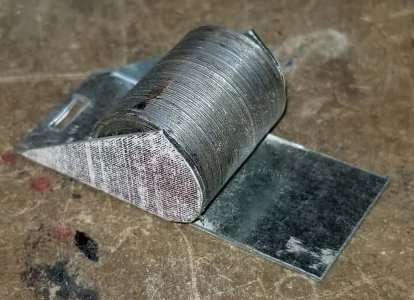
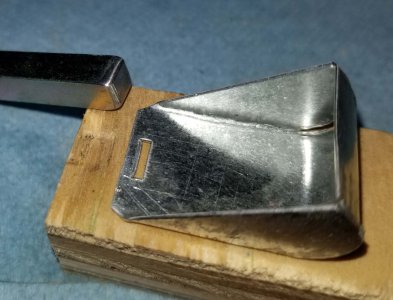
The area by the rectangular hole has its edge bumped down slightly so the bottom of the bucket can rest on the face of the ladder chain. I do this with a piece of ¼” key stock and a block of wood. Set the bucket in place on the wood block, set the key stock over the edge, and give it a tap with a hammer.
Punch and wooden block to form the edge of the bucket at the ladder chain hole. This lets the bucket set canted on the ladder chain (per the model photo above)
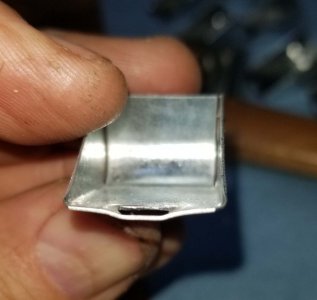
I remove the paper pattern by throwing the parts in a plastic bag with lacquer thinner which blows away the glue, then peel off the paper and dunk them again in clean lacquer thinner to clean off any residual glue before painting.
I’m always looking for ways to save time, dawned on my that I have a Tormach mill and a diamond engraver, why not replace the paper pattern with a scribed line?
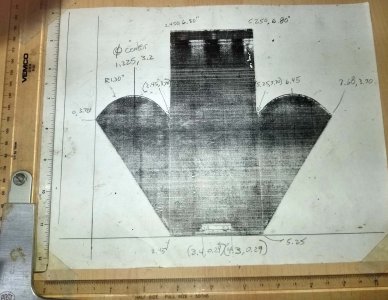
Printed a 4X scale of my pattern and took dimensions with a drafting machine. Then wrote a G-code routine to draw the pattern. I’m pretty happy with the results, running the mill at 40 ipm draws the pattern on 6 pieces in about 90 seconds. The line is defined well enough to not need Dykem.
4X scale pattern. Did the dimensioning with an old school drafting machine which if care is taken, gets me accurate to about 0.010". Being 4X scale, dividing everything by 4 gets me to about the thickness of a piece of paper. Frankly, WAY more than needed for my work.
Wrote a G-code routine to trace the full size pattern on 0.018" sheet metal with a diamond drag.
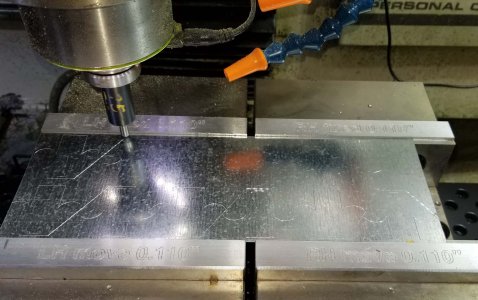
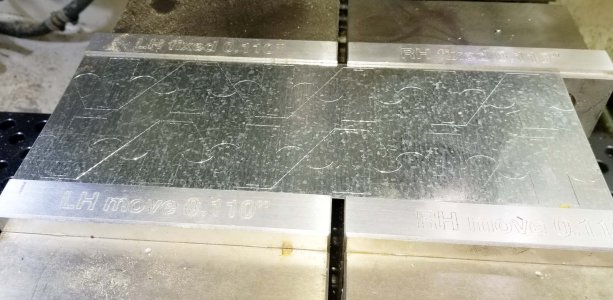
Hard to tell from the glare of the angel-eyes on the punch press, but the scratched line is really well defined. No need for Dykem or having to remove the glued on paper pattern after the fact.
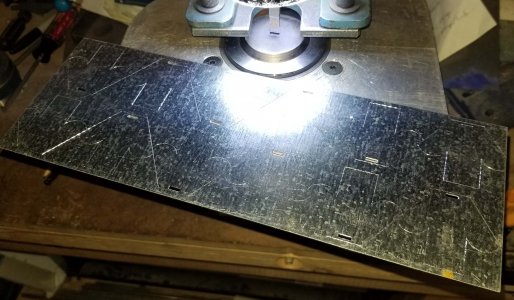
Bore you all with more details, the routine has a variable set in the first line of code for how many buckets to scribe. Makes it pretty flexible for blank size; one number gets changed in the routine if using a 4”, 6” or 12” (for example) blank. I hold the 0.018” sheet metal in stepped soft jaws with no support underneath. The vise jaws get tightened until the metal just starts to buckle up (not down) which isn’t a problem since the diamond engraver is spring loaded.
The routine just does one row of parts. I flip the blank 180 to do another row.
Thanks for looking, Bruce
Bucket is made from 0.018" steel and sets about 3/4" wide about 1" long.


The A.C. Gilbert company numbered their Erector sets by size with the No. 10 being the largest sets in 1924 – 1926. Curiously (at least to Erector set collectors who can be an odd bunch. . . ) only one model was illustrated using this part. On top of that, the sets included 8 parts, but the one illustrated model only shows 4. The small bucket was held to ladder chain by bending one of the chain loops open, slip in the bucket, and bend the loop back closed.
Only model page using the BW small chain bucket

I’d made up 10 sets of these 6 or 8 years ago and sold them all at a couple of shows. Well, Corona has given me time to build up some inventory again as all of the Erector set collecting club shows have been cancelled for the year.
I made the part pattern by flattening a crappy original part. That was scanned on our computer, then nested using Photoshop for a strip of them. I’d then print the paper pattern, glue stick it to 0.018” steel and trim to size.
Nothing too spectacular about the work. I use a Roper Whitney No. 218 punch press to knock in a 1/16” x ~0.25” rectangular notch for the ladder chain loop. Then use a 4-ton notcher to cut the blanks.
Punch a 1/16" x 1/4" rectangular slot with the RW 218

Separate the blanks using a 4-ton notcher.

Bunch of blanks. More boring detail, but I nest them this way so the top and bottom are on a line. Means I waste a little more material than if I nested them closer together and slid the tops/bottoms apart, but that makes the trimming operation a little tougher. The sheet metal is cheap, so I use the less efficient pattern nesting to save time on the trimming.

More trimming with the 4-ton notcher

There’s a ~30 deg. angle that I cut with a Wiss hand notcher, then sand to the edge of the pattern on a Dremel 1” x 30” sander.
This Wiss hand notcher cuts a 30 deg. angle, use that to trim away the "armpit"


Sand in the radius on a 1" x 30" sander, takes about 15 seconds per part

After that, go to my Diacro brake to fold up the sides. I fold one side, then set a round of steel cut to the diameter and width of the inside of the bucket. The chunk of steel is a gauge of sorts to set the width for the 2nd fold.
Finished blank and a second one about to get the 2nd wall folded up. I use the steel round as a gauge to set the width of the part

Use the same round as a die and hand bend the back of the blank to form the back of the bucket. There was no soldering or welding done on the original parts to “seal” the joint as in the grand scheme of things, it’s a part in a kid's toy.
Set the width gauge block in place and fold up the back wall by hand. Couple of taps with a hammer and the forming is complete

The area by the rectangular hole has its edge bumped down slightly so the bottom of the bucket can rest on the face of the ladder chain. I do this with a piece of ¼” key stock and a block of wood. Set the bucket in place on the wood block, set the key stock over the edge, and give it a tap with a hammer.
Punch and wooden block to form the edge of the bucket at the ladder chain hole. This lets the bucket set canted on the ladder chain (per the model photo above)


I remove the paper pattern by throwing the parts in a plastic bag with lacquer thinner which blows away the glue, then peel off the paper and dunk them again in clean lacquer thinner to clean off any residual glue before painting.
I’m always looking for ways to save time, dawned on my that I have a Tormach mill and a diamond engraver, why not replace the paper pattern with a scribed line?
Printed a 4X scale of my pattern and took dimensions with a drafting machine. Then wrote a G-code routine to draw the pattern. I’m pretty happy with the results, running the mill at 40 ipm draws the pattern on 6 pieces in about 90 seconds. The line is defined well enough to not need Dykem.
4X scale pattern. Did the dimensioning with an old school drafting machine which if care is taken, gets me accurate to about 0.010". Being 4X scale, dividing everything by 4 gets me to about the thickness of a piece of paper. Frankly, WAY more than needed for my work.

Wrote a G-code routine to trace the full size pattern on 0.018" sheet metal with a diamond drag.


Hard to tell from the glare of the angel-eyes on the punch press, but the scratched line is really well defined. No need for Dykem or having to remove the glued on paper pattern after the fact.

Bore you all with more details, the routine has a variable set in the first line of code for how many buckets to scribe. Makes it pretty flexible for blank size; one number gets changed in the routine if using a 4”, 6” or 12” (for example) blank. I hold the 0.018” sheet metal in stepped soft jaws with no support underneath. The vise jaws get tightened until the metal just starts to buckle up (not down) which isn’t a problem since the diamond engraver is spring loaded.
The routine just does one row of parts. I flip the blank 180 to do another row.
Thanks for looking, Bruce
Last edited:


