- Joined
- Jul 28, 2017
- Messages
- 2,370
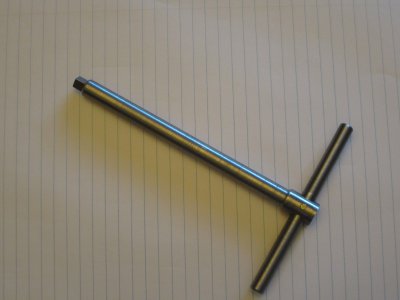
I'm always either cracking my knuckles or bumping the dial indicator when I dial-in something on my 4-jaw chuck. I had made a second chuck wrench to make it easier to line things up, but I made it the same length as the one that came with the chuck. Bad idea. So I've been working on one with a longer reach to avoid that problem. Working on it was kinda nice because my machine shop is in the basement, which currently is 65F. The main house is 85, and its 96 outside. Plus the humidity is pretty high so I'm dripping with sweat as I write this.
Anyway:

The steel was 1018, not the greatest for a decent finish so I used hand-ground HSS bits to turn the pieces, and used my rotary table to cut the square key to match the chuck tightening screws. I ground a vertical shear bit to get a friction fit between the shaft and handle, then co-drilled/reamed them for a brass pin. I used my lathe to ease the ends of the handle and the step between the shaft and square keyed end, then de-burred the square corners/ends of the key with a fine-toothed file.
This wrench is almost 6 inches long end-to-end so hopefully that will be enough to keep my knuckles out of the way. These things always take longer than I expect, but, like I said, it was a LOT cooler down there than the main part of the house so it was all good.
Anyway:

The steel was 1018, not the greatest for a decent finish so I used hand-ground HSS bits to turn the pieces, and used my rotary table to cut the square key to match the chuck tightening screws. I ground a vertical shear bit to get a friction fit between the shaft and handle, then co-drilled/reamed them for a brass pin. I used my lathe to ease the ends of the handle and the step between the shaft and square keyed end, then de-burred the square corners/ends of the key with a fine-toothed file.
This wrench is almost 6 inches long end-to-end so hopefully that will be enough to keep my knuckles out of the way. These things always take longer than I expect, but, like I said, it was a LOT cooler down there than the main part of the house so it was all good.

